Tag: cardio for adults

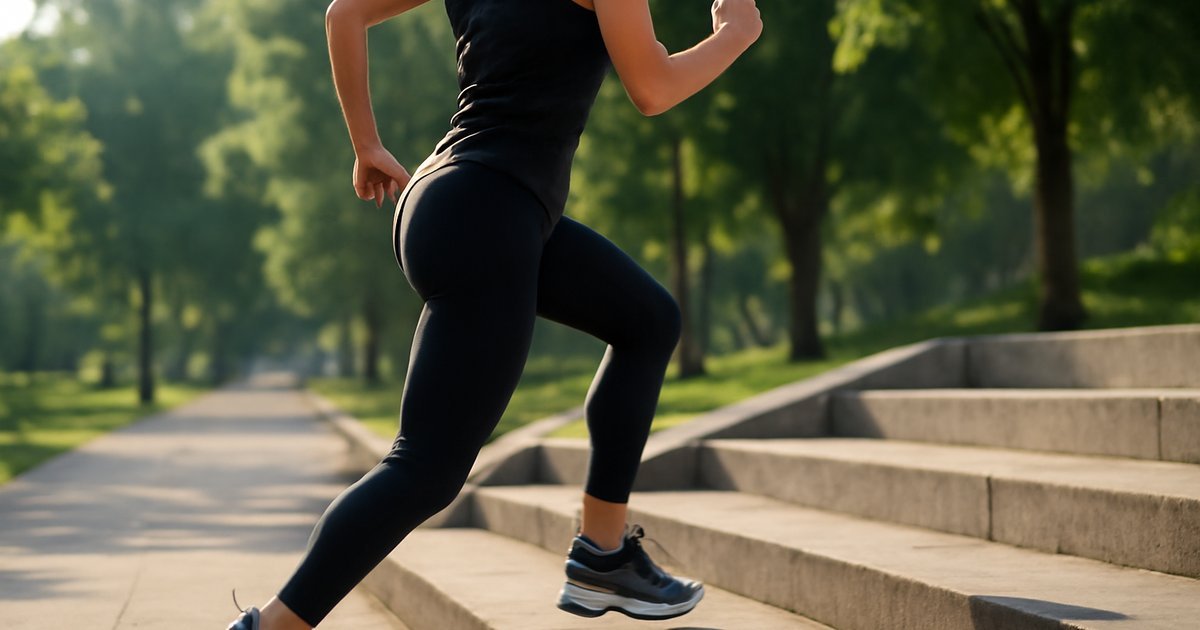
  • Stair Climbing Workout: Build Strength and Cardio Fast

    Stair Climbing Workout: Build Strength and Cardio Fast

    Stair Climbing Workout: Build Strength and Cardio Fast

    You walk past stairs every single day — but most people have no idea they’re ignoring one of the most effective workouts available to them, completely free.

    There’s a good chance you already have access to the perfect piece of fitness equipment and you’ve been bypassing it to press a button. Stairs — whether in your home, apartment building, office, local park, or stadium — offer a surprisingly powerful workout that combines cardiovascular conditioning, lower-body strength, and calorie burn in a compact, time-efficient package.

    A stair climbing workout isn’t just for elite athletes or people training for mountain hikes. It’s one of the most accessible, low-cost fitness options available to adults of all fitness levels. Whether you’re completely new to structured exercise or looking to shake up a plateau in your current routine, stair training deserves a serious spot in your weekly schedule.

    In this guide, you’ll learn exactly why stair climbing is so effective for adults aged 25 to 60, how to get started safely, the most common mistakes people make (and how to avoid them), and realistic timelines for what you can expect to feel and see. Let’s climb.

    Why Stair Climbing Matters More Than You Think

    Most people underestimate stair climbing because it sounds too simple. But simplicity doesn’t mean ineffective — and the research backs that up in a significant way.

    According to a study published in the British Journal of Sports Medicine, stair climbing performed in short bouts throughout the day significantly improved cardiorespiratory fitness in previously sedentary adults — comparable to dedicated treadmill intervals. That’s a striking finding for anyone who thinks they don’t have time to exercise.

    Stair climbing activates multiple major muscle groups simultaneously: your glutes, quadriceps, hamstrings, calves, and core all engage with every step you take upward. Unlike flat-surface walking, climbing stairs requires your muscles to work against gravity, which increases both muscular demand and energy expenditure significantly.

    Harvard Health Publishing estimates that a 155-pound adult burns approximately 223 calories during 30 minutes of stair climbing at a moderate pace — more than jogging at a light pace for the same duration. And because you’re moving in a vertical direction, your cardiovascular system has to work harder to deliver oxygen to those working muscles, making it an excellent heart health habit as well.

    For adults in the 40-60 age range especially, maintaining leg strength and cardiovascular capacity is directly tied to longevity and functional independence. The American College of Sports Medicine (ACSM) recommends that adults engage in both moderate-intensity cardio and muscle-strengthening activities weekly — and stair climbing uniquely checks both boxes at the same time.

    The Science Behind How Stair Climbing Works

    Understanding what’s happening in your body during a stair workout helps you train smarter — and stick with it longer.

    When you climb stairs, you’re performing a movement pattern that closely resembles a step-up or a modified squat. Each step engages your posterior chain — the glutes and hamstrings — more deeply than flat walking does, because your hip extensors are required to lift your body against gravity through a greater range of motion. Over time, this translates into real strength gains in your lower body.

    One common myth worth addressing: many people believe that stair climbing is bad for your knees. The reality is more nuanced. Research published in the Journal of Orthopaedic and Sports Physical Therapy suggests that stair climbing with proper form — controlled descent, soft knee bend, and not letting your knees cave inward — is generally safe for healthy adults and can even strengthen the muscles that protect the knee joint.

    The key distinction is going up versus going down. Ascending stairs loads the muscles concentrically (contracting as they shorten), while descending loads them eccentrically (contracting as they lengthen). Eccentric loading is where most knee discomfort originates, and it’s also the phase that builds the most muscular resilience when done progressively. This is why beginners should take descents slowly and with control.

    From a cardiovascular perspective, stair climbing elevates heart rate rapidly — often reaching the moderate-to-vigorous intensity zone within just 60 to 90 seconds of sustained effort. This makes it an excellent tool for improving VO2 max, the gold-standard measure of aerobic fitness, without needing a gym or any equipment at all.

    It’s also worth noting that the metabolic demand of stair climbing persists after your workout ends. Your body continues burning slightly elevated calories during recovery — a phenomenon known as excess post-exercise oxygen consumption (EPOC). While the effect varies by individual and workout intensity, it adds a meaningful layer to your overall daily calorie expenditure over time.

    How to Get Started: Practical Steps for Every Level

    One of the best things about stair climbing is that it scales perfectly to where you are right now. Here’s how to approach it depending on your current fitness baseline.

    Before You Begin: Wear supportive athletic shoes with good grip. Avoid sandals, flip-flops, or worn-out sneakers. Warm up with 3-5 minutes of light walking or dynamic leg swings. Use the handrail initially if you need support — there’s no shame in it, and safety comes first.

    Beginner Level (Weeks 1-3):

    • Start with 2-3 flights of stairs, 2-3 times per week
    • Walk at a comfortable, controlled pace — no rushing
    • Rest for 60-90 seconds between each climb
    • Focus on pushing through your heel and glute rather than your toe and quad
    • Descend slowly and with control — don’t rush downstairs
    • Aim for 10-15 minutes of total stair activity per session

    Intermediate Level (Weeks 4-8):

    • Increase to 4-6 flights per set, 3-4 times per week
    • Introduce interval-style training: climb fast for 1 minute, rest for 1 minute, repeat 6-8 times
    • Try taking two steps at a time occasionally to increase glute activation
    • Add a light backpack (5-10 lbs) for added resistance if the workout feels too easy
    • Aim for 20-30 minutes of total stair activity per session

    Advanced Level (Week 9 and beyond):

    • Incorporate lateral step climbing (sideways up the stairs) for hip abductor engagement
    • Try stair sprints: maximum effort for 20-30 seconds, full recovery, repeat 6-10 rounds
    • Use a weighted vest (10-20 lbs) for progressive overload
    • Combine stair climbing with bodyweight exercises — push-ups or lunges at the top — for a full circuit
    • Aim for 30-45 minutes total, 4-5 days per week

    If you’re working with any joint issues, osteoporosis, or cardiovascular conditions, speak with your healthcare provider before ramping up intensity. Results vary significantly depending on your starting point, consistency, and overall lifestyle.

    Common Mistakes That Sabotage Your Stair Workout

    Even a simple exercise like stair climbing has its pitfalls. Here are the most common errors adults make — and how to correct them before they derail your progress.

    Mistake #1: Rushing the Descent
    Going down stairs feels like rest, so most people fly through it without thinking. But uncontrolled descents put excessive stress on your knee joints and reduce the muscular benefit of the eccentric phase. Fix it: Slow your descent deliberately. Take each step with full foot contact and a slight bend in the knee. Think of the way down as its own exercise.

    Mistake #2: Gripping the Handrail the Entire Time
    Using the handrail for balance when you’re first starting is completely fine. But leaning heavily into it as a crutch offloads the work from your legs and core — defeating the purpose of the workout. Fix it: Use the rail lightly for safety, but aim to gradually reduce dependence on it as your balance and strength improve.

    Mistake #3: Letting Your Heels Hang Off the Step
    Many people climb on their toes, leaving their heels unsupported. This shifts all the load onto the calves and away from the glutes and hamstrings, which are the bigger, more metabolically active muscles. Fix it: Plant your entire foot on each step, pressing through the heel as you push upward. This engages the glutes and makes the workout significantly more effective.

    Mistake #4: Skipping the Warm-Up
    Stair climbing spikes heart rate quickly. Jumping straight into a hard climb without warming up increases the risk of muscle strains and cardiovascular strain, especially for adults over 40. Fix it: Always spend 3-5 minutes walking briskly or doing light leg movements before you start your stair session.

    Mistake #5: Doing Too Much, Too Soon
    Enthusiasm is great — but the most common reason people quit stair workouts is soreness and fatigue from overdoing it in the first week. The ACSM recommends a progressive approach to any new exercise program. Fix it: Start with shorter sessions and fewer flights than you think you need. Increase volume and intensity by no more than 10% per week.

    What to Eat to Support Your Stair Climbing Training

    Nutrition plays a significant role in how your body performs during and recovers from stair training. The good news is that you don’t need a complicated meal plan — just a few strategic habits.

    Fuel Before Your Workout: If you’re training in the morning or after work, a light snack with carbohydrates and a small amount of protein 45-60 minutes before helps sustain energy. Think: a banana with a tablespoon of almond butter, or a small bowl of oatmeal with berries. The Academy of Nutrition and Dietetics recommends 30-60 grams of carbohydrate before moderate exercise sessions.

    Prioritize Protein for Recovery: Your muscles are being challenged significantly during stair training — especially your glutes and quads. To support repair and growth, aim for 20-30 grams of high-quality protein within 30-60 minutes after your workout. Good sources include Greek yogurt, eggs, cottage cheese, grilled chicken, or a protein shake if you’re in a rush.

    Don’t Skip Hydration: Stair climbing elevates your heart rate quickly, which increases sweat loss even if you don’t feel it as much as outdoor exercise. According to the USDA Dietary Guidelines, adults should aim for at least 8 cups of water daily — more on active days. Have 16 oz of water before your session and sip during if you’re training for longer than 20 minutes.

    Anti-Inflammatory Foods Help Long-Term: If you’re training consistently 4-5 days per week, incorporating anti-inflammatory foods can support joint health and recovery. Think: fatty fish like salmon (omega-3s), leafy greens, berries, turmeric, and walnuts. These aren’t miracle foods, but over time they contribute to reduced soreness and better recovery between sessions.

    Foods to Moderate: Highly processed foods high in refined sugar and saturated fat can blunt your recovery and energy levels without adding nutritional benefit. You don’t need to eliminate them, but the USDA Dietary Guidelines recommend limiting added sugars to less than 10% of total daily calories.

    How Long Until You See Results — and What to Track

    One of the most common questions people ask is: how soon will I notice a difference? The honest answer is that it depends on your starting point, frequency, and consistency — but here’s what the research and practical experience suggest.

    Week 1-2: Expect soreness in your glutes, quads, and calves, especially if this is a new movement for you. Your heart will also feel the effort more intensely in the beginning. This is normal and a sign of adaptation.

    Week 3-4: Most beginners report noticeably less breathlessness at the same flight count. Leg strength improvements begin to show up in how you feel going up stairs in daily life — less fatigue, more control. A study published in Applied Physiology, Nutrition, and Metabolism found measurable cardiovascular improvements in sedentary adults after just four weeks of regular stair climbing.

    Week 6-8: With consistent training (3-4 sessions per week), you’ll likely notice improved endurance, tighter leg and glute muscle tone, and better energy levels throughout the day. This is also when most people feel ready to increase intensity or add load.

    What to Track:

    • Number of flights per session (aim to increase gradually)
    • Resting heart rate (should trend downward over 4-6 weeks of consistent cardio)
    • Recovery time between sets (should decrease as fitness improves)
    • How winded you feel at specific flight counts (a great subjective marker)
    • Lower body strength — can you do a single-leg squat with better control than before?

    If you’ve been training consistently for 8-12 weeks and feel like you’re stuck, consider reassessing your nutrition, sleep quality, and overall stress levels — all of which directly affect fitness adaptation. Working with a certified personal trainer for a session or two can also help identify plateaus and build a more structured plan.

    For related training strategies that complement stair climbing well, check out our guides on Interval Training for Adults and Balance Training for Adults — both pair naturally with stair work to build a complete, functional fitness routine.

    Frequently Asked Questions

    Is stair climbing enough exercise on its own, or do I need to add other workouts?
    Stair climbing covers cardiovascular fitness and lower-body strength well — but it doesn’t significantly train your upper body or horizontal plane movements. For a well-rounded routine, consider pairing it with upper-body resistance training 1-2 times per week. On its own, it can absolutely be a primary cardio and lower-body workout, especially for beginners.

    Can I do stair climbing every day?
    For casual stair use (like taking stairs instead of an elevator), every day is perfectly fine. For structured stair training sessions, most adults benefit from 1-2 rest days per week to allow muscle recovery — especially when training at moderate-to-high intensity. Listen to your body: persistent soreness or fatigue is a signal to rest.

    Is stair climbing safe for people with knee pain?
    This depends significantly on the cause and severity of the knee issue. Many people with mild knee discomfort can climb stairs safely with good form and controlled descent. However, those with arthritis, ligament injuries, or post-surgical conditions should consult an orthopedic specialist or physical therapist before beginning a stair training program. Results vary considerably based on individual diagnosis.

    What’s the difference between stair climbing and using a StairMaster machine?
    Both are effective, but they differ in mechanics. Real stairs require your full leg to lift your body weight step by step — including the descent phase. A StairMaster is a continuous loop and eliminates the downward eccentric component. Real stair climbing also engages stabilizer muscles more due to balance demands. Both have value — real stairs simply require no equipment or membership.

    How many stairs do I need to climb to get a good workout?
    There’s no universal number because intensity and pace matter more than raw stair count. A general guideline: 10-15 minutes of continuous moderate-effort stair climbing is comparable to a solid cardio session. You can also combine it with power walking on flat surfaces for a longer, varied session.

    The Bottom Line

    Stair climbing is one of those workouts that consistently earns its reputation quietly. It doesn’t require a gym, expensive equipment, or a lot of time. What it does require is consistency, proper form, and a willingness to take things progressively — especially in the beginning.

    Whether your goal is to improve your cardiovascular health, build stronger legs, manage your weight more effectively, or simply feel more energetic in your daily life, stair climbing offers a path that’s both proven and practical.

    Start where you are. Climb at your own pace. Add a flight or two each week. And before long, those stairs you used to avoid will be the part of your day you actually look forward to.

    Your next workout is probably just down the hall.


    Wellness Disclaimer: This article is for informational and educational purposes only. The content is not intended to replace professional medical, nutritional, or fitness advice. Always consult a qualified healthcare provider, registered dietitian, or certified fitness professional before starting a new health program or making significant changes to your lifestyle.

    Content reviewed by our wellness editorial team, with references to peer-reviewed research and guidelines from leading health organizations.
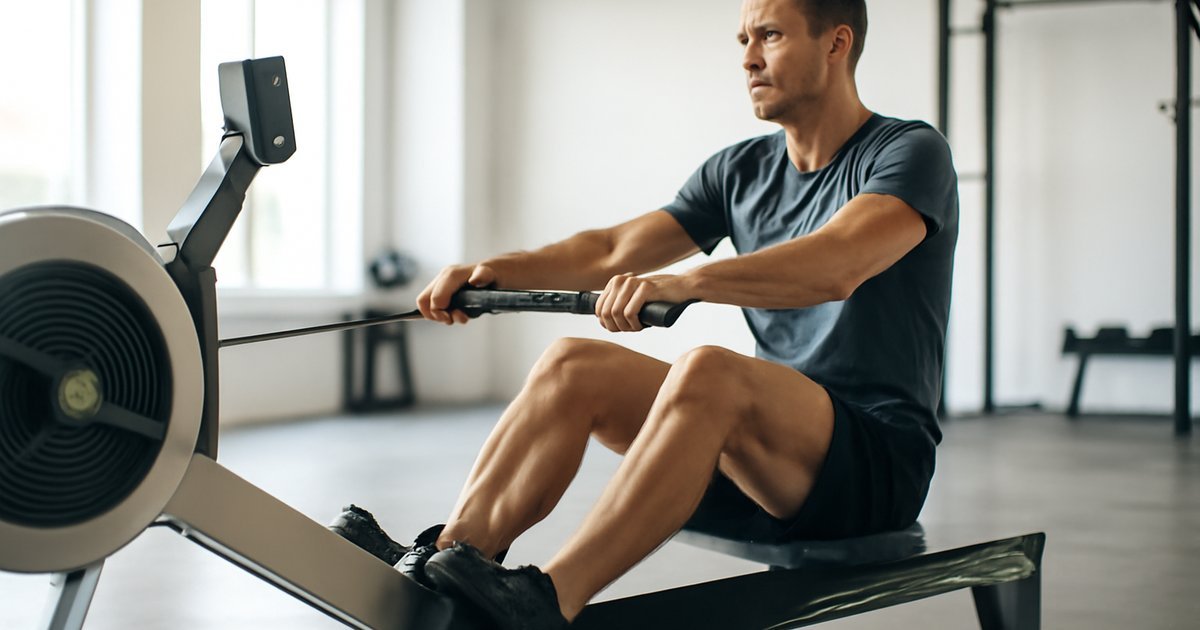

  • Rowing Machine Workout for Adults: Full-Body Results

    Rowing Machine Workout for Adults: Full-Body Results

    Rowing Machine Workout for Adults: Full-Body Results

    Most people walk right past the rowing machine at the gym — and it might be the single biggest fitness mistake they’re making.

    You’ve probably seen it sitting in the corner of your gym, slightly dusty, largely ignored while the treadmills and ellipticals are packed. The rowing machine doesn’t get the marketing love it deserves — and that’s a shame, because study after study confirms it’s one of the most efficient, low-impact, full-body workouts available to adults of any fitness level.

    Here’s the truth: a single rowing session engages roughly 86% of the muscles in your body. That includes your legs, glutes, core, back, shoulders, and arms — all working together in one fluid, rhythmic motion. Whether your goal is fat loss, cardiovascular conditioning, muscle endurance, or simply getting more done in less time, rowing machine workouts deliver.

    This guide is for adults aged 25 to 60 who want a smarter approach to cardio — something that doesn’t beat up your joints, doesn’t bore you to tears, and actually produces measurable results. We’ll cover the science, the technique, the most common mistakes, and how to build a rowing routine that fits your real life.

    Why Rowing Machine Workouts Matter More Than You Think

    If you’ve been sticking to the same cardio machine for years and feeling like your results have plateaued, you’re not alone. Most adults fall into a routine that stops challenging their body after a few weeks. The rowing machine breaks that pattern in a uniquely effective way.

    According to the American College of Sports Medicine (ACSM), total-body cardiovascular exercise — the kind that recruits both upper and lower body simultaneously — produces superior caloric expenditure and cardiovascular adaptation compared to single-limb exercises like cycling or walking. Rowing fits that profile perfectly.

    A 155-pound adult rowing at moderate intensity can burn approximately 260 to 316 calories in 30 minutes, depending on stroke rate and resistance, according to data from Harvard Health Publishing. At vigorous intensity, that number climbs significantly higher.

    But calorie burn is only part of the story. Rowing also strengthens the posterior chain — the often-neglected muscles along your back, glutes, and hamstrings that are critical for posture, injury prevention, and long-term mobility. For desk workers and anyone who spends hours seated, this is particularly valuable.

    And because rowing is non-weight-bearing and low-impact on the joints, it’s an excellent option for adults managing knee discomfort, hip tightness, or recovering from lower-body strain — though individual suitability always depends on your specific situation and should be evaluated by a healthcare professional.

    The Science Behind Rowing: How It Actually Works

    One of the biggest misconceptions about rowing is that it’s primarily an upper-body workout — something for rowers and athletes. In reality, proper rowing technique is about 60% legs, 20% core, and 20% arms. If you’re only feeling it in your shoulders and biceps, your form needs attention.

    The rowing stroke follows a four-phase sequence: the catch, the drive, the finish, and the recovery. In the catch phase, you’re coiled at the front of the machine with knees bent, shins vertical, and core engaged. The drive initiates with a powerful leg press — not a pull. As your legs extend, your core braces and your torso leans back slightly. Only then do your arms draw the handle toward your lower ribcage. The finish, recovery, and return to the catch complete the cycle.

    A study published in the Journal of Strength and Conditioning Research found that indoor rowing at moderate intensity produced significant improvements in VO2 max — a key marker of cardiovascular fitness — after just 8 weeks of consistent training. Participants also showed measurable improvements in muscle endurance across the back, core, and lower body.

    The myth that rowing is bad for your back deserves a direct rebuttal: when performed with proper form, rowing actually strengthens the muscles that support spinal health. The problem arises when people round their lower back or yank with their arms — a technique error, not an inherent risk of the exercise itself.

    Another advantage of rowing is its built-in intensity control. By adjusting the damper setting (resistance on air rowers) and your stroke rate (strokes per minute, or SPM), you can dial this workout from a gentle aerobic session to a high-intensity interval challenge — all on the same machine.

    How to Get Started: Practical Steps for Every Level

    The rowing machine has a slight learning curve, but most adults feel comfortable with the basic mechanics within two or three sessions. Here’s how to approach it based on where you’re starting from.

    Before Your First Session:

    • Adjust the footplates so the strap crosses over the widest part of your foot (the ball of your foot).
    • Set the damper between 3 and 5 for beginners — higher isn’t always better; it mimics rowing a heavier boat and requires more strength than new rowers typically have.
    • Sit tall, shoulders relaxed, and grip the handle loosely — not with a white-knuckle squeeze.

    Beginner: Weeks 1–3

    • Row for 10 to 15 minutes at a comfortable, conversational pace (18–22 SPM).
    • Focus entirely on form — legs drive first, then core, then arms on the way out; reverse that order on the way back.
    • Take 60-second rest breaks every 5 minutes if needed.
    • Aim for 2 to 3 sessions per week.

    Intermediate: Weeks 4–8

    • Extend sessions to 20–30 minutes of continuous rowing.
    • Introduce stroke rate variation: 2 minutes at 22 SPM, 1 minute at 26–28 SPM, repeat.
    • Begin tracking your 500-meter split time (displayed on the monitor) as a benchmark for improvement.
    • Add a second rowing day, targeting 3 to 4 sessions per week.

    Advanced: Beyond Week 8

    • Incorporate structured interval sessions: 8 x 250 meters with 90 seconds rest, or 4 x 500 meters with 2 minutes rest.
    • Experiment with pyramid workouts: row 1 minute hard, 1 minute easy; 2 minutes hard, 2 minutes easy; up to 5 minutes hard, then back down.
    • Consider pairing rowing with interval training principles to structure progressive sessions that keep your body adapting.

    Common Mistakes That Sabotage Your Rowing Results

    Even enthusiastic beginners fall into predictable traps on the rowing machine. The good news: every one of these is fixable once you know what to look for.

    Mistake 1: Using your arms before your legs.
    This is the most widespread form error in rowing. If you pull the handle toward you before your legs are fully extended, you lose the primary power source of the stroke — your legs — and put all the strain on your arms and lower back. The fix: think "legs, lean, arms" on the drive, and "arms, lean, legs" on the recovery. Drill this sequence slowly until it becomes automatic.

    Mistake 2: Setting the damper too high.
    A damper set at 10 feels more intense, which leads many beginners to assume it’s more effective. It’s not — at least not the way you’d hope. A high damper creates excessive drag, which slows your stroke and prioritizes raw strength over cardiovascular efficiency. Most experienced rowers train at a damper setting of 3 to 5. It feels lighter but requires a faster, more powerful stroke — which is actually harder on your cardiovascular system.

    Mistake 3: Rowing at one constant pace every session.
    Steady, low-effort rowing has its place — but doing nothing else means your body adapts quickly and your fitness stalls. Varying your intensity across sessions (some easy, some moderate, some hard intervals) is what drives continued improvement, according to principles outlined by the ACSM’s guidelines on aerobic training progression.

    Mistake 4: Ignoring posture during fatigue.
    As you get tired, the lower back tends to round and the shoulders hunch forward. This is when injury risk rises. If your form breaks down significantly, it’s better to stop, rest 60 to 90 seconds, and resume with proper mechanics than to grind through poor movement patterns. Fatigued, sloppy rowing is how people develop back soreness that gets attributed to the machine rather than the technique.

    Mistake 5: Skipping the warm-up.
    Jumping onto the rower and immediately hammering hard intervals is a recipe for muscle soreness and potential strain. Spend the first 3 to 5 minutes at an easy pace (18–20 SPM) to lubricate joints, raise core temperature, and establish your stroke rhythm before adding intensity.

    What to Eat Before and After Rowing Workouts

    Rowing is a metabolically demanding exercise that uses both aerobic and anaerobic energy systems, so fueling appropriately makes a real difference in performance and recovery.

    Pre-workout (1–2 hours before): Aim for a small, balanced meal with moderate carbohydrates and protein. A bowl of oatmeal with a hard-boiled egg, or Greek yogurt with fruit, gives you sustained energy without digestive discomfort during the session. The Academy of Nutrition and Dietetics recommends 1 to 4 grams of carbohydrate per kilogram of body weight in the hours before moderate-intensity exercise.

    If rowing first thing in the morning: A small carbohydrate snack 30 minutes before — half a banana, a slice of whole grain toast — can support performance without heaviness. Some people row well in a fasted state; results vary significantly depending on your fitness level and morning intensity.

    Post-workout (within 30–60 minutes): Prioritize protein for muscle repair and carbohydrates to replenish glycogen. A protein shake with a piece of fruit, or a chicken and rice bowl, are practical choices. Research published in the Journal of the International Society of Sports Nutrition supports consuming 20 to 40 grams of protein after resistance-based and endurance exercise to optimize muscle protein synthesis.

    Hydration: Rowing produces significant sweat output, especially during intense sessions. The USDA Dietary Guidelines and ACSM both recommend maintaining consistent fluid intake throughout the day, and replacing fluid losses during and after exercise. A practical starting point: drink 16 to 20 ounces of water 1 to 2 hours before rowing, and continue hydrating throughout your session.

    How Long Until You See Results — and What to Track

    Realistic timelines matter. Setting honest expectations keeps you consistent when early progress feels invisible.

    Weeks 1–2: You’ll feel the workout — muscle fatigue, elevated heart rate, and possibly some soreness in your lats, glutes, and core. This is normal adaptation. Don’t judge your progress by how you feel yet.

    Weeks 3–4: Most beginners notice improved cardiovascular endurance — sessions that felt difficult start to feel more manageable. Your stroke becomes more fluid and efficient. If you’re tracking your 500-meter split time, you’ll likely see it drop.

    Weeks 6–8: This is typically when visible and measurable changes appear — improved posture, a stronger back and core, and for those also managing their nutrition, potential changes in body composition. A study in the Journal of Strength and Conditioning Research noted meaningful cardiovascular improvements after 8 weeks of consistent rowing at 3 sessions per week.

    What to track:

    • 500-meter split time — your average time to row 500 meters; a key rowing performance benchmark
    • Total meters per session — a simple indicator of volume
    • Resting heart rate — drops as your cardiovascular fitness improves
    • How you feel at a fixed effort level — if 22 SPM feels easier than it did three weeks ago, that’s progress

    If you’re combining rowing with strength training, consider pairing it with foundational movements. Resources on dumbbell training for adults and kettlebell training complement rowing well, addressing muscle groups that rowing doesn’t isolate as directly.

    When to reassess or seek guidance: if you experience persistent lower back pain, sharp joint discomfort, or your performance stops improving after 8 to 10 weeks of consistent effort, consult a certified personal trainer or physical therapist to evaluate your form and programming.

    Frequently Asked Questions

    Is the rowing machine good for weight loss?
    Rowing can absolutely support a weight loss goal, primarily because it burns a meaningful number of calories while also building muscle — and more muscle means a higher resting metabolic rate over time. That said, exercise alone rarely produces significant fat loss without corresponding attention to nutrition. Rowing works best as part of a broader lifestyle approach that includes a balanced, moderate calorie intake.

    Is rowing safe if I have lower back problems?
    It depends on the nature and severity of your back issue. For many adults with mild chronic lower back tightness, rowing with correct form actually strengthens the supporting muscles and reduces discomfort over time. However, if you have a diagnosed disc injury, spinal stenosis, or acute back pain, you should get clearance from your physician or physical therapist before rowing. Never push through sharp or radiating back pain.

    How many days a week should I row?
    For general fitness, 3 to 4 days per week is a solid target for most adults. This allows enough volume for cardiovascular adaptation while giving your muscles — especially the back and legs — adequate recovery time. Beginners may do well starting with 2 days per week and building up gradually.

    Can rowing replace all my cardio?
    For many people, yes — rowing covers all the bases of cardio fitness: aerobic endurance, muscular endurance, and high-intensity conditioning. However, varied movement patterns are always beneficial for long-term health. Mixing rowing with walking, cycling, or other low-impact activities keeps your body adaptable and reduces overuse patterns.

    What’s a good rowing workout for complete beginners?
    Start with a simple 15-minute session: 3 minutes easy rowing at 18–20 SPM, 1 minute slightly harder at 22–24 SPM, and repeat this pattern three times. Keep the damper between 3 and 5, focus entirely on letting your legs lead the stroke, and track how your body feels throughout. Simple, structured, and sustainable is the right starting point.

    Start Rowing — One Stroke at a Time

    The rowing machine isn’t a secret, but it might as well be — because most people walk past it without ever experiencing what it can do for their fitness. Full-body engagement, low joint impact, scalable intensity, and genuine cardiovascular challenge. It checks every box a busy adult needs from a workout.

    You don’t need to be an athlete or a competitive rower to benefit. You just need to show up, learn the stroke, and stay consistent. Progress on the rowing machine is measurable, tangible, and — for most people — surprisingly fast.

    Your action step for today: if you have access to a rowing machine, commit to one 10-minute form-focused session this week. Just focus on the sequence — legs, core, arms. Everything else builds from there.


    This article is for informational and educational purposes only. The content is not intended to replace professional medical, nutritional, or fitness advice. Always consult a qualified healthcare provider, registered dietitian, or certified fitness professional before starting a new health program or making significant changes to your lifestyle.

    Content reviewed by our wellness editorial team, with references to peer-reviewed research and guidelines from leading health organizations.

  • Power Walking for Adults: Benefits, Technique & Results

    Power Walking for Adults: Benefits, Technique & Results

    Power Walking for Adults: Benefits, Technique & Results

    You already know how to walk — but power walking might be the smartest cardio upgrade you haven’t tried yet.

    Here’s a number that might surprise you: according to the American Heart Association, physical inactivity contributes to nearly 1 in 10 premature deaths in the United States. And yet, one of the most effective tools for cardiovascular health is something almost every adult can do, requires zero equipment, and can fit into a lunch break — power walking.

    Not strolling through the park. Not window-shopping at a leisurely pace. Power walking is a purposeful, technique-driven form of cardio that sits in a sweet spot between casual walking and running — challenging enough to deliver real results, low-impact enough to be sustainable for decades.

    If you’ve ever written off walking as “not enough,” this article is going to change your mind. You’ll learn what power walking actually is, the science behind why it works, how to do it correctly, and what kind of results you can realistically expect — with a clear plan to get started today.

    Why Power Walking Matters More Than You Think

    Most adults don’t have a motivation problem — they have a sustainability problem. Intense workout programs get started and abandoned. Joints flare up. Schedules don’t cooperate. That’s exactly where power walking earns its place.

    A landmark study published in Arteriosclerosis, Thrombosis, and Vascular Biology — part of the National Runners’ and Walkers’ Health Study — found that brisk walking reduced the risk of hypertension, high cholesterol, diabetes, and coronary heart disease by amounts comparable to running, when energy expenditure was matched. In other words, it’s not the speed that matters most — it’s the effort and consistency.

    Power walking elevates your heart rate into a moderate-to-vigorous aerobic zone, typically between 60-80% of your maximum heart rate. That’s the zone the American College of Sports Medicine (ACSM) recommends for improving cardiovascular fitness, managing weight, and reducing chronic disease risk in healthy adults.

    What makes power walking especially relevant for adults aged 25-60 is the low injury risk. Running carries a reported injury rate of 37-56% per year, largely due to impact forces. Power walking dramatically reduces that stress on knees, hips, and ankles — which makes it a smarter long-term strategy for most people who aren’t competitive athletes.

    It also fits. You can power walk during a lunch break, before work, or after dinner. No gym. No class schedule. No learning curve beyond a few technique adjustments.

    The Science Behind Power Walking and How It Actually Works

    Power walking isn’t just “fast walking.” It’s a specific movement pattern that changes how your body recruits muscles, burns fuel, and responds cardiovascularly.

    The key distinction from regular walking is intentional biomechanics: a faster cadence (steps per minute), an engaged core, active arm drive, and a heel-to-toe stride with full hip extension. These elements together increase oxygen demand and caloric expenditure significantly — without the impact of running.

    Research published in the Journal of Sports Sciences found that walking speed is one of the strongest predictors of metabolic health outcomes in adults. Walkers who moved at a pace classified as brisk or faster (typically above 3.5 mph) showed significantly better cardiovascular markers compared to those walking at slower speeds, even when total steps were similar.

    One common myth worth busting: many people believe you need to be out of breath to benefit from cardio. Power walking challenges that assumption. Because it keeps you in a sustained aerobic zone without pushing into anaerobic thresholds, it’s actually highly effective for fat oxidation — your body’s preferred fuel system during moderate-intensity, sustained movement.

    Harvard Health Publishing notes that a 155-pound person can burn approximately 300-370 calories per hour power walking at a 4 mph pace — comparable to many gym classes. The difference is in the sustainability and accessibility.

    Power walking also engages more muscle groups than people assume. Active arm swing recruits the shoulders, upper back, and core. Maintaining upright posture activates the glutes and hip flexors. A conscious heel-to-toe roll engages the calves and tibialis anterior. This isn’t just a lower-body exercise — done correctly, it’s a functional, full-body movement pattern.

    How to Get Started: Technique and Progression

    Before adding speed or distance, nail the mechanics. Poor technique won’t just limit your results — it can create the exact joint stress you’re trying to avoid.

    Core Technique Checklist:

    • Posture: Stand tall with your chin parallel to the ground. Avoid the forward lean that many people develop when trying to walk fast. Your spine should be neutral, not hunched.
    • Arm swing: Bend your elbows at roughly 90 degrees and drive them back (not across your body). This forward-backward arm action is what separates power walking from regular walking and is key to increasing speed naturally.
    • Foot strike: Land on your heel and roll through to push off with your toes. This heel-to-toe motion activates the full kinetic chain of your lower leg.
    • Hip engagement: Think about driving through your hips with each step. Full hip extension at the back of the stride is what activates the glutes and generates power.
    • Cadence target: Aim for 100-120 steps per minute for brisk walking. Using a metronome app or walking playlist with the right BPM can help you find and hold this rhythm.

    Beginner (Weeks 1-3): Start with 20-minute sessions, 3 days per week. Focus on technique over speed. A 3.0-3.5 mph pace is a solid starting point. You should be able to speak in short sentences — slightly breathless, but not gasping.

    Intermediate (Weeks 4-8): Increase to 30-40 minutes, 4 days per week. Add one incline session per week — even a 5% grade significantly increases caloric burn and lower-body engagement. Target 3.5-4.0 mph on flat terrain.

    Advanced (Week 9+): Incorporate intervals — alternating 2 minutes of maximum-effort power walking with 1 minute of recovery pace. This structure mirrors the principles of interval training and can be layered into your routine 1-2 times per week. For more on interval principles, see Interval Training for Adults: Burn Fat and Build Fitness.

    Common Mistakes That Sabotage Power Walking Results

    Power walking looks simple — and that’s exactly why people underestimate how easy it is to do incorrectly. Here are the most common errors and how to correct them.

    Mistake 1: Taking longer strides instead of faster ones. When people want to speed up, the instinct is to reach further forward with each step. But overstriding actually puts the brake on — it creates impact at the heel and slows your momentum. The fix: keep your stride compact and increase your step rate (cadence) instead. More steps per minute, not longer steps.

    Mistake 2: Skipping the arm drive. Many walkers let their arms hang or swing loosely. This wastes energy and limits your natural speed ceiling. Active arm swing isn’t just for show — it counterbalances your leg movement and rhythmically increases pace. Practice the 90-degree elbow bend and drive each elbow backward with intention.

    Mistake 3: Keeping the same flat route every day. Walking the same course at the same effort level is comfortable — but your body adapts quickly. After 3-4 weeks, the same walk produces fewer cardiovascular and metabolic benefits. Rotate between flat terrain, hills, and interval efforts to keep your body challenged. Adding even a modest incline changes the entire demand profile of the workout.

    Mistake 4: Ignoring recovery. Power walking is low-impact, but it’s still a physical stressor. Adults who go from sedentary to daily power walking often experience calf tightness, shin discomfort, or hip flexor fatigue. Schedule at least 1-2 rest days per week, and include post-walk stretching — especially for the calves, hamstrings, and hip flexors. For a complementary approach, explore Flexibility Training for Adults: Move Better, Feel Stronger.

    Mistake 5: Not tracking intensity. “I went for a walk” is not a training dose. Without tracking pace, duration, or heart rate, it’s impossible to know if you’re progressing. Use a fitness tracker, a phone GPS app, or simply time yourself over a known distance. The data keeps you honest and motivated.

    What to Pair With Power Walking for Better Results

    Power walking is a complete cardiovascular workout on its own — but pairing it with complementary habits amplifies your results significantly.

    Protein intake: The Academy of Nutrition and Dietetics recommends 1.2-1.6 grams of protein per kilogram of body weight per day for active adults. This supports muscle recovery and helps preserve lean mass, especially important as adults age and natural muscle loss accelerates. Prioritize lean sources: chicken, eggs, Greek yogurt, legumes, fish.

    Hydration: The ACSM recommends drinking 16-20 oz of water 2 hours before exercise and 6-12 oz every 20 minutes during activity. Power walking outdoors in warm weather increases sweat loss significantly. Dehydration — even at 2% of body weight — impairs both performance and recovery.

    Strength training: Power walking primarily conditions your cardiovascular system and lower body endurance. Pairing it with 2 days per week of resistance training preserves muscle mass and bone density — both critical concerns for adults over 40. Dumbbell-based routines are an accessible complement. See Dumbbell Training for Adults: Build Strength and Burn Fat for a practical starting point.

    Sleep: Research from the National Sleep Foundation shows that regular moderate exercise improves sleep quality and duration. The relationship works in reverse too — poor sleep impairs recovery, reduces motivation, and increases cortisol levels that can stall fat loss. Aim for 7-9 hours per night as a baseline.

    How Long Until You See Results and What to Track

    Realistic expectations matter. Power walking is a long-game strategy — not a 7-day transformation. Here’s what the research actually supports:

    Weeks 1-2: You’ll likely notice improved energy and slightly better mood. This is largely due to increased endorphin activity and improved sleep quality. Don’t expect visible physical changes yet — but they’re coming.

    Weeks 3-6: Cardiovascular efficiency improves. Many people notice they’re less winded climbing stairs, walking at a faster pace feels easier, and resting heart rate may begin to drop. A 2019 review in the British Journal of Sports Medicine found that even 150 minutes per week of brisk walking produced measurable improvements in VO2 max and blood pressure within 4-6 weeks.

    Weeks 8-12: With consistent effort and appropriate nutrition, body composition changes become visible. Waist circumference, how clothes fit, and energy levels are the most reliable early indicators — not the scale alone, which fluctuates for many reasons.

    Key metrics to track:

    • Resting heart rate (lower is generally better)
    • Average pace per mile over the same route
    • Session duration and weekly total minutes
    • Perceived exertion (how hard a given pace feels over time)
    • Waist-to-hip ratio or how your clothing fits

    If you’ve been consistently power walking 4+ days per week for 12 weeks and see no improvement in any measurable area, it may be time to consult a registered dietitian or certified personal trainer to reassess your approach. Results vary significantly based on starting fitness level, nutrition, sleep quality, and stress load.

    Frequently Asked Questions About Power Walking

    Is power walking as effective as running for weight loss?
    When caloric expenditure is matched, research suggests the outcomes are comparable for cardiovascular health markers. Running burns more calories per minute, but power walking can be sustained longer with far less injury risk — which often means more total weekly activity over time. For many adults, power walking produces better long-term results precisely because they can stick with it.

    How fast do I need to walk for it to count as power walking?
    Most fitness professionals define power walking as a pace between 3.5 and 5.0 mph, with intentional technique — arm drive, engaged core, and heel-to-toe foot strike. For reference, 3.5 mph means covering a mile in about 17 minutes. The “talk test” is a reliable gauge: you should be able to speak in short phrases, but holding a full conversation should require effort.

    Can power walking help with belly fat specifically?
    You can’t spot-reduce fat from any specific area, but research consistently shows that sustained aerobic exercise — including brisk walking — reduces visceral fat (the deep abdominal fat linked to metabolic disease). A study published in the Journal of Nutrition found that brisk walking combined with moderate caloric adjustment was effective at reducing waist circumference over a 12-week period.

    Do I need special shoes for power walking?
    Not necessarily “special,” but appropriate footwear matters. Running shoes with excessive heel cushioning can actually hinder the natural heel-to-toe roll of power walking. Look for walking-specific shoes or neutral running shoes with moderate heel drop and flexible forefoot. Replace them every 300-500 miles — worn-out cushioning is a common cause of shin splints and knee discomfort.

    Can I power walk every day?
    Many healthy adults can power walk daily, especially if they alternate intensity levels — harder sessions 3-4 days and easier recovery walks on others. However, if you’re starting from a sedentary baseline, build up gradually. Daily high-intensity power walking without recovery time is a common cause of early burnout and overuse injuries in beginners.

    Start Walking With Purpose Today

    Power walking isn’t a consolation prize for people who can’t run. It’s a deliberate, science-supported cardiovascular strategy that works — and one that’s accessible at almost any fitness level.

    The research is clear: consistency at moderate intensity beats intensity done sporadically. And power walking, done correctly and progressively, delivers real cardiovascular benefits, supports healthy body composition, and can be sustained for years without the joint wear and tear of higher-impact options.

    Your next step — literally — is a 20-minute walk today with your elbows at 90 degrees, your core gently engaged, and a pace that has you breathing just hard enough to notice. That’s where results begin.

    Small, consistent steps done with intention outperform ambitious plans done sporadically every single time.


    Wellness Disclaimer: This article is for informational and educational purposes only. The content is not intended to replace professional medical, nutritional, or fitness advice. Always consult a qualified healthcare provider, registered dietitian, or certified fitness professional before starting a new health program or making significant changes to your lifestyle.

    Content reviewed by our wellness editorial team, with references to peer-reviewed research and guidelines from leading health organizations.