
Blog

  • Zone 2 Cardio: The Science-Backed Way to Train Smarter

    Zone 2 Cardio: The Science-Backed Way to Train Smarter

    You’ve been pushing hard every session — but what if training easier is actually the key to going further?

    Most people treat every cardio session like a race. They go hard, they go fast, they leave drenched and proud. And while intensity has its place, research now shows that one of the most powerful things you can do for your fitness, longevity, and metabolic health is… slow down.

    Zone 2 cardio has quietly become one of the most talked-about concepts in evidence-based fitness — not because it’s trendy, but because the science behind it is genuinely compelling. From elite endurance athletes to busy professionals trying to improve their health without burning out, people are discovering that training at a lower intensity can deliver surprisingly deep physiological benefits.

    In this guide, you’ll learn exactly what Zone 2 cardio is, how it works at the cellular level, how to know if you’re actually in Zone 2, and how to build it into your weekly routine — whether you’re a complete beginner or a seasoned gym-goer. No gimmicks, no extreme protocols — just a smarter way to move.

    Why Zone 2 Cardio Matters More Than You Think

    Here’s a surprising stat: according to research cited by Harvard Health Publishing, the majority of recreational exercisers spend most of their cardio time working too hard to be in Zone 2 — but not hard enough to trigger the high-intensity adaptations of Zones 4 and 5. They’re stuck in what exercise scientists sometimes call the “gray zone” — working harder than necessary without the payoff.

    Zone 2 cardio specifically targets your aerobic base — the foundation of all physical endurance and metabolic efficiency. At this intensity, your body primarily burns fat for fuel, trains the mitochondria in your muscle cells to become more numerous and more efficient, and builds cardiovascular capacity without putting excessive stress on your recovery systems.

    According to the American College of Sports Medicine (ACSM), a well-developed aerobic base improves VO2 max over time, lowers resting heart rate, and enhances the body’s ability to clear lactate — all markers that correlate with long-term cardiovascular health and athletic performance.

    What makes this especially relevant to everyday life? Better mitochondrial function means more energy throughout the day, better blood sugar regulation, and a stronger metabolic engine. This isn’t just for athletes — it’s foundational wellness for anyone aged 25 to 60 who wants to feel better and age well.

    The Science Behind Zone 2: How It Actually Works

    Your heart rate zones are typically divided into five ranges, based on a percentage of your maximum heart rate. Zone 2 falls roughly between 60–70% of your max heart rate — an intensity where you can hold a conversation, but you’re definitely working.

    At this intensity, something specific happens metabolically: your muscles rely predominantly on fat oxidation rather than glycogen (stored carbohydrates) for energy. This is sometimes called the “fat-burning zone,” but that label oversimplifies it — the real value isn’t just calorie burning. It’s cellular adaptation.

    Research published in the journal Cell Metabolism found that endurance training at low to moderate intensities significantly increases mitochondrial density and function in skeletal muscle. More mitochondria means your muscles can produce energy more efficiently — a direct upgrade to your aerobic engine.

    Busting the myth: Many people believe that if you’re not sweating through your shirt and gasping for air, you’re not getting a real workout. That’s simply not true. The low-intensity adaptations from Zone 2 are distinct from — and complementary to — high-intensity training. Neither approach alone gives you a complete fitness picture.

    Renowned sports medicine physician Dr. Peter Attia, who has extensively discussed Zone 2 training, describes it as the single most important type of exercise for metabolic health and longevity. While individual results vary significantly based on fitness baseline, age, and training history, the underlying biology is consistent: regular Zone 2 work builds a more resilient, efficient cardiovascular and metabolic system.

    It’s also worth noting that Zone 2 training supports recovery between harder sessions. Because the intensity is low enough not to deplete glycogen stores or heavily stress your central nervous system, you can perform Zone 2 work 3–5 times per week without the burnout that often comes from training too hard too often.

    How to Get Started With Zone 2 Cardio

    Getting into Zone 2 is simple in theory — the challenge is most people naturally drift above it when they feel like they’re not “working hard enough.” Here’s how to nail it from the start.

    Step 1: Find Your Zone 2 Heart Rate Range
    Use the basic formula: 220 minus your age = estimated max heart rate. Zone 2 is 60–70% of that number. For a 40-year-old: 220 – 40 = 180 max HR. Zone 2 = approximately 108–126 bpm.

    A more practical test: if you can hold a full conversation without gasping — but singing would be difficult — you’re likely in Zone 2. This is called the “talk test” and it’s validated by the ACSM as a reliable intensity guide for general fitness purposes.

    Step 2: Choose Your Activity
    Any steady-state aerobic activity works. Popular options include:

    • Brisk walking or incline walking (especially for beginners)
    • Cycling — stationary or outdoor
    • Light jogging or run-walk intervals
    • Rowing machine
    • Swimming at a steady pace
    • Elliptical trainer

    Beginner entry point: Start with 20–30 minutes, 2–3 times per week. Focus on keeping your heart rate in range — slow down if needed, even if that means walking.

    Intermediate level: Aim for 45–60-minute sessions, 3–4 times per week. At this point, you can mix in one or two higher-intensity sessions weekly — like a HIIT workout — while using Zone 2 as your foundation.

    Advanced level: Many elite endurance athletes perform 80% of their total training volume in Zone 2 (the 80/20 principle). At this stage, sessions can extend to 90 minutes or more, and tracking with a heart rate monitor becomes essential for precision.

    Step 3: Use a Heart Rate Monitor
    A chest strap or wrist-based monitor takes the guesswork out. Without one, most people consistently overestimate their Zone 2 without realizing it.

    Common Mistakes That Sabotage Zone 2 Results

    Zone 2 sounds easy — and that’s exactly why people mess it up. Here are the most common errors and exactly how to fix them.

    Mistake 1: Going Too Hard
    This is the number one problem. The moment your heart rate creeps above Zone 2, you shift your energy system and lose the specific adaptations you’re training for. It feels too easy, so people speed up. Fix: Use a heart rate monitor and commit to slowing down, even if your ego takes a hit. An incline walk at 3 mph in Zone 2 beats a jog at 6 mph in Zone 4 for this specific goal.

    Mistake 2: Not Doing It Consistently Enough
    Mitochondrial adaptations develop gradually over weeks and months — not after two sessions. Research from the NIH suggests significant aerobic base improvements require at least 8–12 weeks of consistent training. Fix: Treat Zone 2 sessions as non-negotiable weekly appointments, not optional add-ons.

    Mistake 3: Skipping It Because It Feels Unproductive
    Many gym-goers feel guilty doing “easy” cardio. That psychological barrier keeps them from reaping real physiological benefits. Fix: Reframe the purpose. Zone 2 isn’t “easy” — it’s precision training for your mitochondria, heart, and metabolic system. Track your resting heart rate over time — watching it drop is deeply satisfying evidence that it’s working.

    Mistake 4: Ignoring Nutrition Around Sessions
    Because Zone 2 relies on fat oxidation, some people train fasted to amplify this effect — which can work for some individuals. But for others, especially those prone to low blood sugar or exercising longer than 60 minutes, under-fueling leads to poor performance and post-session fatigue. This depends heavily on your baseline — experiment and observe how your body responds.

    What to Eat to Support Zone 2 Training

    Zone 2 cardio is fueled primarily by fat at the muscular level, but your overall diet still plays a significant role in how well you recover, adapt, and feel across your training week.

    According to the Academy of Nutrition and Dietetics, endurance athletes — even at moderate volumes — benefit from a balanced macronutrient approach that prioritizes complex carbohydrates, lean proteins, and healthy fats.

    Before a Zone 2 session (1–2 hours prior):
    A light, easily digestible meal or snack works well. Think: a banana with almond butter, oatmeal with berries, or a small yogurt with granola. Avoid heavy, high-fat meals that slow digestion and make sustained effort uncomfortable.

    During sessions under 60 minutes:
    Water is typically sufficient. Electrolyte-enhanced water can help for longer sessions or on hot days.

    After Zone 2 sessions:
    Replenish with a combination of protein and carbohydrates within 30–60 minutes. A target of 20–30 grams of protein supports muscle recovery and adaptation. Options: Greek yogurt with fruit, a protein smoothie with oats, or eggs on whole grain toast.

    Daily diet foundation: The USDA Dietary Guidelines recommend a diet rich in vegetables, whole grains, lean proteins, and healthy fats — a pattern that naturally supports both aerobic performance and metabolic health. Omega-3-rich foods like salmon, walnuts, and flaxseeds are particularly useful for reducing exercise-related inflammation.

    If you’re also pursuing body composition goals alongside Zone 2 training, check out our guide on body recomposition for a deeper look at how to align your nutrition and training.

    How Long Until You See Results — and What to Track

    Zone 2 is a long game, and that’s not a warning — it’s actually one of its best features. Unlike crash diets or extreme programs, the adaptations it builds are durable and compound over time.

    Weeks 1–3: Don’t expect dramatic changes yet. Your body is beginning to upregulate fat oxidation pathways and slowly improving mitochondrial function. What you may notice: sessions feel a little easier at the same heart rate, or you recover faster between efforts.

    Weeks 4–8: Measurable aerobic improvements become more apparent. Your resting heart rate may begin to drop. Many people notice they can sustain a faster pace at the same heart rate — a reliable sign of improved aerobic efficiency. A study published in the Journal of Applied Physiology found that 6–8 weeks of moderate-intensity endurance training produced significant improvements in VO2 max and fat oxidation rates.

    Weeks 8–16: If you’ve been consistent, your aerobic base is genuinely stronger. Energy levels throughout the day often improve, resting heart rate drops further, and you likely find your higher-intensity workouts feel more manageable — because your base is supporting everything above it.

    What to track:

    • Resting heart rate (measure each morning before getting up)
    • Pace or power output at the same heart rate over time
    • Perceived exertion at a given intensity
    • Recovery between sessions (soreness, sleep quality, energy)

    If you’re not seeing improvements after 12 weeks of consistent Zone 2 training (3+ sessions/week), consider consulting a certified fitness professional or sports medicine physician to assess your program design, sleep, and nutrition. For a well-rounded fitness plan, building on a sustainable workout routine alongside Zone 2 can make a significant difference.

    Frequently Asked Questions

    Q: Is Zone 2 cardio good for weight loss?
    Zone 2 training does burn fat as its primary fuel source during exercise, and over time improves your metabolic efficiency. However, weight loss is primarily driven by overall calorie balance and lifestyle habits. Zone 2 is a powerful tool in a weight management plan, but it’s not a standalone solution. Pair it with balanced nutrition for meaningful results.

    Q: How many days a week should I do Zone 2?
    For general health, 3 sessions per week of 30–60 minutes is a strong starting point. Research and elite training programs often suggest that 4–5 Zone 2 sessions per week produces the best aerobic adaptations, especially when combined with 1–2 higher-intensity workouts. Start where you are and build gradually.

    Q: Can Zone 2 replace strength training?
    No — and it’s not meant to. Zone 2 develops your cardiovascular and metabolic system, while resistance training builds muscle mass, bone density, and functional strength. They’re complementary, not interchangeable. Ideally, include both in your weekly routine. For strength guidance, our article on compound exercises for full-body strength is a great starting point.

    Q: What if my heart rate spikes into Zone 3 or 4 even when walking?
    This is common for beginners or those with lower current fitness levels. It doesn’t mean you’re out of shape — it means your aerobic base is exactly what Zone 2 training is designed to build. Slow down, walk flat terrain, or shorten sessions. As your fitness improves, your heart rate at the same pace will decrease. Be patient — this is the process working.

    Q: Is Zone 2 the same as “low-intensity steady-state” (LISS) cardio?
    They overlap significantly but aren’t identical. LISS refers broadly to any sustained, low-intensity cardio. Zone 2 is specifically defined by heart rate — keeping intensity precisely between 60–70% of max HR. All Zone 2 training is essentially LISS, but not all LISS guarantees you’re in Zone 2. The heart rate precision is what makes Zone 2 training specifically effective.

    The Takeaway: Train Easier to Go Further

    Zone 2 cardio is one of those concepts that sounds almost too simple — slow down, stay in a moderate heart rate range, and do it regularly. But the simplicity is the point. The biology is real, the research is solid, and the benefits compound in ways that support your fitness for the long haul.

    You don’t need to overhaul your entire routine. Start by replacing one high-intensity cardio session per week with a true Zone 2 session — a 40-minute brisk walk, a steady bike ride, or an easy row. Keep your heart rate in check. Stay consistent for 8–12 weeks. Track your resting heart rate.

    Small, consistent efforts — not heroic one-off workouts — are what build a body that performs well for decades. Zone 2 is one of the most sustainable, scientifically grounded habits you can add to your fitness life starting today.


    This article is for informational and educational purposes only. The content is not intended to replace professional medical, nutritional, or fitness advice. Always consult a qualified healthcare provider, registered dietitian, or certified fitness professional before starting a new health program or making significant changes to your lifestyle.

    Content reviewed by our wellness editorial team, with references to peer-reviewed research and guidelines from leading health organizations.


  • Progressive Overload: The Key to Never-Ending Fitness Gains

    Progressive Overload: The Key to Never-Ending Fitness Gains

    If your workouts feel exactly the same as they did three months ago, that’s not consistency — that’s a plateau in disguise.

    Here’s a stat that might surprise you: research from the American College of Sports Medicine (ACSM) shows that the majority of recreational gym-goers stop making meaningful strength or endurance gains within 6 to 8 weeks of starting a new program — not because they’re lazy, but because they never change what they’re doing. The body is incredibly adaptive. Give it the same stimulus long enough, and it simply stops responding.

    That’s where progressive overload comes in — arguably the single most important concept in fitness, and yet one of the most misunderstood.

    Whether you’re lifting weights, doing bodyweight training, running, or cycling, progressive overload is the engine behind every meaningful result. It’s what separates people who keep improving from those who spin their wheels for months. In this guide, you’ll learn exactly what progressive overload is, how it works in your body, how to apply it smartly — and how to avoid the mistakes that stall your progress or lead to injury.

    Why Progressive Overload Matters More Than You Think

    Most people think fitness progress is about working hard. And yes, effort matters. But the real driver of improvement isn’t just how hard you work — it’s whether your body is being challenged progressively. This is the difference between doing 3 sets of 10 push-ups every day for a year and actually getting stronger versus staying exactly the same.

    Your body adapts to stress. When you expose your muscles, cardiovascular system, or connective tissue to a challenge slightly beyond their current capacity, they respond by growing stronger, more efficient, and more resilient. But once your body adapts, that same challenge no longer provides enough stimulus to trigger further change.

    A landmark review published in the Journal of Strength and Conditioning Research confirmed that progressive overload is one of the foundational principles of effective resistance training, alongside specificity and recovery. Without progressive overload, your workouts become maintenance — not growth.

    This matters daily because many busy adults settle into a comfortable routine. The same 30-minute treadmill walk at the same speed. The same dumbbells for the same reps. Comfort feels productive, but physiologically, it’s neutral. Your body has already paid its adaptation dues and is simply cruising.

    The good news: you don’t need to dramatically increase intensity to keep progressing. Small, consistent increases — applied strategically — are all it takes.

    The Science Behind Progressive Overload: How It Actually Works

    When you challenge a muscle or your cardiovascular system beyond its current capacity, a process called mechanotransduction begins. Muscle fibers experience microscopic damage, triggering an inflammatory repair response. Over the following 24 to 72 hours, your body rebuilds those fibers slightly thicker and stronger than before — a process known as muscle protein synthesis.

    Repeat this cycle consistently — with slightly more challenge each time — and you have the foundation of all strength and endurance gains.

    A common myth is that progressive overload only means adding weight to the bar. In reality, there are multiple dimensions of overload:

    • Load (weight): Increasing the amount of resistance
    • Volume: Doing more sets or reps at the same weight
    • Frequency: Training the same muscle group more often
    • Density: Doing the same work in less time
    • Range of motion: Deepening the movement pattern
    • Tempo: Slowing down reps to increase time under tension

    Research from Harvard Health Publishing and sports science literature consistently reinforces that beginners can progress rapidly through multiple dimensions simultaneously, while intermediate and advanced individuals need more specific and calculated overload strategies.

    One important nuance: more overload is not always better. The NIH’s National Institute on Aging notes that excessive overload without adequate recovery — especially in adults over 40 — significantly increases injury risk. The goal is the minimum effective dose of overload, not the maximum possible stress.

    How to Apply Progressive Overload: Practical Steps for Every Level

    The beauty of progressive overload is that it can be applied regardless of where you’re starting. Here’s how to make it work across different fitness levels:

    Beginner (0–6 months of consistent training)

    1. Start with form mastery. Before increasing anything, own your movement patterns. A properly executed squat at a manageable weight beats sloppy form at a heavy load every time.
    2. Add reps first. If your program calls for 3 sets of 8, aim to reach 3 sets of 12 over 2 to 3 weeks before increasing weight.
    3. Increase weight in small increments. For upper body, increase by 2.5 lbs at a time. For lower body, 5 lbs is a reasonable jump. Resist the temptation to leap ahead.
    4. Track everything. Write down your sets, reps, and weight every session. Memory isn’t reliable — a training journal or app is your accountability partner.

    Intermediate (6 months to 2 years)

    1. Use periodization. Alternate between phases of higher volume (more reps, moderate weight) and higher intensity (fewer reps, heavier weight) over 3 to 6 week blocks.
    2. Manipulate tempo. Try a 3-second lowering phase (eccentric) to increase time under tension without adding load.
    3. Add training frequency. If you’re training a muscle group once a week, consider twice. The ACSM recommends training each major muscle group 2 to 3 times per week for ongoing strength adaptation.

    Advanced (2+ years of consistent training)

    1. Work with a periodized mesocycle plan. Progress in 4 to 8 week blocks with planned deload weeks (lighter loads to allow full recovery).
    2. Focus on rate of perceived exertion (RPE) and proximity to failure. Advanced lifters need to train closer to their limit to drive adaptation.
    3. Consider single-leg, unilateral, and variation work to address asymmetries and stimulate new neuromuscular patterns.

    If you’re building your routine around these principles, our guide on how to Build a Sustainable Workout Routine can help you structure each training block with intention.

    Common Mistakes That Sabotage Progressive Overload

    Even people who know about progressive overload often undermine their own results. Here are the most common errors — and how to correct them:

    1. Jumping weights too fast

    Ego loading is real. Adding 20 lbs to a lift because you “feel strong” without actually being ready for it leads to form breakdown, injury, and setbacks that cost weeks of training. Fix it by using the rep range as your guide — only increase load when you can complete all sets with good form and 2 to 3 reps still in the tank.

    2. Ignoring non-weight variables

    Many people think progressive overload is exclusively about lifting heavier. But as outlined earlier, volume, tempo, density, and frequency are all valid levers. If adding weight isn’t appropriate, manipulate another variable. This keeps training productive without unnecessary strain.

    3. Skipping deload weeks

    Pushing harder every week without recovery is a direct path to overtraining syndrome — a documented condition recognized by the Mayo Clinic that causes fatigue, performance decline, mood disturbances, and increased injury risk. Plan one deload week every 4 to 6 weeks: reduce volume or load by 40 to 50 percent to allow full systemic recovery.

    4. Not tracking workouts

    You cannot progressively overload what you’re not measuring. Without a log, you’ll likely repeat the same weights and reps week after week without realizing it. Use a notebook, spreadsheet, or a free app like Strong or Jefit to record every session.

    5. Neglecting sleep and nutrition

    Progressive overload is a stimulus — your actual adaptation happens during recovery. Research from the National Sleep Foundation shows that muscle protein synthesis peaks during deep sleep. If you’re averaging under 6 hours a night or not eating adequate protein, you’re applying overload without the recovery infrastructure to benefit from it.

    Nutrition to Support Progressive Overload

    You can’t outwork poor nutrition — and this is especially true when your goal is ongoing adaptation. Here’s what the evidence says:

    Protein is non-negotiable. The Academy of Nutrition and Dietetics recommends 1.2 to 2.0 grams of protein per kilogram of body weight per day for active adults aiming to build or maintain muscle. That’s roughly 0.55 to 0.9 grams per pound. Good sources include chicken breast, eggs, Greek yogurt, cottage cheese, salmon, lentils, and tofu.

    Carbohydrates fuel your training. Many people undercut their carb intake in the name of fat loss, leaving their muscles without sufficient glycogen for high-effort sessions. The USDA Dietary Guidelines recommend that 45 to 65 percent of your daily calories come from carbohydrates — with a focus on whole grains, legumes, fruits, and vegetables.

    Timing matters somewhat — but not as much as totals. Research published in the Journal of the International Society of Sports Nutrition suggests that consuming 20 to 40 grams of protein within two hours post-workout supports muscle protein synthesis, though total daily protein intake remains the primary driver of adaptation.

    Don’t skip calories to extremes. A moderate calorie deficit (around 300 to 500 calories below maintenance) is sustainable for fat loss while preserving muscle mass, especially when protein intake is high. Extreme restriction slows recovery and undermines the overload response. For a full picture of combining fat loss with muscle building, check out our article on Body Recomposition: Lose Fat and Build Muscle Together.

    How Long Until You See Results — and What to Track

    One of the most common frustrations in fitness is expecting fast results and getting discouraged when they don’t appear quickly. Here’s what the research actually tells us:

    Strength gains: Beginners can notice measurable strength improvements within 2 to 4 weeks, primarily due to neuromuscular adaptations (your nervous system learns to recruit muscle fibers more efficiently). Actual muscle hypertrophy — visible size changes — typically requires 6 to 12 weeks of consistent progressive overload training.

    Endurance improvements: Cardiovascular adaptations are faster — many people notice improved stamina within 2 to 3 weeks of consistent progressive cardio work.

    Body composition: This is the most variable metric and depends heavily on your nutrition, sleep, and starting point. Research in the American Journal of Clinical Nutrition suggests that meaningful changes in lean mass and body fat percentage typically take 8 to 16 weeks with consistent training and adequate protein.

    What to track:

    • Weight lifted per exercise (weekly)
    • Total weekly volume (sets × reps × weight)
    • Rate of perceived exertion (RPE) at the end of working sets
    • Recovery quality: sleep hours, soreness levels, energy during training
    • Performance benchmarks: time to complete a standard workout, max reps at a given weight

    If you’re not seeing progress after 6 to 8 weeks of consistent tracking, it may be time to reassess your program design, recovery habits, or consult a certified personal trainer for a programming audit. For reinforcing the foundational movements that respond best to progressive overload, revisiting Compound Exercises: Your Full-Body Strength Shortcut is a great starting point.

    Frequently Asked Questions About Progressive Overload

    Can I apply progressive overload without weights?

    Absolutely. Bodyweight training responds just as well to progressive overload principles. You can increase difficulty by adding reps, reducing rest time, elevating your feet, slowing tempo, or advancing to harder movement variations (like moving from a standard push-up to a decline push-up or archer push-up). The principle is the same — the challenge must increase over time.

    How often should I increase weight or reps?

    For most beginners, every 1 to 2 weeks is appropriate. For intermediate trainees, every 2 to 4 weeks is realistic. There’s no universal schedule — your readiness, recovery, and how close you are to your genetic ceiling all influence this. The safest rule: only progress when you can complete all prescribed sets with clean form and at least 2 reps left in reserve.

    Is progressive overload safe for people over 50?

    Yes — and arguably more important. The ACSM strongly advocates resistance training with progressive overload for older adults to combat age-related muscle loss (sarcopenia), maintain bone density, and support metabolic health. The key adjustment is being more conservative with load increases, prioritizing recovery, and working with a qualified trainer to ensure safe programming.

    What if I miss a week of training? Do I lose my progress?

    One missed week rarely sets you back significantly. Research suggests that measurable detraining in trained individuals begins after about 2 to 3 weeks of complete inactivity. Return to training at slightly reduced loads and volume, and most people recapture previous levels within 1 to 2 weeks. The body has a "muscle memory" effect supported by epigenetic research that speeds re-adaptation.

    Can I apply progressive overload to cardio?

    Yes. For running, increase weekly mileage by no more than 10 percent per week — a guideline widely endorsed by running coaches and sports medicine specialists to reduce overuse injury risk. For cycling or rowing, you can increase duration, resistance, or intensity (like interval structure) progressively using the same principles.

    Your Next Step Starts This Week

    Progressive overload isn’t a complex system reserved for competitive athletes. It’s a simple, science-backed principle that works for anyone willing to pay attention to what they’re doing and make small, intentional upgrades over time.

    You don’t need to transform your entire program overnight. Start this week by writing down what you lift, how many reps you do, and how hard it felt. Then, next week, do just a little more. Add one rep. Rest 10 seconds less between sets. Slow your tempo by one second. These micro-adjustments compound into real, lasting results.

    Consistency with progressive intent always beats sporadic intensity. Show up, track it, and trust the process — your body is remarkably good at adapting when you give it the right signals.


    Wellness Disclaimer: This article is for informational and educational purposes only. The content is not intended to replace professional medical, nutritional, or fitness advice. Always consult a qualified healthcare provider, registered dietitian, or certified fitness professional before starting a new health program or making significant changes to your lifestyle.

    Author Line: Content reviewed by our wellness editorial team, with references to peer-reviewed research and guidelines from leading health organizations.

  • Compound Exercises: Your Full-Body Strength Shortcut

    Compound Exercises: Your Full-Body Strength Shortcut

    Many people walk into the gym with a desire to get stronger, feel fitter, and look better. Often, they gravitate towards machines or exercises that target one muscle at a time – bicep curls today, triceps extensions tomorrow, followed by leg extensions. It’s a common approach, but it can leave you feeling like you’re spending endless hours working out with minimal returns on your overall strength and functional ability. You might be building individual muscles, but are you building a truly strong, coordinated body?

    The truth is, while isolation exercises have their place, they often miss the bigger picture of how your body moves in the real world. Think about it: when do you ever use just one muscle group in isolation outside of a gym? Lifting groceries, playing with kids, climbing stairs, or simply moving through your day – these all demand multiple muscles working together. This is where the profound power of compound exercises comes into play.

    This comprehensive guide will revolutionize your approach to fitness. We’ll dive deep into what compound exercises are, why they are a cornerstone of any effective training program, and how you can seamlessly integrate them into your routine. Prepare to discover how to build maximal strength, boost calorie burn, and cultivate real-world functional fitness, all while making your workouts more efficient and rewarding. Forget endless isolated movements; it’s time to train smarter, not just harder.

    Why Compound Exercises Matter More Than You Think

    When you boil down human movement, it’s almost always a symphony of muscles and joints working in concert. Compound exercises are the conductors of this symphony. They are movements that involve the coordinated action of multiple joints and engage several major muscle groups simultaneously. Think about iconic movements like squats, deadlifts, overhead presses, or pull-ups.

    These aren’t just exercises; they’re fundamental human movement patterns. By training them, you’re not just strengthening individual muscles; you’re teaching your body to move as an integrated, powerful unit. This functional strength is what truly translates to improved performance in daily life, whether you’re carrying heavy bags, moving furniture, or engaging in sports.

    The American College of Sports Medicine (ACSM) consistently emphasizes the importance of multi-joint exercises for comprehensive strength development. They highlight that these movements are superior for improving athletic performance, enhancing daily functional capacity, and promoting overall fitness compared to single-joint movements. This isn’t just theory; it’s a principle backed by decades of exercise science.

    Beyond the gym, this integrated strength impacts your longevity and independence. As we age, maintaining the ability to stand from a chair (a squat pattern), lift objects off the floor (a deadlift pattern), or reach overhead (an overhead press pattern) becomes crucial for quality of life. Compound exercises are your proactive investment in a strong, capable future, helping to train your body for real life.

    The Science Behind How Compound Exercises Actually Work

    The magic of compound exercises lies in their efficiency and the unique physiological response they elicit. When you perform a movement like a barbell squat, your hip, knee, and ankle joints all articulate. This simultaneous movement engages your quadriceps, hamstrings, glutes, core, and even your back muscles as stabilizers. Compare this to a leg extension, which only moves the knee joint and isolates the quads.

    This extensive muscle activation during compound movements demands significantly more energy from your body. More muscles working means a higher caloric expenditure during the workout itself. But the benefits extend far beyond the session. The metabolic stress and muscle damage (the good kind, that leads to growth) from compound lifts are greater, leading to an elevated post-exercise oxygen consumption (EPOC), often called the “afterburn effect.” This means you continue to burn more calories even after your workout is over.

    A common misconception is that you need separate workout days for every single muscle group to achieve a balanced physique. While body part splits can be effective for advanced bodybuilders, for most people, this approach is often inefficient and unnecessary. Compound exercises bust this myth by hitting multiple muscles effectively and synergistically, allowing for highly efficient full-body workouts that can deliver superior results in less time.

    Furthermore, research published in the Journal of Strength and Conditioning Research has demonstrated that multi-joint exercises, like the squat and deadlift, can elicit a greater acute hormonal response compared to single-joint exercises. This includes higher levels of anabolic hormones such as testosterone and growth hormone. While the direct impact of these acute spikes on long-term muscle growth is still debated, it underscores the intense systemic demand and adaptational potential that compound movements place on the body, contributing to greater overall muscle growth and strength adaptations over time.

    How to Get Started: Practical Steps for Incorporating Compound Exercises

    Ready to unlock the power of compound movements? Here’s a progressive guide to integrating them into your routine:

    Beginner-Friendly Entry Points:

    1. Master Bodyweight Basics: Before adding external load, become proficient with your own body weight. Start with exercises like bodyweight squats, lunges (forward and reverse), push-ups (on your knees or incline if needed), and planks. Focus intently on proper form and control. This builds a crucial foundation of stability and movement patterns.
    2. Learn Proper Form: This is non-negotiable. Watch high-quality instructional videos from certified personal trainers. Consider investing in a few sessions with a qualified coach to learn the fundamental movement patterns safely and effectively. Good form is your best insurance against injury and your most direct path to maximizing results.
    3. Start Light, Stay Safe: When you’re ready to introduce weights, always begin with very light dumbbells, kettlebells, or even just an empty barbell. The goal initially is to groove the movement pattern under light resistance, not to lift heavy. Focus on feeling the right muscles work and maintaining impeccable form throughout the entire range of motion.

    Intermediate Options:

    1. Embrace Progressive Overload: Once you’ve mastered the basic forms with light weights, it’s time to systematically challenge your body. This is the principle of progressive overload – gradually increasing the weight, reps, or sets over time. Without it, your body has no reason to adapt and get stronger. Track your progress to ensure you’re consistently challenging yourself. This is a critical component of any sustainable workout routine.
    2. Incorporate Key Lifts: Build your workouts around the classic compound lifts: barbell squats (back or front), deadlifts (conventional or Romanian), overhead presses, bench presses, and bent-over rows. These movements form the backbone of a comprehensive strength program.
    3. Full-Body Split: A highly effective way to structure your training is through a 2-3 day per week full-body split. This allows you to hit all major muscle groups with compound exercises, followed by adequate recovery days. For example, Monday, Wednesday, Friday workouts with Tuesday, Thursday, Saturday, Sunday for rest or active recovery.

    Advanced Options:

    1. Vary Intensity and Rep Ranges: To continue making progress, manipulate your training variables. Utilize lower rep ranges (e.g., 3-5 reps) for pure strength development, and higher rep ranges (e.g., 8-12 reps) for muscle hypertrophy (growth). Periodically change your rep schemes to keep your body adapting.
    2. Explore Advanced Variations: With a solid foundation, you can explore more complex compound movements like power cleans, snatches, or plyometric variations. However, these require significant technical proficiency and are best learned under the direct supervision of an experienced coach.
    3. Implement Periodization: Advanced lifters often benefit from periodization, which involves structuring training into specific blocks with varying intensity and volume goals. This helps prevent plateaus, optimizes recovery, and prepares the body for peak performance.

    Common Mistakes That Sabotage Results

    While compound exercises are incredibly effective, they also require attention to detail. Many enthusiastic lifters make common errors that can derail progress or even lead to injury. Acknowledging these pitfalls is the first step toward correcting them.

    1. Sacrificing Form for Weight: This is arguably the most prevalent and damaging mistake. The allure of lifting heavier can be strong, but attempting weights you can’t control with proper technique is counterproductive. Poor form reduces the effectiveness of the exercise by shifting tension away from the target muscles and dramatically increases your risk of injury.
    2. Fix: Leave your ego at the door. Drop the weight to a level where you can perform every repetition with perfect form, maintaining control throughout the entire movement. Focus on the muscle connection and the quality of each rep, not just the number on the barbell.

    3. Skipping Warm-ups and Cool-downs: Many individuals jump straight into heavy lifting or abruptly finish their workout, neglecting the crucial bookends of a training session. A proper warm-up prepares your body for the demands of the workout, increasing blood flow, raising core temperature, and improving joint mobility. A cool-down aids in recovery and flexibility.
    4. Fix: Dedicate 5-10 minutes to dynamic stretches (e.g., leg swings, arm circles, torso twists) before your workout. After your session, spend another 5-10 minutes on static stretches, holding each stretch for 20-30 seconds, focusing on the muscles you’ve worked.

    5. Lack of Progressive Overload: Your body is an incredible adapter. If you consistently perform the same exercises with the same weight and the same number of reps, your body will eventually stop seeing a reason to get stronger or grow. This leads to frustrating plateaus.
    6. Fix: Implement systematic progressive overload. This means periodically increasing the weight, performing more repetitions with the same weight, adding an extra set, or even reducing rest times. Small, consistent increases over time are more effective and sustainable than trying to make huge leaps.

    7. Neglecting Core Engagement: For virtually all compound movements, a strong and stable core is paramount. It acts as the bridge between your upper and lower body, transferring force and protecting your spine. A weak or disengaged core can compromise your form, reduce your power output, and significantly increase your risk of back injury, particularly in lifts like squats and deadlifts.

      Fix: Consciously brace your core before and throughout each repetition. Imagine preparing for a punch to your stomach – this creates intra-abdominal pressure that stabilizes your torso. Supplement your compound lifts with specific core work like planks, dead bugs, and bird-dogs to build foundational core strength.

    Fueling Your Compound Exercise Progress

    Training effectively with compound exercises is only half the battle; your nutrition plays an equally critical role in supporting muscle growth, recovery, and energy levels. You can’t out-train a poor diet, especially when demanding multi-joint movements. Here’s what to focus on:

    • Adequate Protein Intake: Protein is the building block of muscle. To repair muscle fibers broken down during intense training and to synthesize new ones, you need sufficient protein. Aim for approximately 0.7 to 1 gram of protein per pound of body weight per day, distributing your intake across all your meals. Excellent sources include lean meats (chicken, turkey, beef), fish, eggs, dairy products (Greek yogurt, cottage cheese), legumes, and tofu.
    • Complex Carbohydrates: These are your primary energy source. Complex carbohydrates provide sustained energy for your demanding workouts and are crucial for replenishing muscle glycogen stores afterward, aiding in recovery. Prioritize whole grains (oats, brown rice, quinoa), sweet potatoes, fruits, and vegetables. The USDA Dietary Guidelines for Americans typically recommend that carbohydrates make up 45-65% of your daily caloric intake, a range that active individuals often find beneficial for performance.
    • Healthy Fats: Don’t shy away from fats; they are essential for hormone production, nutrient absorption, and overall health. Focus on unsaturated fats found in avocados, nuts, seeds, olive oil, and fatty fish (like salmon, rich in Omega-3s). These healthy fats contribute to satiety and provide a concentrated energy source.
    • Hydration is Key: Often overlooked, water is absolutely critical for performance, recovery, and preventing fatigue and cramps. Even mild dehydration can significantly impair your strength and endurance. The National Academies of Sciences, Engineering, and Medicine suggest about 15.5 cups (3.7 liters) of fluids a day for men and about 11.5 cups (2.7 liters) of fluids a day for women. However, your individual needs will vary based on activity level, climate, and overall health. Keep a water bottle handy and sip throughout the day, not just during workouts.

    Conversely, minimize your intake of processed foods, excessive added sugars, and unhealthy trans fats. These offer little nutritional value, can contribute to inflammation, and ultimately hinder your progress and recovery from the rigorous demands of compound training.

    How Long Until You See Results & What to Track

    One of the most common questions in fitness is, “How long until I see results?” The answer, while not always straightforward, can be broken down into realistic timelines based on scientific understanding.

    Realistic Timelines:

    • Initial Strength Gains (Neurological Adaptations): Within the first 2-4 weeks of consistent compound training, you’ll likely notice a significant increase in your ability to lift more weight or perform more repetitions. This initial surge in strength is largely due to your nervous system becoming more efficient at recruiting and coordinating muscle fibers. You’re essentially getting better at using the strength you already have.
    • Muscle Hypertrophy (Visible Growth): While strength gains can appear quickly, visible changes in muscle size (hypertrophy) typically take a bit longer. Expect to see noticeable changes after 6-12 weeks of consistent, challenging training, coupled with proper nutrition and adequate recovery. It’s important to remember that results vary significantly among individuals due to genetics, training history, age, and adherence to the program.

    Specific Metrics to Monitor:

    • Workout Log: This is your most powerful tool. Keep a detailed log of every workout, recording the exercises performed, the weight lifted, the number of sets, and repetitions for each set. This allows you to track your progress, ensure you’re applying progressive overload, and identify areas for improvement.
    • Perceived Exertion (RPE): Use a simple scale of 1-10 (1 being no effort, 10 being maximal effort) to rate how challenging each set feels. This helps you gauge your effort level and fatigue, ensuring you’re working hard enough but not overdoing it.
    • Form Check-ins: Regularly film yourself performing key lifts or ask a knowledgeable spotter/trainer to observe your form. Small deviations can creep in over time, and regular checks help maintain proper technique.
    • Body Composition (Optional but Informative): If specific goals like weight loss or muscle gain are central to your journey, tracking body measurements (e.g., waist, hips, arms) or periodically assessing body fat percentage (via methods like DEXA scans, bioelectrical impedance analysis, or calipers) every 4-8 weeks can provide objective feedback on your physical changes.
    • How You Feel: Don’t underestimate subjective markers. Pay attention to your energy levels, sleep quality, mood, and recovery between sessions. These are excellent indicators of whether your training and recovery are balanced. Persistent fatigue, poor sleep, or chronic soreness might signal overtraining or inadequate recovery.

    When to Seek Professional Guidance: If you encounter persistent pain that isn’t typical muscle soreness, hit a prolonged plateau despite consistent effort and adjustments, or simply feel uncertain about your form or programming, do not hesitate to consult a certified personal trainer, physical therapist, or other qualified healthcare provider. Their expertise can provide invaluable insights and corrective strategies.

    Frequently Asked Questions

    1. Are compound exercises enough for a complete workout?
      Yes, for most individuals aiming for general strength, fitness, and muscle development, a well-rounded program built primarily on compound exercises is highly effective. They challenge your body holistically. While isolation exercises can be added to address specific muscle weaknesses or aesthetic preferences, they are not strictly necessary for overall fitness.
    2. Can beginners do compound exercises?
      Absolutely! In fact, beginners should prioritize learning compound movements. Starting with bodyweight variations (like squats and push-ups) or very light resistance, focusing intently on proper form, builds a strong foundational movement pattern. This approach teaches your body efficient movement from the outset, serving you well as you progress to heavier loads.
    3. How often should I do compound exercises?
      For optimal results and adequate recovery, aim for 2-4 full-body compound exercise sessions per week. It’s crucial to allow at least one rest day between demanding full-body workouts to enable muscle repair and growth. Listen to your body and adjust frequency based on your recovery capacity and energy levels.
    4. Do compound exercises help with weight loss?
      Yes, significantly. Because they engage multiple large muscle groups and demand more energy, compound exercises lead to a higher calorie expenditure during your workout compared to isolation movements. Furthermore, building muscle through compound training increases your resting metabolic rate, meaning your body burns more calories even when at rest, which is a powerful advantage for sustainable weight management.
    5. What’s the difference between compound and isolation exercises?
      Compound exercises involve movement at multiple joints and engage several major muscle groups simultaneously (e.g., squat, deadlift). Isolation exercises, in contrast, target a single joint and primarily work one muscle group (e.g., bicep curl, leg extension). Both types have their place in a comprehensive fitness plan, but compound exercises offer greater efficiency and functional carryover.

    Conclusion

    Integrating compound exercises into your fitness routine is one of the most powerful and efficient shifts you can make for comprehensive strength, efficiency, and overall well-being. They challenge your body in a way that directly translates to real-world demands, building not just muscle and physical strength, but also coordination, resilience, and confidence in your body’s capabilities.

    Remember, the journey to greater strength and fitness isn’t about perfection; it’s about consistency, commitment to proper form, and the willingness to progressively challenge yourself. Start with the foundational movements, focus on mastering their technique, and trust the process.

    Choose one compound exercise from this guide – perhaps a bodyweight squat or a push-up – and incorporate it thoughtfully into your next workout. Feel the power of your body working as one, and take the first step towards a stronger, more functional you today.

    WELLNESS DISCLAIMER:

    This article is for informational and educational purposes only. The content is not intended to replace professional medical, nutritional, or fitness advice. Always consult a qualified healthcare provider, registered dietitian, or certified fitness professional before starting a new health program or making significant changes to your lifestyle.

    AUTHOR LINE:

    Content reviewed by our wellness editorial team, with references to peer-reviewed research and guidelines from leading health organizations.

  • Build a Strong Core: Beyond Just Abs

    Build a Strong Core: Beyond Just Abs

    Ever felt a twinge in your lower back after a long day at your desk? Or maybe you’ve struggled to maintain balance during everyday tasks, like carrying groceries or playing with your kids? You’re not alone. Many adults underestimate the foundational role their core plays in virtually every movement and daily function.

    It’s easy to think of a strong core as something only athletes or fitness models need, or that it simply means having a visible “six-pack.” The truth is, your core is so much more than just your abdominal muscles, and its strength is vital for preventing injury, improving posture, and enhancing your quality of life, regardless of your fitness level.

    In this guide, we’ll dive deep into what a truly strong core means, why it’s critical for your overall well-being, and how you can build functional core strength without spending hours doing crunches. You’ll learn the science-backed methods, common pitfalls to avoid, and practical steps to integrate effective core training into your routine, empowering you to move better and feel stronger every day.

    Why Core Strength Matters More Than You Think

    When we talk about the core, most people immediately picture the rectus abdominis—the “six-pack” muscle. However, your core is a complex network of muscles that wraps around your entire torso, including your abdominals (rectus abdominis, obliques, transversus abdominis), lower back muscles (erector spinae), pelvic floor muscles, and even your diaphragm and glutes. These muscles work together as a crucial stability system.

    A strong core acts as the central hub of your body, connecting your upper and lower body movements. Think of it as the stable base from which all movement originates. Without this stable base, your limbs operate less efficiently, increasing the risk of injury and reducing power. For example, lifting a heavy box, swinging a golf club, or simply reaching for something on a high shelf all rely heavily on core stability.

    Research published in the Journal of Physical Therapy Science has consistently shown that strong core muscles are directly linked to improved balance and reduced risk of falls, especially as we age. Furthermore, the American College of Sports Medicine (ACSM) emphasizes core training not just for athletes, but for everyone seeking to improve functional movement and mitigate musculoskeletal pain, particularly in the lower back.

    Beyond injury prevention and improved athletic performance, a robust core contributes significantly to better posture, reduced back pain, and greater efficiency in daily activities. It’s the silent hero that supports your spine, transfers force, and keeps your body aligned, impacting everything from how you sit to how you walk.

    The Science Behind It: How It Actually Works

    Building core strength isn’t about isolating muscles; it’s about teaching them to work together to stabilize your spine and pelvis. The primary function of your deep core muscles, like the transversus abdominis and multifidus, is anticipatory stabilization. This means they activate milliseconds before you even move a limb, creating a rigid foundation that protects your spine.

    A common myth is that endless crunches will give you a strong core. While crunches work the superficial rectus abdominis, they do little for the deeper, stabilizing muscles that are truly essential for functional strength. In fact, over-reliance on crunches can sometimes exacerbate posture problems and even contribute to back pain if not balanced with other exercises.

    True core training focuses on exercises that require your core muscles to resist movement (anti-extension, anti-flexion, anti-lateral flexion, anti-rotation) rather than just create movement. This is why exercises like planks, bird-dogs, and Pallof presses are often more effective than traditional sit-ups for building functional core strength.

    A landmark study from the National Institutes of Health (NIH) highlighted the importance of integrating proprioceptive exercises (those that challenge your balance and body awareness) into core training to enhance neuromuscular control. This means your brain and muscles learn to communicate more effectively, leading to better stability and coordination in real-world scenarios.

    How to Get Started: Practical Steps for a Stronger Core

    Ready to build a powerhouse core? Remember, consistency triumphs over intensity, especially when you’re starting out. Here’s how to integrate effective core training into your routine, with options for every level:

    Beginner Core Exercises (Focus on Stability and Control)

    1. Belly Breathing (Diaphragmatic Breathing): Lie on your back with knees bent, feet flat. Place one hand on your chest, the other on your belly. Inhale deeply through your nose, feeling your belly rise. Exhale slowly through your mouth, drawing your belly button towards your spine. This engages your diaphragm and transversus abdominis. Do 5-10 breaths before each workout.
    2. Pelvic Tilts: Lie on your back, knees bent, feet flat. Gently flatten your lower back into the floor by tilting your pelvis upward, engaging your lower abdominal muscles. Hold for 5 seconds, then relax. Repeat 10-12 times.
    3. Bird-Dog: Start on all fours (hands under shoulders, knees under hips). Keep your back flat and core engaged. Slowly extend your right arm forward and left leg straight back, keeping your hips level. Hold for 2-3 seconds, then return to start. Alternate sides. Perform 8-10 reps per side.
    4. Forearm Plank: Start face down, then prop yourself up on your forearms and toes, keeping your body in a straight line from head to heels. Avoid sagging hips or raising your butt too high. Hold for 20-30 seconds, rest, and repeat for 2-3 sets.

    Intermediate Core Exercises (Adding Challenge and Movement)

    1. Side Plank: Lie on your side, propped on one forearm, feet stacked or staggered. Lift your hips off the floor, forming a straight line from head to heels. Hold for 30-45 seconds per side, 2-3 sets.
    2. Dead Bug: Lie on your back, knees bent at 90 degrees, arms extended towards the ceiling. Keep your lower back pressed into the floor. Slowly lower your right arm towards the floor behind your head and your left leg towards the floor simultaneously. Return to start and alternate. Perform 10-12 reps per side.
    3. Stability Ball Rollout: Kneel behind a stability ball, placing your forearms on the ball. Keeping your core tight and back straight, slowly roll the ball forward, extending your arms and body. Go as far as you can without arching your back, then pull the ball back using your core. Perform 8-10 reps.

    Advanced Core Exercises (Integrating Power and Complexity)

    1. Hanging Leg Raises: Hang from a pull-up bar with an overhand grip. Keeping your core tight, slowly lift your knees towards your chest, or if possible, your straight legs up towards the bar. Control the descent. Perform 8-12 reps for 3 sets.
    2. Pallof Press: Attach a D-handle to a cable machine at chest height. Stand perpendicular to the machine, holding the handle with both hands at your chest. Step away to create tension. Press the handle straight out in front of you, resisting the rotational pull of the cable. Hold for a moment, then slowly return. Perform 8-10 reps per side.
    3. Dragon Flag: Lie on a bench, gripping the bench behind your head. Lift your entire body (from shoulders to feet) into a straight line, supported only by your upper back and shoulders. Slowly lower your body, maintaining the straight line, without letting your hips touch the bench. This is a very challenging exercise requiring significant core strength.

    Remember, the goal is controlled movement and proper form over speed or quantity. When in doubt, start with the beginner variations and progress as your strength and confidence grow. For more dynamic movement, consider how core strength enhances functional fitness training.

    Common Mistakes That Sabotage Results

    Even with the best intentions, it’s easy to fall into common traps that hinder your core strength progress. Recognizing these can help you course-correct and get more from your efforts:

    1. Arching the Lower Back: This is perhaps the most frequent mistake, especially during planks, bird-dogs, and leg raises. Arching your lower back takes the tension off your core and places undue stress on your spine, increasing injury risk.
      • How to Fix It: Focus on maintaining a neutral spine. Imagine drawing your belly button towards your spine or tucking your tailbone slightly. For planks, ensure your body forms a straight line from head to heels.
    2. Holding Your Breath: Many people instinctively hold their breath during challenging core exercises. This can raise blood pressure and prevents proper engagement of deep core muscles, especially the transversus abdominis and diaphragm.
      • How to Fix It: Consciously practice diaphragmatic breathing. Exhale on the exertion phase of an exercise (e.g., as you lift legs in a dead bug, or as you press out in a Pallof press).
    3. Focusing Only on “Abs” (Rectus Abdominis): As mentioned, your core is a 360-degree powerhouse. Neglecting your obliques, lower back, or deep stabilizers will lead to imbalances and limit your overall strength.
      • How to Fix It: Incorporate a variety of exercises that target different core functions: anti-extension (planks), anti-rotation (Pallof press), anti-lateral flexion (side planks), and hip flexion (leg raises).
    4. Rushing Through Movements: Speed can compromise form and reduce muscle engagement. Core exercises are most effective when performed slowly and with control.
      • How to Fix It: Slow down! Focus on the mind-muscle connection. Aim for a 2-second concentric (lifting) phase, a 1-second hold, and a 2-second eccentric (lowering) phase for most exercises.

    Beyond the Workout: Supporting Your Core Strength

    While targeted exercises are crucial, building and maintaining a strong core is also about your broader lifestyle. Just like a sturdy house needs a solid foundation and ongoing care, your core benefits from a holistic approach.

    • Balanced Nutrition: Fueling your body with a variety of whole foods supports muscle repair and growth, which is essential for any strength-building endeavor. According to the Academy of Nutrition and Dietetics, adequate protein intake (around 0.7-1 gram per pound of body weight for active individuals) is vital for muscle synthesis. Don’t forget complex carbohydrates for energy and healthy fats for overall cellular function.
    • Hydration: Water is essential for every bodily function, including muscle contraction, nutrient transport, and joint lubrication. Dehydration can lead to muscle fatigue and reduced performance. Aim for at least 64 ounces of water daily, more if you’re active.
    • Adequate Sleep and Recovery: Your muscles don’t grow when you’re working out; they grow and repair during rest. The National Sleep Foundation recommends 7-9 hours of quality sleep for most adults. Prioritize rest days and consider incorporating stretching routines to aid recovery and flexibility, which can complement core stability.
    • Mindful Movement and Posture: Be aware of your posture throughout the day, whether sitting at a desk or standing. Engage your core subtly by drawing your navel slightly towards your spine. This constant, low-level engagement reinforces core stability and can significantly reduce everyday back pain.
    • Stress Management: Chronic stress can lead to muscle tension, including in the core and lower back. Incorporate stress-reducing practices like mindfulness, deep breathing, or light activity to help maintain muscle relaxation and overall well-being.

    Integrating these habits with your core workout routine creates a powerful synergy for lasting strength and health. For a comprehensive approach, consider how core work fits into building a sustainable workout routine.

    How Long Until You See Results? What to Track

    Patience and consistency are key when building core strength. You won’t develop a rock-solid core overnight, but you will likely notice improvements sooner than you think, especially in how you feel and move.

    Realistic Timelines:

    • Weeks 2-4: You’ll start to notice improved body awareness and better control during exercises. Movements will feel less awkward, and you might find it easier to maintain proper form.
    • Months 1-3: You should experience noticeable improvements in stability, balance, and a reduction in minor aches and pains, particularly lower back discomfort. You’ll likely be able to hold planks longer, perform more reps of bird-dogs, or progress to slightly more challenging variations.
    • Months 3-6+: Significant functional strength gains. Daily tasks become easier, posture improves, and you might see aesthetic changes, though these are secondary to functional strength.

    Results vary significantly based on your starting fitness level, consistency, exercise selection, and overall lifestyle. Someone starting from a very sedentary baseline might see quicker initial changes than an already active individual refining their core strength.

    What to Track:

    • Exercise Performance: Record the duration you can hold planks, the number of reps you complete, or the resistance used for exercises like the Pallof press. Consistent improvement in these metrics is a clear sign of progress.
    • Body Awareness: Pay attention to how your body feels. Do you have better balance? Is it easier to sit upright? Do you feel more stable when bending, twisting, or lifting?
    • Pain Reduction: Note any decrease in back pain, hip discomfort, or improved overall comfort during daily activities.
    • Posture: Observe your standing and sitting posture. Is it naturally improving?

    If you’re not seeing any improvements after a few months, or if you experience persistent pain, it’s wise to reassess your technique or seek guidance from a certified fitness professional or physical therapist. They can evaluate your form and provide personalized adjustments.

    Frequently Asked Questions About Core Strength

    Q: Do I need equipment to train my core?

    A: Not at all! Many highly effective core exercises, like planks, bird-dogs, and dead bugs, rely solely on your body weight. As you progress, you might incorporate resistance bands, stability balls, or dumbbells, but they are not necessary for a strong core.

    Q: How often should I work my core?

    A: For most adults, 2-3 dedicated core sessions per week, lasting 10-20 minutes, is sufficient. You can also integrate core exercises into your existing full-body workouts. Allow for rest days in between to permit muscle recovery and growth.

    Q: Can core exercises help with back pain?

    A: Yes, absolutely. A weak core is a common contributor to lower back pain. Strengthening the muscles that support your spine can significantly reduce discomfort by improving stability and posture. However, if you have chronic or severe back pain, consult a healthcare professional before starting any new exercise program.

    Q: Is it safe to train my core if I’m pregnant?

    A: Core training during pregnancy can be beneficial, but it must be modified and done under guidance. Avoid exercises that involve lying flat on your back for prolonged periods or create excessive intra-abdominal pressure. Consult your doctor or a prenatal fitness specialist for safe and effective exercises.

    Q: Will core training give me a “six-pack”?

    A: Core training builds muscle strength and definition. However, whether a “six-pack” becomes visible largely depends on your body fat percentage. You can have a very strong core without having visible abdominal muscles. Focus on functional strength and overall health rather than purely aesthetic goals.

    The Foundation of Your Well-Being Starts Here

    Building a strong, functional core is one of the most impactful investments you can make in your long-term health and well-being. It’s not just about looking good; it’s about moving better, feeling more stable, preventing injuries, and supporting your body through every twist, bend, and lift of daily life. Remember, genuine strength comes from consistency, proper form, and a holistic approach that extends beyond just your workout sessions.

    Don’t let the quest for a “perfect” core overwhelm you. Start small, focus on the fundamentals, and be patient with your progress. Even a few minutes of dedicated core work a few times a week can yield profound benefits. Take the first step today – your body, and your future self, will thank you for it.

    WELLNESS DISCLAIMER

    This article is for informational and educational purposes only. The content is not intended to replace professional medical, nutritional, or fitness advice. Always consult a qualified healthcare provider, registered dietitian, or certified fitness professional before starting a new health program or making significant changes to your lifestyle.

    AUTHOR LINE

    Content reviewed by our wellness editorial team, with references to peer-reviewed research and guidelines from leading health organizations.

  • Unlock Your Movement: The Complete Guide to Mobility Training

    Unlock Your Movement: The Complete Guide to Mobility Training

    Unlock Your Movement: The Complete Guide to Mobility Training

    Feeling stiff, achy, or like your body just doesn’t move as freely as it used to? You’re not alone, and mobility training might be your game-changer.

    It’s a common scenario: you wake up feeling a bit creaky, find yourself compensating when reaching for something on a high shelf, or perhaps notice that everyday movements like bending down or tying your shoes aren’t as effortless as they once were. For many adults aged 25-60, this feeling of restriction isn’t necessarily a sign of serious health issues, but rather a subtle indicator that your body’s ability to move through its full range of motion is diminishing.

    Often, we confuse “flexibility” with “mobility,” assuming that simply stretching more is the answer. While stretching has its place, true mobility training goes deeper, addressing not just how far your joints can move, but how well your muscles can control those movements. It’s the difference between passively letting a limb move and actively commanding its journey through space.

    In this comprehensive guide, we’ll cut through the misconceptions and dive into the practical, science-backed world of mobility training. You’ll learn why cultivating robust mobility is essential for your long-term health, how it actually works, and most importantly, actionable steps to integrate it into your busy life. Prepare to reclaim your freedom of movement and enhance your overall well-being with functional fitness.

    Why Mobility Training Matters More Than You Think

    Think about how often you move throughout your day. From lifting a child to reaching for groceries, or even just getting in and out of a car, your body performs countless movements. When your joints lack adequate mobility, these simple tasks can become challenging, leading to compensatory movements, increased strain, and eventually, discomfort or even injury.

    Mobility is the unsung hero of overall fitness and daily function. It’s your body’s ability to move through its full, healthy range of motion without pain or restriction. This isn’t just about being able to touch your toes; it’s about having stable, strong joints that can perform their intended functions effectively and safely.

    For instance, restricted hip mobility can impact your lower back, knees, and even how efficiently you walk or run. Limited shoulder mobility can lead to neck pain or hinder your ability to lift objects overhead. The American College of Sports Medicine (ACSM) consistently highlights the importance of maintaining and improving joint range of motion as a fundamental component of physical fitness, crucial for injury prevention and enhancing daily functional capacity. When your joints are mobile, they’re also more resilient.

    Beyond preventing aches and pains, good mobility improves your quality of life. Imagine being able to play sports with your kids without worrying about tweaking something, reaching for that top shelf with ease, or simply sitting and standing without stiffness. It improves your posture, allows for more effective workouts if you engage in strength training, and can even contribute to better balance as you age. It’s an investment in your body’s longevity and capability.

    The Science Behind Mobility: More Than Just Stretching

    Let’s clear up a common misconception: mobility is not simply another word for flexibility. While the two are related, they describe different aspects of movement. Flexibility refers to the passive range of motion of a joint or series of joints, often achieved through static stretching. Mobility, on the other hand, is the active, controlled movement of a joint through its full range of motion, requiring both flexibility and strength within that range.

    Consider a gymnastic split. Someone who can achieve a full split with assistance demonstrates passive flexibility. However, if they can lift their leg high into a split position and hold it there using their own muscle strength, they have excellent mobility. Mobility involves the nervous system, muscle strength, and joint health all working in harmony.

    The magic happens when your muscles can actively engage and stabilize a joint throughout its entire available range. This active control protects the joint, makes movements more efficient, and reduces the risk of injury. When you stretch a muscle, you might increase its length, but without the corresponding strength to control that new range, the joint can actually become less stable. This is why just “stretching more” often falls short for lasting relief from stiffness or improved movement.

    Research published in journals like the Journal of Strength and Conditioning Research has frequently demonstrated that dynamic mobility exercises, which actively move joints through their full range, can significantly improve performance and reduce injury risk compared to static stretching alone prior to activity. These exercises enhance neuromuscular control — the communication between your brain and muscles — teaching your body to effectively use its newfound range.

    Ultimately, mobility training builds robust joints and resilient movement patterns, equipping your body to handle the demands of daily life and physical activity with greater ease and safety.

    How to Start Your Mobility Journey: Practical Steps

    Starting a mobility routine doesn’t require hours at the gym or expensive equipment. Consistency and mindful movement are key. Here’s how to begin, with options for various experience levels:

    Beginner-Friendly Entry Points (5-10 minutes daily)

    • Gentle Joint Rotations: Start with simple, slow circles for major joints. Think neck circles (gentle!), shoulder rolls, wrist circles, ankle rotations, and small hip circles. Focus on moving each joint independently and smoothly.
    • Cat-Cow Stretch: On hands and knees, arch your back as you inhale (cow) and round it as you exhale (cat). This gently mobilizes your spine.
    • Thoracic Rotations: Lie on your side with knees bent and stacked. Extend your arms forward. Keep your bottom knee grounded and rotate your top arm up and over to the other side, allowing your upper back to twist.
    • Hip Flexor Stretch: Kneel on one knee, with the other foot flat on the floor in front of you. Gently push your hips forward to feel a stretch in the front of your back hip. Hold for 30 seconds per side.

    Intermediate Progressions (10-20 minutes, 3-5 times per week)

    Once you’re comfortable with the basics, introduce “Controlled Articular Rotations” (CARs). These are slow, deliberate movements that take a joint through its largest possible pain-free range of motion, activating muscles at every point of the movement.

    • Hip CARs: From all fours or standing, slowly lift one knee and rotate your hip through its full circle, focusing on control. Imagine painting the largest circle possible with your knee.
    • Shoulder CARs: Stand tall, arm extended. Slowly rotate your arm in a large circle, focusing on isolating the shoulder joint from the torso.
    • Spine CARs: In a seated position, gently articulate your spine through flexion, extension, lateral flexion, and rotation. Think of moving one vertebra at a time.
    • Deep Squat Holds: Descend into the deepest squat you can comfortably hold with good form (heels down, chest up). Hold for 30-60 seconds, using a support if needed.

    For more specific routines, consider exploring stretching routines as a complementary practice to maintain muscle length and support your mobility work.

    Advanced Options (As part of a regular fitness routine)

    • Loaded Mobility: Incorporate light weights or resistance bands into CARs to build strength at end ranges.
    • P.A.I.L.s & P.R.O.A.I.L.s: (Progressive and Regressive Angular Isometrics) — These advanced techniques, often taught by mobility specialists, involve contracting muscles within a stretched range to rapidly increase both flexibility and strength.
    • Complex Multi-Joint Flows: Combine several mobility movements into a fluid sequence, such as “shinbox switches” or “flow” routines that move the entire body through various planes.

    Remember, the goal is to improve your active range of motion, not to push into pain. If you’re unsure about a movement or experience discomfort, consult a certified fitness professional or physical therapist. Integrating these movements will also enhance your performance in strength training and other exercises.

    Common Mistakes That Sabotage Your Mobility Gains

    While mobility training is incredibly beneficial, it’s also easy to fall into habits that prevent you from seeing the best results. Being aware of these common pitfalls can help you adjust your approach and maximize your efforts.

    1. Rushing Through Movements

    Why it happens: In our fast-paced world, it’s tempting to speed through exercises. We might treat mobility like another item on a checklist, rather than a mindful practice.

    How to fix it: Mobility training is about control and precision, not speed. Slow down each movement significantly. Focus on feeling every degree of motion in the joint. Imagine moving through thick honey. This deliberate pace allows your nervous system to better communicate with your muscles, improving motor control and making lasting changes.

    2. Only Stretching, Not Activating

    Why it happens: As discussed, many people confuse flexibility with mobility. They focus solely on static stretches, passively extending muscles without engaging the surrounding musculature.

    How to fix it: Integrate active components. When you reach the end of a range of motion (during a CAR, for example), actively try to pull yourself deeper into that range using the muscles on the opposite side of the joint. Then, try to push out of the stretch using the muscles being stretched. This teaches your body to “own” the new range, making it stable and usable.

    3. Pushing Into Pain or “No Pain, No Gain” Mentality

    Why it happens: We’re often taught that discomfort is part of progress, but with mobility, pain is a warning sign, not a goalpost. Pushing into sharp pain can lead to injury and reinforce protective guarding patterns in your body.

    How to fix it: Always work within a pain-free range. You might feel a gentle stretch or tension, but never sharp, stabbing, or pinching pain. If a movement causes pain, reduce the range or stop altogether and consult a professional. Listen to your body’s signals; they are there to protect you.

    4. Inconsistency and Lack of Structure

    Why it happens: It’s easy to treat mobility as an “add-on” when you have time, rather than a fundamental part of your routine. This inconsistent approach yields inconsistent results.

    How to fix it: Make mobility a non-negotiable part of your day, even if it’s just 5-10 minutes. Integrate it into your warm-up before a workout, as a cool-down, or as a dedicated “movement break” during your workday. Having a simple, structured routine you follow regularly is far more effective than sporadic, intense sessions.

    Fueling Your Flexibility: Nutrition for Joint Health

    While mobility training directly addresses joint mechanics and muscle control, what you put into your body plays a significant supporting role in the health and function of your joints, connective tissues, and muscles. Optimizing your nutrition can enhance your body’s ability to recover, reduce inflammation, and maintain the integrity of your musculoskeletal system.

    Stay Hydrated

    Water is essential for nearly every bodily function, including the health of your joints. Synovial fluid, which lubricates your joints and nourishes cartilage, is primarily water. Dehydration can lead to stiffer joints and reduced shock absorption. Aim for at least 8 glasses (around 2 liters) of water daily, and more if you’re active or in a warm climate.

    Prioritize Omega-3 Fatty Acids

    These essential fatty acids are well-known for their powerful anti-inflammatory properties, which can be particularly beneficial for joint comfort and recovery. Research published in the Journal of Nutrition and consistently supported by Harvard Health Publishing highlights Omega-3s’ role in reducing systemic inflammation. Incorporate fatty fish like salmon, mackerel, and sardines into your diet a few times a week, or consider plant-based sources like flaxseeds, chia seeds, and walnuts.

    Embrace Anti-Inflammatory Foods

    A diet rich in whole, unprocessed foods can naturally help combat inflammation that may contribute to joint stiffness and pain. Focus on a wide variety of fruits and vegetables (berries, leafy greens, broccoli), whole grains, legumes, and lean proteins. Spices like turmeric and ginger also have well-documented anti-inflammatory benefits.

    Limit Processed Foods and Added Sugars

    Conversely, a diet high in processed foods, unhealthy fats, and added sugars can promote chronic inflammation throughout the body. Reducing your intake of these items can create a more hospitable environment for joint health and overall well-being. This doesn’t mean complete avoidance, but rather mindful consumption.

    Ensure Adequate Micronutrient Intake

    Vitamins and minerals like Vitamin C (for collagen production), Vitamin D (for bone health and immune function), and Calcium (for bone strength) are vital for musculoskeletal integrity. Ensure your diet includes a diverse array of nutrient-dense foods to cover these needs, and consult with a registered dietitian if you have concerns about deficiencies.

    Realistic Expectations: When to See Results and What to Track

    Mobility training is a marathon, not a sprint. While you might feel immediate improvements in fluidity and reduced stiffness after a single session, significant, lasting changes take time and consistent effort. Patience is crucial.

    Realistic Timelines

    • Immediate: You’ll likely feel more fluid and less stiff right after a session, especially dynamic movements.
    • Weeks 2-4: You might notice slight improvements in your range of motion and a general reduction in everyday stiffness. Movements that felt awkward might start to feel a bit smoother.
    • Months 2-3: This is often when more noticeable and consistent gains begin to appear. You’ll likely experience significant improvements in specific movements, better posture, and a reduction in minor aches. Your body will start to “own” the new ranges of motion.
    • Beyond 3 Months: Mobility becomes a foundational habit, and you’ll continue to build on your progress. It’s about ongoing maintenance and gradual expansion, rather than dramatic leaps.

    What to Track and Monitor

    Seeing progress helps with motivation. Here are some metrics and signals to monitor:

    • Subjective Feelings: Pay attention to how your body feels. Is that morning stiffness less pronounced? Do daily tasks like reaching, bending, or squatting feel easier and more comfortable? Note these small wins.
    • Specific Movement Tests: Choose 2-3 specific movements that are currently challenging for you (e.g., reaching overhead, squatting deep, internal hip rotation). Periodically re-test them and note any improvements in depth, ease, or pain-free range.
    • Consistency: Track how often you engage in your mobility routine. Consistency is the most reliable predictor of success.
    • Workout Performance: If you exercise, observe if your mobility work is improving your form in lifts, reducing compensatory movements, or allowing you to move through a fuller range in your exercises.

    If you experience persistent pain, lack of progress after several weeks of consistent effort, or a sudden decrease in range of motion, it’s time to seek professional guidance. A physical therapist, certified athletic trainer, or experienced mobility specialist can provide a personalized assessment and tailored plan.

    Frequently Asked Questions About Mobility Training

    Q1: Is mobility training the same as stretching?

    No, they are distinct but related. Stretching primarily focuses on lengthening muscles and increasing passive range of motion. Mobility training focuses on active control and strength within the full range of motion of a joint, making the range usable and stable.

    Q2: How often should I do mobility training?

    Consistency is key. Even 5-10 minutes of dedicated mobility work daily can be highly effective. Integrating short mobility drills into your warm-up or cool-down, or taking movement breaks throughout the day, is more beneficial than one long, infrequent session.

    Q3: Can mobility training help with pain?

    Often, yes. Many common aches and pains (like lower back or knee pain) are rooted in poor movement patterns or restricted joint mobility elsewhere in the body. By improving how a joint moves, mobility training can alleviate strain and reduce pain. However, always consult a healthcare professional for persistent or severe pain.

    Q4: Do I need special equipment for mobility training?

    For most fundamental mobility work, no. Your body weight is often sufficient. Tools like foam rollers, lacrosse balls, or resistance bands can be beneficial for specific areas or for adding resistance, but they are not necessary to start.

    Q5: Is it too late to start mobility training?

    It’s never too late! While maintaining mobility throughout life is ideal, adults of any age can improve their joint health, range of motion, and overall movement quality with consistent and appropriate mobility training. Start gently and listen to your body.

    Reclaim Your Movement Freedom

    Mobility training isn’t just another fitness fad; it’s a fundamental practice for anyone looking to live a healthier, more active life with less pain and greater ease. By understanding the science and consistently applying practical, controlled movements, you’re investing in the longevity and capability of your body.

    Remember, perfection isn’t the goal — consistent, mindful effort is. Start small, focus on quality over quantity, and celebrate every incremental improvement. Your body is designed to move freely, and with dedicated mobility training, you can reclaim that inherent freedom. Why not try a few gentle joint rotations or a cat-cow stretch today and begin your journey toward unlocking your full movement potential?

    This article is for informational and educational purposes only. The content is not intended to replace professional medical, nutritional, or fitness advice. Always consult a qualified healthcare provider, registered dietitian, or certified fitness professional before starting a new health program or making significant changes to your lifestyle.

    Content reviewed by our wellness editorial team, with references to peer-reviewed research and guidelines from leading health organizations.

  • Build Your Sustainable Workout Routine: A Lifelong Guide

    Build Your Sustainable Workout Routine: A Lifelong Guide

    Ever felt the surge of motivation to start a new workout routine, only to find yourself back on the couch a few weeks later? You’re not alone. The fitness world is flooded with “quick fixes” and “extreme challenges” that often lead to burnout, injury, or simply giving up. It’s estimated that a significant percentage of people who start a new exercise program drop out within six months. This isn’t usually about a lack of desire, but often about an unsustainable approach.

    Many of us dive headfirst into intense regimens that aren’t tailored to our bodies, our lives, or our long-term goals. We confuse intensity with consistency and perfection with progress. But what if you could build a sustainable workout routine that genuinely fits into your life, delivers real results, and keeps you motivated for the long haul? This guide will show you how to move beyond temporary fitness fads and create a personalized, evidence-backed exercise plan that you can actually stick with, transforming your health and well-being for good.

    Why a Sustainable Workout Routine Matters More Than You Think

    It’s easy to get caught up in the immediate gratification of a strenuous workout – the sweat, the “burn,” the feeling of having “earned it.” However, true fitness isn’t built on sporadic bursts of extreme effort. It’s cultivated through consistent, moderate, and adaptable practices that respect your body’s needs and your life’s demands. A sustainable routine is one you can maintain week after week, month after month, year after year.

    Consider the long-term health benefits. The American College of Sports Medicine (ACSM) consistently recommends that adults aim for at least 150 minutes of moderate-intensity aerobic activity or 75 minutes of vigorous-intensity aerobic activity per week, along with muscle-strengthening activities two or more days a week. It’s the adherence to these guidelines over time that truly reduces the risk of chronic diseases like heart disease, type 2 diabetes, and certain cancers, not just occasional intense sessions. A sustainable approach also drastically lowers your risk of injury, allowing your body adequate time to recover and adapt, rather than pushing it past its limits prematurely. It fosters a positive relationship with exercise, making it a source of energy and joy, rather than a dreaded chore.

    The Science Behind Effective Program Design

    Building a successful workout routine isn’t just about showing up; it’s about understanding a few core scientific principles that govern how your body adapts to exercise. Ignoring these can lead to plateaus, frustration, or even injury.

    Progressive Overload: The Cornerstone of Gains

    Your muscles and cardiovascular system adapt to stress. To continue improving, you must gradually increase the demands placed on them. This is known as progressive overload. Research in the Journal of Strength and Conditioning Research has highlighted progressive overload as a fundamental principle for muscle hypertrophy and strength gains. This doesn’t just mean lifting heavier weights; it can involve:

    •   Increasing the weight or resistance.
    •   Performing more repetitions with the same weight.
    •   Adding more sets.
    •   Decreasing rest time between sets.
    •   Increasing the frequency of training (e.g., from 2 to 3 times a week).
    •   Improving exercise form and range of motion.

    Without progressive overload, your body has no reason to get stronger or fitter beyond its current state. Your workouts will become stale, and your progress will stall.

    Periodization: Smart Planning for Long-Term Progress

    Periodization involves strategically varying your training intensity, volume, and type over specific cycles. It prevents overtraining, reduces injury risk, and ensures continuous adaptation. While often associated with elite athletes, basic periodization principles apply to everyone. For example, you might have “mesocycles” (weeks or months) focused on building strength, followed by periods emphasizing endurance or recovery. This allows your body to recover fully and “supercompensate,” emerging stronger than before. A common myth is that you must always push to your maximum; in reality, smart programming includes planned deload weeks or lighter sessions to facilitate recovery and prevent burnout.

    How to Get Started: Designing Your Sustainable Plan

    Creating your routine doesn’t require a degree in exercise science. Start with these practical, adaptable steps:

    1. Define Your “Why” and “What”:
      •   Your “Why”: What truly motivates you? Is it more energy for your kids, better sleep, mental clarity, or simply feeling stronger? Connect to this deep reason.
      •   Your “What”: What are your realistic, measurable goals? “Run a mile without stopping,” “Perform 10 push-ups on my knees,” or “Walk 30 minutes daily.”
    2. Assess Your Starting Point: Be honest about your current fitness level. Can you walk for 30 minutes comfortably? Can you lift a light weight? This helps set realistic initial targets and avoids starting too intensely.
    3. Choose Activities You Enjoy: This is paramount for sustainability. If you dread your workouts, you won’t stick with them. Experiment with different types: walking, cycling, dancing, swimming, strength training (Strength Training for Beginners: Your Complete Starter Guide), yoga (Yoga Benefits: Flexibility, Strength & Mental Clarity), or even active sports.
    4. Determine Frequency and Duration:
      •   Beginner: Start with 3 days a week, 20-30 minutes per session. Focus on full-body movements and consistent attendance.
      •   Intermediate: Aim for 4-5 days a week, 30-45 minutes. You might incorporate specific strength days and cardio days, or a blend.
      •   Advanced: 5-6 days a week, 45-60+ minutes. This could include more specialized training, higher intensity, or longer endurance sessions.
    5. Structure Your Sessions (Workout Split):
      •   Full-Body Workouts: Excellent for beginners, hitting all major muscle groups in one session. Do 2-3 times per week.
      •   Upper/Lower Split: One day for upper body, one for lower body. Allows more focus on each area. Do 4 days a week.
      •   Push/Pull/Legs (PPL): A popular 3-day split that can be repeated twice a week (6 days total).
      •   Hybrid: Combine strength days with dedicated cardio or flexibility days (Stretching Routines: Flexibility, Recovery & Daily Mobility).
    6. Incorporate Variety and Adaptability: Your routine shouldn’t be rigid. Life happens. Build in flexibility for busy days or travel. Cross-train to prevent boredom and work different muscle groups.

    Common Mistakes That Sabotage Results

    Even with good intentions, many people fall into common traps that derail their fitness journey. Recognizing these pitfalls can help you avoid them.

    1. Starting Too Hard, Too Fast: This is perhaps the most common mistake. Overenthusiasm leads to extreme workouts, soreness, exhaustion, and often injury. When this happens, motivation plummets. Instead, ease into your routine and gradually increase intensity and volume over weeks, not days.
    2. Skipping Warm-ups and Cool-downs: These aren’t optional – they’re crucial for injury prevention and recovery. A proper warm-up prepares your muscles and cardiovascular system for activity, while a cool-down aids in flexibility and helps remove metabolic byproducts. Neglecting them increases stiffness and pain.
    3. Ignoring Recovery: Exercise breaks down muscle tissue; recovery rebuilds it stronger. This includes adequate sleep (7-9 hours for most adults), proper nutrition, and rest days. Pushing through constant fatigue not only hinders progress but can lead to overtraining syndrome, reducing performance and increasing injury risk.
    4. Lack of a Clear Plan or Progression: “Winging it” might work for a few sessions, but without a structured plan, you won’t apply progressive overload effectively. You’ll likely repeat the same workouts, leading to plateaus. Have a plan for what exercises you’ll do, how many sets/reps, and how you’ll increase the challenge over time.
    5. Comparing Yourself to Others: Social media often presents curated “highlights” of others’ fitness journeys. Your journey is unique. Focus on your progress, celebrate your small wins, and remember that everyone starts somewhere.

    Fueling Your Workouts: Nutrition Essentials

    You can’t out-train a poor diet. Nutrition is inextricably linked to your workout performance, recovery, and overall results. Think of food as fuel for your body.

    The USDA Dietary Guidelines for Americans emphasize a balanced approach:

    •   Protein: Crucial for muscle repair and growth. Aim for 0.7-1.0 grams of protein per pound of body weight, spread throughout the day. Examples: lean meats, poultry, fish, eggs, dairy, legumes, tofu, protein powder.
    •   Complex Carbohydrates: Your body’s primary energy source. They fuel your workouts and replenish glycogen stores. Focus on whole grains, fruits, vegetables, and legumes. About 45-65% of your daily calories should come from carbohydrates.
    •   Healthy Fats: Essential for hormone production and overall health. Sources: avocados, nuts, seeds, olive oil, fatty fish. Aim for 20-35% of daily calories from healthy fats.
    •   Hydration: Often overlooked, but critical. Dehydration can significantly impair performance and recovery. Drink plenty of water throughout the day, before, during, and after workouts.

    Avoid excessive amounts of processed foods, sugary drinks, and unhealthy fats, as these can hinder recovery, cause inflammation, and reduce overall energy levels.

    How Long Until You See Results & What to Track

    Patience is a virtue in fitness. While you might feel immediate changes in energy or mood, visible physical results take time. Realistic timelines vary significantly based on your starting point, consistency, and genetic factors.

    •   Initial Changes (1-4 weeks): You’ll likely notice increased energy, improved sleep quality, better mood, and reduced stress. Neuromuscular adaptations might make exercises feel easier even before significant strength gains.
    •   Strength & Endurance Improvements (4-8 weeks): You’ll start to lift heavier, perform more reps, or sustain cardio for longer.
    •   Visible Body Composition Changes (8-12+ weeks): This is when you might start seeing changes in muscle definition or fat loss, provided your nutrition is also aligned.

    Don’t just rely on the scale. Track these metrics for a holistic view of your progress:

    •   Performance Metrics: Record weights lifted, reps performed, distance covered, or workout duration.
    •   Non-Scale Victories: How do your clothes fit? Do you have more energy? Is your sleep better? Are daily tasks easier?
    •   Body Measurements: Track waist, hips, arms, and thighs every 4-6 weeks if body composition is a goal.
    •   Photos: Take progress photos every 4-6 weeks in consistent lighting and poses.
    •   Mood and Energy Levels: Keep a simple journal of how you feel daily.

    If you’re not seeing any progress after 8-12 weeks of consistent effort, it might be time to reassess your routine, nutrition, or seek guidance from a certified personal trainer or registered dietitian.

    Frequently Asked Questions

    Q1: How do I stay motivated when I feel like giving up?

    Focus on consistency, not perfection. Remind yourself of your “why.” Break down big goals into smaller, achievable steps. Find a workout buddy or join a class for accountability. Remember, motivation isn’t constant; discipline and habit-building are key. Celebrate small victories!

    Q2: What if I miss a workout? Should I double up the next day?

    No, don’t double up. Simply get back on track with your next scheduled workout. Missing a single session won’t derail your progress, but overcompensating can lead to fatigue, soreness, and an increased risk of injury, which makes it harder to stay consistent long-term.

    Q3: Is it okay to do the same workout every day?

    While consistency is good, doing the exact same workout every day can lead to plateaus and overuse injuries. Your body needs variety and progressive overload to adapt and grow. Incorporate different types of exercise (strength, cardio, flexibility) and vary the specific exercises within those categories. Rest days are also crucial for recovery.

    Q4: How important is stretching?

    Stretching is very important for maintaining and improving flexibility, preventing injuries, and aiding in recovery. Dynamic stretches (movement-based) are best before a workout, and static stretches (holding a position) are ideal during your cool-down. Check out our guide on Stretching Routines: Flexibility, Recovery & Daily Mobility for more.

    Q5: Should I train to failure every time?

    No, training to failure every time is generally not recommended for most individuals and can lead to increased fatigue and a higher risk of injury over time. For sustainable progress, aim to leave 1-2 reps “in the tank” on most sets. Training to failure can be incorporated periodically, but it shouldn’t be the standard practice.

    Conclusion

    Building a sustainable workout routine isn’t about chasing fleeting trends or punishing your body with extreme measures. It’s about creating a consistent, enjoyable, and progressive plan that supports your long-term health and well-being. By understanding the science, setting realistic goals, and embracing flexibility, you can cultivate a fitness habit that empowers you, boosts your energy, and helps you thrive for years to come. Remember, consistency beats intensity, and small, steady steps always lead to lasting change. Start today by choosing one enjoyable activity and committing to it three times this week. Your future self will thank you.

    This article is for informational and educational purposes only. The content is not intended to replace professional medical, nutritional, or fitness advice. Always consult a qualified healthcare provider, registered dietitian, or certified fitness professional before starting a new health program or making significant changes to your lifestyle.

    Content reviewed by our wellness editorial team, with references to peer-reviewed research and guidelines from leading health organizations.

  • HIIT Workouts for Beginners: Start Smart & See Results

    HIIT Workouts for Beginners: Start Smart & See Results

    You’ve heard everyone talking about HIIT — but every video you find feels like it was made for someone who already runs marathons for fun.

    Here’s a number worth sitting with: according to the American College of Sports Medicine, high-intensity interval training (HIIT) has ranked among the top global fitness trends for nearly a decade straight. Yet most people who try it for the first time either burn out in two weeks or injure themselves before they ever see results.

    The problem isn’t the method — it’s the entry point. Most beginner HIIT content skips the part where they explain how to actually begin safely, build a base, and make it sustainable for real, busy adults who aren’t already in elite shape.

    This guide is different. Whether you’re coming off the couch, returning after a long break, or just tired of cardio routines that feel endless and pointless, you’ll walk away with a clear, evidence-backed plan to start HIIT the right way — without wrecking your joints or your motivation in the process.

    Let’s get into it.

    Why HIIT Matters More Than You Think

    Most adults struggle to find time for exercise. The CDC reports that fewer than 25% of American adults meet both aerobic and muscle-strengthening physical activity guidelines. HIIT became popular precisely because it delivers meaningful fitness gains in a fraction of the time required by traditional cardio.

    But time efficiency isn’t the only reason to pay attention. Research published in the Journal of Physiology found that just three 20-minute HIIT sessions per week produced comparable improvements in cardiovascular fitness to five weekly sessions of moderate-intensity steady-state exercise. That’s a significant trade-off for anyone with a packed schedule.

    Beyond cardiovascular health, HIIT has been shown to improve insulin sensitivity, support healthy blood pressure, increase VO2 max (your body’s ability to use oxygen during exercise), and contribute to fat loss — particularly visceral fat, the type stored around internal organs that’s closely linked to metabolic disease.

    For adults in the 25-60 age range, this matters enormously. As we age, maintaining cardiovascular fitness and metabolic health becomes increasingly important for long-term quality of life — not just appearance. HIIT, done correctly, addresses both in less time than most people spend scrolling their phones in the morning.

    The Science Behind How HIIT Actually Works

    HIIT works by alternating short bursts of high-effort movement with recovery periods. During the intense intervals, your heart rate spikes — typically to 80-95% of your maximum heart rate. During recovery, it drops back down. This cycle creates a powerful training stimulus for your cardiovascular system and muscles.

    One of the most studied effects of HIIT is what researchers call EPOC — Excess Post-Exercise Oxygen Consumption. After an intense HIIT session, your body continues burning calories at an elevated rate for up to 24 hours as it works to restore oxygen levels, repair muscle tissue, and regulate body temperature. Harvard Health Publishing notes that this afterburn effect is significantly greater following HIIT than after steady-state cardio of the same duration.

    Common myth to bust: Many beginners believe that longer workouts always produce better results. A 45-minute jog is not automatically more effective than a 20-minute HIIT session — in fact, for many fitness goals, the shorter session may deliver more efficient adaptations, especially for time-pressed adults.

    It’s also worth noting that HIIT’s effectiveness depends heavily on actual effort. True high-intensity intervals should feel genuinely hard — like you’re working at a pace you couldn’t sustain for more than a minute or two. If every session feels easy, you’re likely doing moderate-intensity cardio in interval format, which is fine but not the same thing.

    If you’re also curious about how HIIT compares to longer, lower-intensity cardio for your specific goals, our guide on HIIT vs Steady-State Cardio: Which One Is Right for You? breaks it down in detail.

    How to Get Started: A Beginner-Friendly HIIT Framework

    Before you do a single interval, there’s one non-negotiable: build a movement base. Jumping into intense intervals with no conditioning history is a fast track to injury, excessive soreness, and quitting. Here’s how to approach it by phase.

    Phase 1 — Foundation (Weeks 1-2): Movement quality over intensity

    • Walk briskly for 20-30 minutes, 3-4 days per week
    • Practice the movement patterns you’ll use: bodyweight squats, modified push-ups, standing march, jumping jack variations (low-impact to start)
    • Focus on breathing rhythmically and maintaining good posture
    • Goal: get your body used to moving without dreading it

    Phase 2 — Beginner HIIT (Weeks 3-5): True intervals, manageable effort

    • Work-to-rest ratio: 20 seconds of effort / 40 seconds of rest
    • Total rounds: 6-8
    • Frequency: 2-3 sessions per week, with at least one full rest day between sessions
    • Sample exercises: bodyweight squats, alternating reverse lunges, step touches, modified push-ups, mountain climbers (slow)
    • Perceived effort during work intervals: 7-8 out of 10

    Phase 3 — Intermediate HIIT (Weeks 6+): Progressive overload

    • Work-to-rest ratio: 30 seconds effort / 30 seconds rest
    • Total rounds: 8-10
    • Add more demanding exercises: jump squats, burpees, high knees, lateral shuffles
    • Begin tracking heart rate — aim for 80-90% of max HR during work intervals
    • Consider adding a strength component: pairing HIIT days with resistance training on alternate days

    Always begin with a 5-minute dynamic warm-up (leg swings, arm circles, hip rotations, light marching) and end with a 5-minute cooldown and light stretching. For guidance on effective cooldown routines, see our article on Stretching Routines: Flexibility, Recovery & Daily Mobility.

    Common Mistakes That Sabotage Your HIIT Progress

    HIIT is deceptively simple on paper. In practice, most beginners make the same handful of errors — and they’re all very easy to fall into.

    Mistake 1: Going too hard too soon
    This is the number one reason beginners quit HIIT. Day one becomes a miserable experience, soreness lasts five days, and the whole idea gets scrapped. Your first sessions should feel challenging but manageable. The intensity can — and should — increase gradually over weeks, not days. Use perceived effort as your guide before you worry about following a specific protocol.

    Mistake 2: Skipping rest days
    HIIT places significant demand on your central nervous system and musculoskeletal tissue. The American College of Sports Medicine recommends at least 48 hours of recovery between intense HIIT sessions for most individuals. Doing HIIT every day, especially as a beginner, leads to overuse injuries, fatigue, and stalled progress — the opposite of what you’re working toward.

    Mistake 3: Neglecting form under fatigue
    When you’re tired in the final rounds, form breaks down fast. A squat with a collapsed knee or a push-up with a sagging lower back puts unnecessary stress on joints. It’s always better to reduce the range of motion or switch to a lower-impact variation than to push through with poor mechanics. Record yourself occasionally — most people are surprised by what they actually see versus what they feel they’re doing.

    Mistake 4: Never changing the routine
    Your body adapts. If you’ve been doing the same 8-exercise HIIT circuit for two months, your progress will plateau. Change at least one variable every 3-4 weeks: the exercises, the work-to-rest ratio, the number of rounds, or the type of movements (upper body, lower body, full body). Progressive variation is what keeps the stimulus effective.

    What to Fuel Your HIIT Workouts With

    Nutrition directly impacts how well you perform and recover from HIIT. The Academy of Nutrition and Dietetics emphasizes that active adults should prioritize adequate protein and carbohydrates — not restrict them — especially when training at higher intensities.

    Pre-workout (1-2 hours before):

    • A balanced small meal or snack with both carbohydrates and protein works best
    • Examples: Greek yogurt with fruit, a banana with almond butter, whole grain toast with eggs
    • Avoid heavy, high-fat meals right before training — digestion competes with performance

    Post-workout (within 30-60 minutes):

    • Prioritize protein for muscle repair: aim for 20-30g from quality sources
    • Examples: a protein shake with milk, cottage cheese with berries, chicken with rice
    • Rehydrate: HIIT typically causes significant fluid loss through sweat — water is your first priority, and for sessions over 60 minutes, electrolyte replenishment may be helpful

    Daily hydration:
    The National Academies of Sciences recommend approximately 3.7 liters (125 oz) of total water intake per day for men and 2.7 liters (91 oz) for women, from all beverages and food sources. On HIIT training days, your needs increase. A simple check: if your urine is pale yellow, you’re likely well hydrated.

    This works best when your overall daily diet is built on whole foods — lean proteins, complex carbohydrates, healthy fats, and plenty of vegetables. Extreme calorie restriction while doing HIIT will undercut your energy, delay recovery, and make the whole process harder than it needs to be.

    How Long Until You See HIIT Results — and What to Track

    Results vary significantly depending on your starting fitness level, consistency, sleep quality, nutrition, and stress levels. That said, research gives us realistic windows to work with.

    Weeks 1-2: You’ll likely feel more breathless than expected. This is normal. Your cardiovascular system is adapting. Energy levels may fluctuate.

    Weeks 3-4: Most beginners notice improved recovery between intervals and less breathlessness at the same effort level. This is your cardiovascular system adapting — a clear early win worth celebrating.

    Weeks 6-8: Body composition changes may start to become visible, particularly if nutrition and recovery are on point. A study published in the British Journal of Sports Medicine found that 8-12 weeks of consistent HIIT produced measurable reductions in body fat percentage in previously sedentary adults.

    What to track:

    • Resting heart rate (a downward trend signals improved cardiovascular fitness)
    • Recovery time between intervals (getting faster = progress)
    • Session completion rate (are you finishing all rounds?)
    • Energy levels throughout the day
    • Sleep quality — good HIIT programming improves sleep; overtraining disrupts it

    If after 8 weeks you’re not noticing any improvements in these markers, it may be time to reassess your approach — or consult a certified personal trainer who can evaluate your form, programming, and overall plan. Your progress is also closely linked to your overall movement throughout the day; for a complementary approach, our guide on Functional Fitness: Train Your Body for Real Life pairs well with a HIIT program.

    Frequently Asked Questions About HIIT for Beginners

    Is HIIT safe if I have joint pain or am overweight?
    HIIT can be modified significantly for individuals with joint concerns or higher body weight. Low-impact variations — marching in place, step touches, seated movements — can deliver a similar cardiovascular stimulus without impact stress. That said, it’s important to consult a healthcare provider before starting any new exercise program, especially if you have existing orthopedic or cardiovascular conditions.

    How many days a week should beginners do HIIT?
    The ACSM recommends beginners start with 2 sessions per week and build to no more than 3-4 for most people. HIIT is not a daily training modality — recovery is where adaptation happens. Filling non-HIIT days with light activity like walking or mobility work is ideal.

    Can I do HIIT at home without equipment?
    Absolutely. Bodyweight HIIT is highly effective and requires no gym membership or equipment. Movements like squats, lunges, push-ups, mountain climbers, and jumping jacks can create a challenging session in any living room. The key is maintaining effort levels during work intervals, not having a specific tool.

    Will HIIT help me lose weight?
    HIIT supports fat loss when combined with appropriate nutrition and a sustainable calorie intake. On its own, exercise alone rarely produces significant weight loss without dietary awareness. Results depend on your overall energy balance, consistency, sleep, and stress levels — not any single workout type.

    What if I feel dizzy or nauseous during a HIIT session?
    Stop immediately and rest. Dizziness and nausea during exercise can signal overexertion, dehydration, low blood sugar, or inadequate warm-up. If symptoms are severe or persist, seek medical attention. For most people, dialing back the intensity and ensuring proper pre-workout fueling and hydration resolves these issues in beginner sessions.

    Start Where You Are — Then Build From There

    HIIT doesn’t require a perfect body, a gym membership, or an hour a day. It requires consistency, honesty about your starting point, and a willingness to be a beginner without apologizing for it.

    The adults who see the best long-term results from HIIT aren’t the ones who go hardest on day one — they’re the ones who show up again on day 14, day 45, and day 90, doing a little more each time than the week before.

    Start with Phase 1 this week. Master the basics. Add intensity gradually. Track your recovery, not just your effort. And give your body the food, water, and sleep it needs to actually adapt to the work you’re putting in.

    Your best fitness results are built in the gap between what’s comfortable and what’s challenging — and HIIT, done right, lives exactly there.


    This article is for informational and educational purposes only. The content is not intended to replace professional medical, nutritional, or fitness advice. Always consult a qualified healthcare provider, registered dietitian, or certified fitness professional before starting a new health program or making significant changes to your lifestyle.

    Content reviewed by our wellness editorial team, with references to peer-reviewed research and guidelines from leading health organizations.

  • Functional Fitness: Train Your Body for Real Life

    Functional Fitness: Train Your Body for Real Life

    Functional Fitness: Train Your Body for Real Life

    Most people work out to look better — but the real game-changer is training to move better every single day.

    Picture this: you’re carrying groceries up three flights of stairs, and halfway up, your lower back tightens up. Or you reach across the car seat for your bag and feel a pull in your shoulder. Or you simply squat down to pick something up off the floor and your knees protest the entire way.

    These aren’t signs that you’re out of shape in the traditional gym sense. They’re signs that your fitness routine — however dedicated you are — might not be preparing your body for the movements that actually matter most.

    That’s exactly where functional fitness training comes in. Unlike isolated machine exercises that target one muscle at a time, functional fitness builds the kind of strength, stability, and coordination your body uses in real-life situations. In this guide, you’ll learn what functional fitness really means, what the research says about it, how to start (no matter your current fitness level), and the mistakes that keep most people from seeing results.

    Why Functional Fitness Matters More Than You Think

    Here’s a striking reality: according to the American College of Sports Medicine (ACSM), musculoskeletal injuries — many of which are preventable — are among the most common reasons adults miss work, reduce activity levels, and experience a declining quality of life as they age. A significant portion of those injuries happen during everyday activities, not intense exercise.

    Functional fitness trains the movement patterns your body relies on constantly: pushing, pulling, hinging, squatting, rotating, and carrying. When these patterns are strong and coordinated, your body handles daily demands with less strain and far fewer injuries.

    Research published in the Journal of Strength and Conditioning Research found that functional movement training significantly improved balance, mobility, and lower-body strength in adults across age groups — with particularly notable benefits in those over 40. That matters because after age 30, adults naturally begin losing muscle mass and neuromuscular coordination at a rate of roughly 1% per year if left untrained.

    The payoff isn’t just physical. Functional fitness connects directly to your daily confidence — moving through your day without pain, keeping up with your kids, lifting without wincing, and aging with strength rather than limitation.

    The Science Behind Functional Fitness and How It Actually Works

    Functional fitness is rooted in one key idea: your body is designed to move in integrated patterns, not isolated muscle contractions. Traditional gym machines — like the leg extension or seated chest press — isolate individual muscles in controlled planes of motion. That has its place. But real-world movement is almost always multi-joint, multi-plane, and requires your core, stabilizers, and primary movers to all coordinate at once.

    When you perform a deadlift, for example, your glutes, hamstrings, spinal erectors, lats, and core all activate simultaneously. That mirrors what happens when you lift a heavy box off the floor. A leg extension machine doesn’t replicate that integration.

    One common myth: functional fitness means avoiding weights entirely and just doing bodyweight or balance work. Not true. Functional training can and often should include barbells, kettlebells, dumbbells, and resistance bands. The defining factor isn’t the equipment — it’s whether the movement pattern translates to real-life function.

    A study published in JAMA Internal Medicine reinforced this point, showing that resistance training focused on compound, multi-joint movements produced superior improvements in physical performance and activities of daily living compared to isolated machine-based training — particularly in adults over 50.

    Functional fitness also places a strong emphasis on core stability, which the Mayo Clinic defines as the coordinated activation of the muscles surrounding the spine and pelvis — not just the six-pack muscles. A stable core is the foundation for nearly every movement your body performs.

    How to Get Started with Functional Fitness

    The beauty of functional training is that it scales. You can start with zero equipment and no gym membership, then progress steadily as your body adapts.

    The 6 foundational movement patterns to train:

    1. Squat — Sit-to-stand, bodyweight squat, goblet squat, barbell back squat
    2. Hinge — Romanian deadlift, kettlebell swing, conventional deadlift
    3. Push — Push-up, dumbbell press, overhead press
    4. Pull — Resistance band row, dumbbell row, pull-up or lat pulldown
    5. Carry — Farmer’s carry with dumbbells or kettlebells
    6. Rotate / Anti-rotate — Pallof press, woodchop, cable rotation

    Beginner entry point (2-3 days per week):

    • Bodyweight squats — 3 sets of 10
    • Glute bridges — 3 sets of 12 (hinge pattern foundation)
    • Push-ups (on knees if needed) — 3 sets of 8-10
    • Resistance band rows — 3 sets of 12
    • Farmer’s carry with light dumbbells — 3 sets of 30 seconds
    • Dead bug (core anti-rotation) — 3 sets of 8 per side

    Intermediate option (3-4 days per week): Add goblet squats, single-leg Romanian deadlifts, dumbbell overhead press, and renegade rows. Increase load gradually — the ACSM recommends increasing resistance by no more than 10% per week to reduce injury risk.

    Advanced progression: Barbell deadlifts, barbell squats, Turkish get-ups, and loaded carries with heavier implements. Consider working with a certified strength and conditioning specialist (CSCS) to fine-tune form at heavier loads.

    If you’re building your routine at home, check out this resource on Home Workout Plans: Get Fit Without the Gym for equipment-free approaches that integrate beautifully with functional training principles.

    Common Mistakes That Sabotage Functional Fitness Results

    Even motivated adults consistently make a handful of errors when starting functional fitness. Recognizing them upfront can save you months of frustration.

    Mistake #1: Skipping the mobility work
    Functional fitness demands a baseline of mobility to perform movements safely. Jumping into loaded squats or hinges when your hips and ankles are tight is a setup for compensation patterns that lead to injury. The fix: spend 5-10 minutes before each session on targeted mobility work — hip 90/90 stretches, ankle circles, thoracic rotations. Our Stretching Routines: Flexibility, Recovery and Daily Mobility guide is a perfect companion here.

    Mistake #2: Prioritizing load over movement quality
    Adding weight before your movement pattern is solid is one of the fastest routes to injury. A wobbly squat with 135 lbs is far less valuable — and far more dangerous — than a crisp, controlled bodyweight squat. The fix: film yourself from the side occasionally, or work with a coach even for a session or two to get baseline form feedback.

    Mistake #3: Neglecting the carry pattern
    The farmer’s carry is arguably the most underrated functional exercise in existence. It trains grip strength, core stability, shoulder positioning, and gait — all at once. Yet most people never do it. The fix: add farmer’s carries to every session. Even 20-30 seconds with moderate dumbbells delivers serious functional carry-over to daily life.

    Mistake #4: Training only in one plane of motion
    Real life happens in all directions — sideways, diagonally, rotationally. Most gym routines only train forward-back movements. The fix: include lateral band walks, side lunges, rotational cable exercises, or even simple medicine ball throws to train your body in multiple planes.

    Mistake #5: Ignoring single-leg and single-arm work
    Your body almost never uses both limbs equally at the same time in real life. Walking, climbing stairs, reaching — these are unilateral movements. The fix: integrate split squats, single-leg deadlifts, and single-arm rows into your training at least once per week.

    What to Eat to Support Functional Fitness Training

    Functional fitness places real demands on your muscles, joints, and nervous system. Nutrition isn’t optional — it’s a core part of the result.

    Protein: The Academy of Nutrition and Dietetics recommends 1.2 to 2.0 grams of protein per kilogram of body weight per day for active adults. For a 165-lb adult, that’s roughly 90-150g of protein daily. Prioritize lean sources: chicken, turkey, fish, eggs, Greek yogurt, legumes, and cottage cheese.

    Carbohydrates: Functional training sessions — especially those incorporating compound lifts and carries — are glycogen-demanding. Don’t under-fuel. The USDA Dietary Guidelines recommend that 45-65% of daily calories come from carbohydrates for active individuals. Opt for whole grains, sweet potatoes, oats, and fruit.

    Anti-inflammatory foods: Joint health is central to functional training longevity. Harvard Health Publishing highlights omega-3 fatty acids (found in salmon, sardines, walnuts, and flaxseed) and polyphenol-rich foods (berries, leafy greens, olive oil) as key supporters of reducing systemic inflammation that can slow recovery and increase injury risk.

    Hydration: Even mild dehydration — as little as 2% of body weight — can impair muscle coordination and increase perceived exertion, according to research cited by the NIH. Aim for at least half your body weight in ounces of water daily, more on training days.

    What to limit: Ultra-processed foods high in refined sugars and trans fats contribute to chronic inflammation that undermines recovery. The AHA recommends keeping added sugar under 36g/day for men and 25g/day for women.

    How Long Until You See Results — and What to Track

    Results from functional fitness training are different from traditional fitness metrics — and that’s actually a good thing. You’re not just watching a number on a scale or a bicep measurement. You’re tracking how you function.

    Weeks 1-3: You’ll likely notice improved body awareness — better posture, less lower back tightness after sitting, smoother movement in daily tasks. This is neuromuscular adaptation: your nervous system learning to recruit muscles more efficiently. Don’t be discouraged if the mirror hasn’t changed yet.

    Weeks 4-8: Strength gains become measurable. You’ll be able to carry more, squat deeper, and hinge without pain. Research published in the Journal of Aging and Physical Activity found that significant improvements in functional movement scores occur within 6-8 weeks of consistent training in previously sedentary adults.

    Months 3-6: Body composition changes become visible. Lean muscle develops, posture improves noticeably, and activities of daily living feel dramatically easier. This is also when injury rates typically drop in people who train consistently.

    What to track:

    • Movement quality (how does your squat feel vs. week 1?)
    • Load progression (are you lifting more with the same or better form?)
    • Daily energy levels and recovery speed
    • Pain or discomfort during daily activities (ideally, this decreases)
    • Balance and stability (can you stand on one leg for 30+ seconds?)

    If you’re also interested in how functional strength training intersects with body composition goals, the article on Body Recomposition: Lose Fat and Build Muscle Together is a valuable next read.

    When to reassess: If you’re not seeing any improvement in movement quality or strength after 6-8 weeks, consider consulting a certified personal trainer or physical therapist to evaluate your movement baseline and programming.

    Frequently Asked Questions

    Is functional fitness better than traditional weight training?
    It’s not an either/or. Functional fitness prioritizes movement patterns over isolated muscles, which offers superior carry-over to daily life. That said, traditional strength training has immense value — especially for building foundational muscle mass. The most effective approach for most adults combines both. Results vary based on your goals, age, and starting point.

    Can older adults safely do functional fitness training?
    Absolutely — and in many ways, older adults stand to benefit most. The ACSM specifically recommends functional movement training as a priority for adults over 50 to preserve independence, reduce fall risk, and maintain quality of life. Start at an appropriate intensity and progress gradually. Working with a professional familiar with older adult fitness is always a smart move.

    How many days per week should I do functional fitness training?
    Two to three days per week is an effective and sustainable starting point, with at least one rest or active recovery day between sessions. As you progress, three to four days per week allows for greater adaptation. Overtraining is a real risk — more is not always better, and recovery is where adaptation actually happens.

    Do I need special equipment for functional fitness?
    No. Many of the most effective functional exercises — squats, lunges, push-ups, planks, carries — can be done with minimal or no equipment. Resistance bands, a pair of dumbbells, and a kettlebell or two cover a huge range of functional training options. A full commercial gym is helpful but absolutely not required.

    Can functional fitness help with lower back pain?
    For many people, yes — but with an important caveat. Strengthening the posterior chain (glutes, hamstrings, spinal erectors) and improving core stability are well-established strategies for reducing non-specific lower back pain, according to research from Harvard Health Publishing and the NIH. However, if you have a diagnosed spinal condition, always consult your physician or physical therapist before starting a new program.

    Start Moving Like Your Life Depends On It — Because It Does

    Functional fitness isn’t a trend or a gym marketing concept. It’s the most honest form of training there is: preparing your body to handle the life you actually live, not just the one you live in a gym.

    You don’t need to overhaul everything at once. Pick one movement pattern — start with a squat or a hinge — and do it well, three times a week. Add a carry. Work on your core stability. Over weeks and months, the cumulative effect is real, measurable, and deeply practical.

    Small, consistent steps built on good movement beat sporadic intensity every single time. Your body is built to move. Give it the training it was designed for.

    This article is for informational and educational purposes only. The content is not intended to replace professional medical, nutritional, or fitness advice. Always consult a qualified healthcare provider, registered dietitian, or certified fitness professional before starting a new health program or making significant changes to your lifestyle.

    Content reviewed by our wellness editorial team, with references to peer-reviewed research and guidelines from leading health organizations.
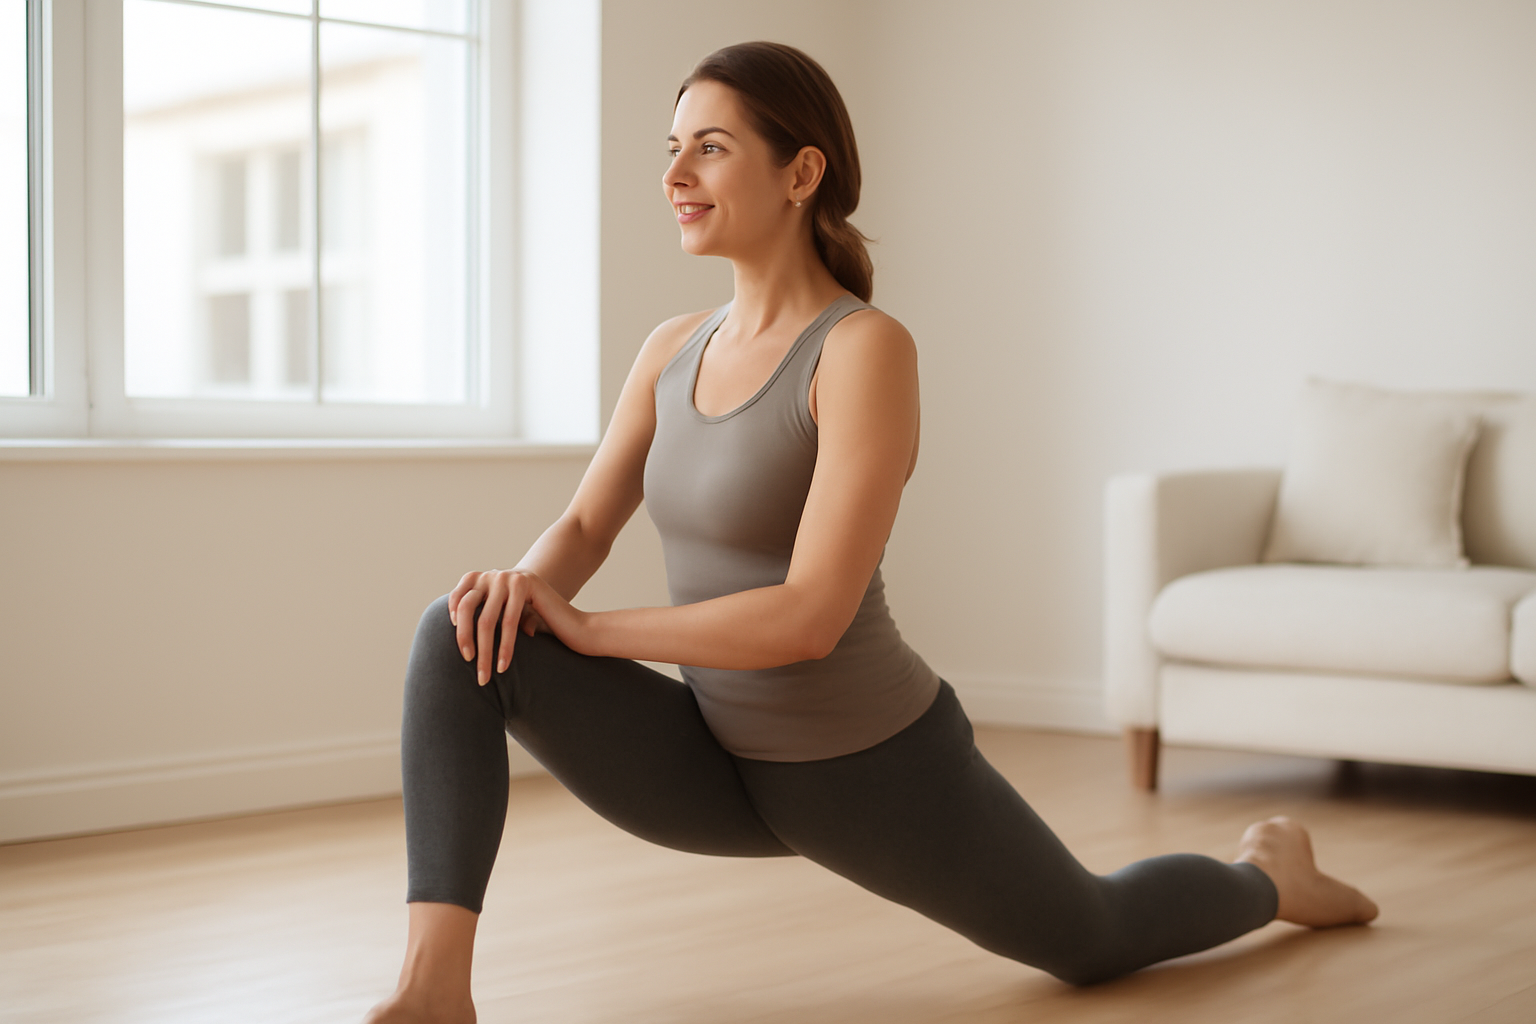
  • Body Recomposition: Lose Fat and Build Muscle Together

    Body Recomposition: Lose Fat and Build Muscle Together

    Body Recomposition: Lose Fat and Build Muscle Together

    You don't always have to choose between getting leaner and getting stronger — here's what the science actually says.

    Most people walk into a gym with one of two goals: lose fat or build muscle. Trainers, fitness apps, and even well-meaning friends usually treat these as separate journeys — bulk first, cut later. But what if you're not chasing extremes? What if you just want to look and feel better, move stronger, and shed the extra weight that crept on over the last few years?

    That's where body recomposition comes in — and it's more achievable than most people realize.

    Body recomposition refers to the process of simultaneously reducing body fat and increasing lean muscle mass. It sounds like it defies basic biology (aren't those two opposite goals?), but research shows it's entirely possible — especially for certain groups of people.

    In this guide, you'll learn what body recomposition really means, who benefits most, how to structure your training and nutrition, and what realistic timelines look like. No extreme diets, no conflicting advice — just an evidence-based roadmap you can actually follow.

    Why Body Recomposition Matters More Than You Think

    Here's a number that puts things in perspective: according to the Centers for Disease Control and Prevention (CDC), over 73% of American adults are overweight or obese — yet many of them also have low muscle mass. This condition, sometimes called "skinny fat" by fitness professionals or more clinically described as "normal-weight obesity," means people can have excess fat and insufficient muscle even at a seemingly average weight.

    The scale alone doesn't tell the full story. Two people at 160 pounds can have dramatically different body compositions — and that difference matters enormously for metabolic health, strength, energy levels, and long-term disease risk.

    Research published in the American Journal of Clinical Nutrition has consistently linked higher muscle mass with better insulin sensitivity, reduced cardiovascular risk, and improved mobility as we age. Meanwhile, excess body fat — particularly visceral fat around the midsection — is associated with chronic inflammation and metabolic dysfunction.

    Body recomposition addresses both sides of the equation at once. It's not just about aesthetics — it's about building a body that functions well, resists disease, and supports your quality of life for decades.

    And for adults in the 25–60 age range, this approach is often more sustainable than aggressive cutting or bulking cycles that require dramatic caloric swings and significant lifestyle disruption.

    The Science Behind Body Recomposition: How It Actually Works

    The common belief is that fat loss requires a calorie deficit and muscle gain requires a calorie surplus — making them mutually exclusive. That logic holds in extremes (elite bodybuilders, for example), but it doesn't apply to most everyday people.

    Body recomposition works through a process called substrate partitioning — your body's ability to use stored body fat as fuel for building and repairing muscle tissue. When you train with resistance exercise while eating adequate protein, your body can pull energy from fat stores to power muscle protein synthesis.

    A landmark study published in the American Journal of Physiology — Endocrinology and Metabolism found that participants who ate a high-protein diet and performed resistance training simultaneously lost fat and gained muscle over a 4-week period — even while in a modest caloric deficit. This challenged the long-held notion that you can't do both at once.

    The myth worth busting: Body recomposition doesn't require eating at maintenance calories. A small deficit (around 200–300 calories below your TDEE — total daily energy expenditure) combined with high protein intake and consistent resistance training creates the conditions for simultaneous fat loss and muscle gain.

    Who benefits most? Research suggests body recomposition is most effective for:

    • Beginners to resistance training (sometimes called "newbie gains")
    • People returning to exercise after a long break
    • Individuals with higher body fat percentages
    • Those who have been sedentary but maintain adequate protein intake

    Advanced athletes with already-low body fat percentages will find simultaneous recomposition much harder — though not impossible. Results vary significantly depending on genetics, training history, hormonal status, and sleep quality.

    How to Get Started: Practical Steps for Body Recomposition

    Getting started doesn't require a complicated program or expensive equipment. Here's a practical framework organized by experience level.

    Step 1: Set Your Protein Target First

    Protein is the non-negotiable foundation of body recomposition. The Academy of Nutrition and Dietetics recommends 1.2–2.0 grams of protein per kilogram of body weight for active adults. For recomposition specifically, research supports aiming toward the higher end — roughly 0.7–1.0 gram per pound of bodyweight daily.

    If you weigh 170 pounds, that's approximately 120–170 grams of protein per day, spread across meals.

    Step 2: Create a Modest Caloric Deficit

    Use a TDEE calculator to estimate your daily calorie burn, then subtract 200–300 calories. This small deficit supports fat loss without compromising muscle protein synthesis or leaving you chronically fatigued.

    Step 3: Prioritize Resistance Training

    This is the engine of body recomposition. The American College of Sports Medicine (ACSM) recommends resistance training at least 2–3 days per week for general health — but for recomposition, 3–4 sessions per week targeting all major muscle groups tends to produce better results.

    For beginners, full-body workouts 3x per week using compound movements (squats, deadlifts, rows, presses) are highly effective. If you're new to strength training, our Strength Training for Beginners: Your Complete Starter Guide is a great place to start.

    Step 4: Add Strategic Cardio

    Cardio supports fat loss and cardiovascular health without undermining muscle gains — as long as it's not excessive. Aim for 2–3 moderate-intensity cardio sessions per week (20–40 minutes each). Walking, cycling, and swimming are excellent low-impact options that don't tax recovery. For a deeper comparison of cardio styles, check out our article on HIIT vs Steady-State Cardio: Which One Is Right for You?

    Intermediate & Advanced Note: If you've been training for over a year, consider periodized programming — alternating phases of slightly higher and slightly lower calorie intake — to continue progressing. At this stage, working with a certified personal trainer or registered dietitian can help fine-tune your approach.

    Common Mistakes That Sabotage Body Recomposition Results

    Body recomposition is a slower, steadier process than aggressive bulk-and-cut cycles — and that slower pace can lead people to make mistakes that stall progress entirely. Here are the most common ones:

    Mistake 1: Not Eating Enough Protein

    This is the single most common reason people fail to gain muscle while losing fat. Without sufficient amino acids, your body can't repair and build muscle tissue — even if your training is perfect. Many people underestimate how much protein they're actually eating. Tracking intake for even 2–3 weeks using a free app like MyFitnessPal can be eye-opening.

    Mistake 2: Doing Too Much Cardio, Too Little Lifting

    Many people default to running or cycling for fat loss while treating weights as optional. But cardio alone doesn't stimulate muscle protein synthesis. For body recomposition, resistance training must be the priority — cardio is the support, not the star.

    Mistake 3: Being Too Aggressive with the Caloric Deficit

    Cutting calories too drastically (more than 500–700 per day) puts your body in a state where muscle tissue becomes a fuel source. This is the opposite of what you want. A conservative deficit protects lean mass while still promoting fat loss. If you feel exhausted, constantly hungry, or your workouts are suffering, your deficit may be too steep.

    Mistake 4: Judging Progress Only by the Scale

    During body recomposition, the scale can stay flat or even go up slightly — even while you're losing fat and gaining muscle. Muscle is denser than fat, so body composition can improve significantly without a dramatic change in bodyweight. Track progress using measurements, progress photos, how your clothes fit, and strength benchmarks in your workouts.

    Mistake 5: Skipping Recovery and Sleep

    Muscle is built during rest, not during workouts. According to the National Sleep Foundation, adults need 7–9 hours of sleep per night for optimal hormonal function — including testosterone and growth hormone, both of which are critical for muscle repair. Chronic poor sleep impairs fat-burning capacity and increases cortisol, which can promote fat storage.

    What to Eat to Support Body Recomposition

    You don't need a rigid meal plan — but you do need a nutritional framework that supports both fat loss and muscle growth simultaneously.

    Protein Sources (prioritize these):

    • Chicken breast, turkey, lean beef (4–6 oz per meal)
    • Eggs and egg whites (2–4 whole eggs or egg white combinations)
    • Greek yogurt (1 cup = 15–20g protein)
    • Cottage cheese, low-fat ricotta
    • Salmon, tuna, cod, tilapia
    • Legumes: lentils, black beans, edamame (good plant-based options)
    • Whey or plant-based protein powder when whole food intake falls short

    Carbohydrates (time them strategically):

    Carbs are not the enemy — they fuel resistance training performance. The USDA Dietary Guidelines recommend that carbohydrates make up 45–65% of total caloric intake for most adults. For recomposition, focus on complex, fiber-rich carbs and time them around workouts.

    • Oats, brown rice, quinoa, sweet potatoes
    • Fruits (berries, apples, bananas pre-workout)
    • Whole grain bread and pasta in moderate portions

    Healthy Fats (don't eliminate them):

    • Avocado, olive oil, nuts, seeds
    • Fatty fish (salmon, mackerel) for omega-3 anti-inflammatory benefits
    • Keep fat intake at roughly 25–35% of total calories

    What to Limit: Ultra-processed foods, alcohol, and added sugars don't just add empty calories — they actively interfere with recovery, sleep quality, and hormonal balance. You don't need to eliminate them entirely, but reducing their frequency will make your body recomposition efforts noticeably more effective.

    How Long Until You See Results — and What to Track

    This is where realistic expectations matter most. Body recomposition is slower than either aggressive fat loss or dedicated muscle-building phases — and that's by design. You're doing two things at once, after all.

    Realistic Timelines:

    • Weeks 1–4: Neuromuscular adaptations (you get stronger without much visible change). Bloating may decrease. Energy during workouts improves.
    • Weeks 4–8: Noticeable strength gains. Some people begin to see changes in how clothes fit. Scale may remain relatively stable.
    • Months 3–6: Visible changes in muscle definition and fat reduction become more apparent, especially with consistent training and nutrition adherence.
    • 6–12+ months: Significant body composition changes for most people who remain consistent.

    Research in the Journal of Strength and Conditioning Research found that meaningful body composition changes typically require at least 8–12 weeks of consistent resistance training and adequate protein intake to be measurable by body composition testing.

    What to Track:

    • Waist, hip, and thigh circumference (monthly)
    • Progress photos (every 4 weeks, same lighting and time of day)
    • Strength benchmarks (can you lift heavier? More reps?)
    • Energy levels and sleep quality (weekly self-check)
    • Body fat percentage if accessible via DEXA scan or reliable skinfold testing

    When to Reassess: If you've been consistent for 12 weeks and see zero measurable changes in any metric, it's worth consulting a registered dietitian or certified personal trainer to review your program. Hormonal imbalances, thyroid issues, or other health factors can sometimes interfere — and a professional can help identify what's happening.

    Frequently Asked Questions

    Can I do body recomposition without going to a gym?

    Yes — resistance training at home using bodyweight exercises, resistance bands, or dumbbells can absolutely support body recomposition, especially for beginners. The key is progressive overload: consistently challenging your muscles with increasing difficulty over time. Check out our guide on Home Workout Plans: Get Fit Without the Gym for practical options.

    Is body recomposition possible after 40?

    Absolutely — though it may progress more slowly due to hormonal changes, particularly declining testosterone and estrogen levels. Research published in the Journal of Gerontology confirms that adults over 40 can still build muscle and lose fat with resistance training. Protein intake becomes even more important with age to offset age-related muscle loss (sarcopenia).

    Do I need protein supplements for body recomposition?

    Not necessarily. Whole food protein sources are always preferable. However, if you consistently struggle to hit your protein target through food alone, a quality whey or plant-based protein supplement can help fill the gap. Supplements are not a replacement for a balanced diet — they're a convenience tool.

    How do I know if I'm losing fat and gaining muscle at the same time?

    The most reliable methods are DEXA scans or hydrostatic weighing, which measure body fat percentage and lean mass separately. More practically, pay attention to whether you're getting stronger in your workouts (a sign of muscle growth) while your waist circumference is shrinking (a sign of fat loss) — even if the scale doesn't move much.

    Can women do body recomposition?

    Yes — and research consistently shows women respond very well to resistance training for body recomposition. Women won't develop bulky muscle mass from typical resistance training due to lower baseline testosterone levels. What they do gain is strength, definition, metabolic efficiency, and improved bone density — all significant health benefits backed by the American College of Sports Medicine.

    Start Where You Are, Stay Consistent

    Body recomposition isn't a quick fix — and that's actually good news. It's a sustainable approach that builds the body you want while supporting real, long-term health. No extreme calorie slashing, no eliminating food groups, no grueling two-a-day workouts required.

    The formula is genuinely simple, even if it takes time: lift weights consistently, eat enough protein, stay in a modest caloric deficit, sleep well, and track the right metrics. Small, consistent steps will always outperform intense, unsustainable sprints.

    Start today by calculating your protein target and planning three resistance training sessions this week. That's it. Build from there.


    This article is for informational and educational purposes only. The content is not intended to replace professional medical, nutritional, or fitness advice. Always consult a qualified healthcare provider, registered dietitian, or certified fitness professional before starting a new health program or making significant changes to your lifestyle.

    Content reviewed by our wellness editorial team, with references to peer-reviewed research and guidelines from leading health organizations.

  • Stretching Routines: Flexibility, Recovery & Daily Mobility

    Stretching Routines: Flexibility, Recovery & Daily Mobility

    Stretching Routines: Flexibility, Recovery & Daily Mobility

    You don't have to be a yogi or a gymnast to benefit from stretching — you just have to start showing up for your body in small, consistent ways.

    Introduction

    Think about the last time you got up from your desk after a long afternoon of work and felt that familiar tightness in your hips, a dull ache in your lower back, or stiffness running up through your shoulders. That's not just discomfort — it's your body sending you a message that it's been neglected.

    Here's a surprising figure: according to the American College of Sports Medicine, flexibility training is one of the four essential components of physical fitness — alongside cardiovascular endurance, muscular strength, and body composition — yet it's consistently the most skipped part of any workout routine.

    Most people treat stretching as an afterthought, something you do quickly before a run or skip entirely because "it doesn't count as real exercise." But a well-structured stretching routine can meaningfully improve how you move, how fast you recover, and even how you feel mentally on a daily basis.

    In this guide, you'll learn why stretching matters beyond flexibility, how different types of stretching work (and when to use them), how to build a practical routine that fits your life, and what to expect in terms of real results. No splits required.

    Why Stretching Matters More Than You Think

    Flexibility often gets associated purely with aesthetics — touching your toes, doing the splits — but the actual health stakes are much higher than that. Tight muscles pull joints out of alignment, disrupt posture, reduce range of motion, and increase injury risk during everyday activities, not just athletic ones.

    A 2019 review published in the Journal of Physical Therapy Science found that regular stretching significantly reduced lower back pain and improved functional mobility in sedentary adults — a group that represents a huge portion of the US workforce. For people who sit for more than six hours a day, hip flexor tightness and thoracic stiffness are nearly universal, and they don't resolve on their own.

    There's also a circulatory benefit that often goes overlooked. Stretching increases blood flow to the muscles being worked, which supports tissue repair, reduces delayed onset muscle soreness (DOMS), and may contribute to better vascular health over time. According to Harvard Health Publishing, regular flexibility work also activates the parasympathetic nervous system — the body's "rest and digest" mode — which can meaningfully reduce resting stress levels.

    If you're already combining movement with other wellness habits, you'll find that stretching works synergistically with strength work and cardio. And if you want a broader look at how to structure movement into your week, our Home Workout Plans guide offers a solid complement to what you'll find here.

    The Science Behind Stretching: How It Actually Works

    Not all stretching is the same, and using the wrong type at the wrong time can actually impair performance rather than support it. Understanding the basic mechanisms helps you make smarter choices.

    There are three primary categories of stretching you'll encounter in the fitness world:

    • Static stretching — holding a stretch in a fixed position for 20-60 seconds. Best for post-workout cool-downs or standalone flexibility sessions.
    • Dynamic stretching — controlled, active movement through a range of motion (think leg swings, arm circles, walking lunges). Best for warm-ups before exercise.
    • Proprioceptive Neuromuscular Facilitation (PNF) — alternating contraction and relaxation of a muscle to deepen the stretch. Often done with a partner. This is an advanced technique with strong evidence for rapid flexibility gains.

    Here's the myth worth busting: static stretching before intense exercise does not prevent injury — and research confirms it may actually reduce power output. A meta-analysis published in the Scandinavian Journal of Medicine & Science in Sports found that pre-exercise static stretching reduced muscle strength by up to 8% when held for longer than 60 seconds. Save the long holds for after your workout or on rest days.

    The neuromuscular mechanism behind flexibility is also worth understanding. When you hold a stretch, your muscle's sensory receptors — specifically the muscle spindles and Golgi tendon organs — gradually signal the nervous system to allow a greater range of motion. This is why flexibility improves over weeks, not in a single session. Consistency is everything here.

    Results vary significantly based on age, muscle fiber composition, activity history, and even genetics. Some people naturally have more elastic connective tissue; others will need to work at it longer. That's completely normal.

    How to Build Your Stretching Routine: Practical Steps

    The best stretching routine is the one you'll actually stick with. Here's how to build one that matches your current level and fits into a real schedule.

    Beginner: The 10-Minute Daily Reset

    If you're new to intentional stretching, start simple. Ten minutes of targeted static stretching per day — ideally in the evening or after a workout — will produce noticeable changes within three to four weeks.

    1. Standing quad stretch — 30 seconds each leg
    2. Seated hamstring stretch — 30 seconds each leg
    3. Hip flexor lunge stretch — 30 seconds each side
    4. Chest opener (doorway stretch) — 30 seconds
    5. Child's pose — 60 seconds
    6. Seated figure-four glute stretch — 30 seconds each side

    Focus on breathing deeply into each stretch rather than forcing range of motion. Discomfort is okay; sharp or shooting pain is not.

    Intermediate: Adding Dynamic Warm-Up Protocols

    Once you're stretching consistently, add dynamic work before any strength or cardio session. A 5-minute dynamic routine might include:

    • Leg swings (forward/back and side to side) — 10 reps each direction per leg
    • Hip circles — 10 reps each direction
    • Arm circles and shoulder rolls — 10 reps
    • Inchworm walk-outs — 5 reps
    • World's greatest stretch (a multi-joint mobility move) — 3 reps each side

    Advanced: Mobility Training and PNF

    If you're looking to significantly improve range of motion for athletic performance or to address specific joint restrictions, explore structured mobility programs (like those used in physical therapy) or PNF stretching with a certified fitness professional. Yoga is also an excellent advanced-level tool — our yoga benefits article breaks this down in depth.

    Common Mistakes That Sabotage Your Flexibility Progress

    Even well-meaning stretchers regularly make a handful of errors that slow their results significantly — or create new problems.

    Mistake 1: Stretching Cold Muscles

    Pulling a cold, tight muscle into a deep stretch before it's warmed up is one of the most common sources of strains. Muscle tissue is more pliable when its temperature is slightly elevated. A 5-minute light walk or jumping jacks is all you need before a static stretching session. This is an easy fix that dramatically reduces risk.

    Mistake 2: Bouncing Through Stretches (Ballistic Stretching)

    Ballistic stretching — using momentum to force a stretch — activates the stretch reflex, which actually causes the muscle to contract rather than lengthen. This increases injury risk and is generally not recommended for recreational athletes. Hold stretches slowly and steadily instead.

    Mistake 3: Only Stretching What's Already Tight

    Most people stretch the muscles they feel most — hamstrings, calves — while ignoring hip flexors, thoracic spine, and shoulder internal rotators. This selective stretching doesn't address the underlying imbalances that cause posture and movement problems. A full-body approach produces far better functional results.

    Mistake 4: Skipping It on "Good Days"

    Flexibility training works cumulatively. Skipping sessions because you "feel fine" erodes the gains made in previous sessions. Consistency over intensity is the rule here. Even five minutes done daily outperforms a 45-minute session once a week.

    Mistake 5: Holding Their Breath

    Bracing or holding the breath during a stretch triggers the sympathetic nervous system — essentially a mild stress response — which counteracts the muscle-relaxing effect you're trying to achieve. Slow, nasal breathing during stretches deepens the neurological release and makes every second more effective.

    What to Pair With Your Stretching Routine for Better Results

    Stretching doesn't exist in isolation. Certain nutritional and lifestyle habits meaningfully affect how quickly your flexibility and recovery improve.

    Hydration: Muscle tissue is approximately 75% water. Dehydrated muscles are stiffer, more prone to cramping, and slower to recover. The USDA recommends at least 8-10 cups of water per day for active adults, and more if you're exercising regularly or live in a hot climate.

    Protein intake: According to the Academy of Nutrition and Dietetics, adequate protein (0.7–1.0 grams per pound of body weight for active adults) supports the repair of connective tissue, including the fascia and tendons that surround your muscles. Without it, even the best flexibility routine will hit a ceiling.

    Anti-inflammatory foods: Chronic low-grade inflammation limits tissue elasticity and slows recovery. Foods rich in omega-3 fatty acids (salmon, walnuts, chia seeds), antioxidants (berries, leafy greens, turmeric), and polyphenols have been shown in multiple NIH-reviewed studies to support musculoskeletal recovery and reduce exercise-induced inflammation.

    Sleep: The National Sleep Foundation identifies deep sleep as the period when the majority of physical tissue repair occurs, including muscle and connective tissue. Consistently getting 7-9 hours per night is one of the most underappreciated accelerators of flexibility and recovery progress.

    If walking is already part of your routine, that's a natural complement to stretching — and our science-backed walking guide covers how to build it into a balanced movement practice.

    How Long Until You See Results — and What to Track

    This is where honest expectations matter. Flexibility is one of the slower-adapting physical qualities, and timelines vary widely depending on your starting point, age, and consistency.

    Research from the American College of Sports Medicine suggests that with consistent static stretching (five or more days per week), most adults begin to notice measurable range-of-motion improvements within three to six weeks. Significant changes — the kind that translate to visible posture improvements and reduced daily stiffness — typically emerge between eight and twelve weeks.

    Here's what to actually track, instead of chasing arbitrary benchmarks like "touching your toes":

    • Morning stiffness duration — How long does it take to feel physically fluid after waking up? This should decrease.
    • Pain-free range of motion — Can you rotate your shoulder more fully? Can you sit cross-legged comfortably for longer?
    • Exercise recovery time — Are your muscles recovering faster between sessions?
    • Postural alignment — Take a side-profile photo weekly to observe shoulder positioning and lower back curvature changes.

    If you've been consistent for 10-12 weeks and are not seeing any progress in range of motion or daily comfort, that's a signal to consult a physical therapist or certified strength and conditioning specialist. Underlying joint issues, nerve tension, or structural factors sometimes require professional assessment to address effectively.

    Frequently Asked Questions

    How long should I hold each stretch?

    For static stretching, the ACSM recommends holding each stretch for 15-60 seconds and repeating two to four times per muscle group. Beginners should start at the lower end — even 15-20 seconds done consistently beats long holds done occasionally. Holding beyond 60 seconds rarely adds significant benefit for most adults.

    Is it okay to stretch every day?

    Yes — for most adults, daily static or light dynamic stretching is safe and actually encouraged. Unlike strength training, muscles don't require 48 hours of recovery between flexibility sessions. The key is avoiding aggressive overstretching, which can strain connective tissue. Gentle to moderate intensity, every day, is the optimal approach.

    Can stretching help with chronic lower back pain?

    In many cases, yes — but the cause matters. Lower back pain driven by tight hip flexors, weak glutes, and hamstring inflexibility often responds well to a targeted stretching and mobility routine. However, stretching alone is not a treatment for herniated discs, sciatica, or structural spinal issues. Always consult a healthcare provider for persistent or severe back pain before starting a self-directed program.

    Should I stretch before or after strength training?

    Dynamic stretching before strength training; static stretching after. Pre-workout, dynamic movements prepare your joints and muscles for load without reducing force output. Post-workout, static holds help release accumulated tension, support blood flow to fatigued tissue, and begin the recovery process. Swapping the order can reduce your performance and increase soreness.

    Will stretching help me lose weight?

    Stretching alone has a minimal direct impact on caloric expenditure. However, it plays a meaningful indirect role — by reducing pain, improving recovery, and increasing your capacity to move freely, it makes other forms of exercise more accessible and sustainable. Think of it as the infrastructure that supports your overall fitness ecosystem, not a standalone weight loss tool.

    Conclusion

    Building a stretching routine doesn't require a gym membership, extra equipment, or an hour of your day. It requires consistency, a little self-awareness, and the willingness to show up for your body even when nothing "hurts yet."

    The adults who move well at 55 and 60 didn't get there by accident — they built small daily habits that added up over years. A ten-minute stretching routine done six days a week beats a single intensive session done occasionally every single time.

    Your action step today: pick three stretches from the beginner list above, set a recurring reminder for tonight, and do them before bed. That's it. Start there. Your joints, posture, and energy levels will thank you in ways you won't expect.


    Wellness Disclaimer: This article is for informational and educational purposes only. The content is not intended to replace professional medical, nutritional, or fitness advice. Always consult a qualified healthcare provider, registered dietitian, or certified fitness professional before starting a new health program or making significant changes to your lifestyle.

    Author Line: Content reviewed by our wellness editorial team, with references to peer-reviewed research and guidelines from leading health organizations.