
Tag: fitness for adults

  • Flexibility Training for Adults: Move Better, Feel Stronger

    Flexibility Training for Adults: Move Better, Feel Stronger

    Flexibility Training for Adults: Move Better, Feel Stronger

    If bending down to tie your shoes leaves you winded — or your hips ache after sitting at a desk all day — flexibility training might be the missing piece in your wellness routine.

    Why Most Adults Are Losing Flexibility Without Realizing It

    Here’s a sobering truth: after age 30, adults can lose up to 10% of their muscle flexibility per decade if they don’t actively work to maintain it. That’s not a scare tactic — it’s a well-documented physiological reality confirmed by research published in the Journal of Aging and Physical Activity.

    Most people don’t notice the gradual stiffness creeping in until something goes wrong — a pulled hamstring during a weekend jog, chronic lower back pain after long work hours, or simply the frustrating inability to reach overhead without wincing.

    And yet, flexibility is one of the most neglected components of adult fitness. Unlike strength training or cardio, it rarely gets scheduled into the week. There’s no calorie counter for a hip flexor stretch. No leaderboard for a longer hamstring hold.

    But here’s what the science keeps confirming: flexibility isn’t just about being able to touch your toes. It’s directly tied to injury prevention, joint health, posture, athletic performance, and even stress relief. In this guide, you’ll get a practical, evidence-based roadmap to start — or restart — a flexibility training routine that actually fits your life.

    Why Flexibility Training Matters More Than You Think

    Flexibility is formally defined by the American College of Sports Medicine (ACSM) as the ability of a joint or series of joints to move through an unrestricted, pain-free range of motion. It sounds clinical, but in everyday terms it means how freely and comfortably your body moves.

    The stakes are higher than most people realize. According to the ACSM’s Health-Related Fitness guidelines, poor flexibility is a contributing risk factor for musculoskeletal injuries, chronic pain conditions, and even falls in older adults. In a population where back pain alone affects roughly 80% of Americans at some point in their lives (per the National Institutes of Health), that matters enormously.

    Beyond injury prevention, flexibility training has been linked to improved circulation, reduced muscle soreness, better posture, and reduced tension headaches — all issues that affect busy adults in their prime working years.

    There’s also an underappreciated connection between flexibility and stress. Research published in the Journal of Physical Therapy Science found that stretching activates the parasympathetic nervous system, helping lower cortisol levels and promote a calmer mental state. That means a 10-minute stretching session before bed isn’t just good for your hips — it may also help you sleep better.

    The bottom line: flexibility training is a foundation, not an accessory. If you’re already doing compound exercises for full-body strength or following a mobility training program, adding structured flexibility work will amplify your results across the board.

    The Science Behind Flexibility: How It Actually Works

    Before diving into techniques, it helps to understand what’s actually happening in your body when you stretch. Muscles don’t work alone — they’re surrounded by connective tissue called fascia, and attached to bones via tendons. When you hold a stretch, you’re influencing all of these structures.

    The primary mechanism behind improved flexibility is a reduction in neural inhibition. In simple terms, your nervous system limits how far a muscle stretches as a protective reflex. Regular stretching trains your brain to tolerate a greater range of motion over time — not just your tissues. This is why consistency matters more than intensity when it comes to flexibility gains.

    Busting a common myth: Many people believe that stretching before a workout prevents injuries and improves performance. However, the research tells a different story. A landmark review published in the British Journal of Sports Medicine found that static stretching (holding a stretch for 30-60 seconds) performed immediately before exercise can actually temporarily reduce muscular strength and power output by up to 8%.

    The better approach? Save static stretching for after workouts or as a standalone session. Before exercise, opt for dynamic stretching — controlled movements that take your joints through their range of motion, like leg swings, arm circles, and hip rotations. This primes the nervous system without compromising muscle performance.

    There are three main types of flexibility training worth knowing:

    • Static stretching: Hold a position for 20-60 seconds. Best for post-workout or dedicated sessions.
    • Dynamic stretching: Controlled, movement-based. Ideal pre-workout warm-up.
    • PNF stretching (Proprioceptive Neuromuscular Facilitation): Contract-relax technique, often done with a partner. Highly effective for rapid flexibility gains, but requires proper instruction.

    Each has its place in a well-rounded program. For most adults starting out, static and dynamic stretching provide the best accessibility-to-results ratio.

    How to Get Started: A Practical Flexibility Routine

    The most important thing to know before you start: you don’t need to be flexible to start a flexibility program. That would be like needing to be strong before starting strength training. You simply begin where you are.

    The ACSM recommends that adults perform flexibility exercises for all major muscle groups at least 2-3 days per week, with daily stretching being ideal for maximum benefit. Each stretch should be held for 10-30 seconds (building to 60 seconds over time), and repeated 2-4 times.

    Beginner Level — The Daily 10-Minute Routine

    Focus on the most commonly tight areas for desk workers and sedentary adults:

    1. Standing quad stretch — 30 seconds each side. Hold a wall if needed for balance.
    2. Standing hamstring stretch (forward fold) — 30-45 seconds. Keep knees slightly bent to protect your lower back.
    3. Hip flexor lunge stretch — 30-45 seconds each side. Drop to one knee, shift your hips forward gently.
    4. Chest opener stretch — Clasp hands behind your back and gently open your chest. 30 seconds.
    5. Neck side stretch — Tilt ear toward shoulder, apply gentle pressure with hand. 20 seconds each side.
    6. Seated figure-four stretch — Cross one ankle over the opposite knee. Hold 30-45 seconds each side. Excellent for piriformis and hip rotators.

    Do this sequence daily. Results won’t come overnight, but most people notice meaningful improvement in tightness and ease of movement within 3-4 weeks of consistent practice.

    Intermediate Level

    Once the beginner routine feels manageable, add:

    • Extended hold times (45-60 seconds per stretch)
    • Butterfly stretch for inner thighs and groin
    • Pigeon pose (from yoga) for deep hip opening
    • Doorway pectoral stretch for chest and shoulder health
    • Supine spinal twist for thoracic and lumbar mobility

    Advanced Level

    Incorporate PNF techniques with a trained partner or coach, yoga flows that challenge end-range flexibility, and targeted active flexibility work (holding the stretched position using your own muscle strength rather than gravity or assistance).

    If you’re already doing bodyweight training, adding this flexibility sequence as a cooldown is an efficient way to check both boxes in the same session.

    Common Mistakes That Sabotage Your Flexibility Progress

    Most adults who try flexibility training don’t fail because the approach is wrong — they fail because of entirely avoidable errors. Here are the most common ones:

    Mistake 1: Bouncing through the stretch (ballistic stretching)
    This feels natural — bouncing at the end range of a hamstring stretch, for example. But ballistic stretching triggers the stretch reflex, causing the muscle to contract rather than relax. It also raises your injury risk. Fix it: move into the stretch slowly, breathe into it, and hold without bouncing.

    Mistake 2: Holding your breath
    Tension and breath-holding go hand in hand, and they work against you in flexibility training. When you hold your breath, you increase muscular tension system-wide. Fix it: inhale slowly to prepare, then exhale as you deepen into the stretch. Use long, slow nasal breaths throughout each hold.

    Mistake 3: Only stretching what’s already flexible
    People tend to stretch what feels good, not what needs work. If your calves are naturally loose, you might ignore your tight hip flexors. Fix it: do a full-body flexibility assessment — or simply follow a structured routine that targets all major muscle groups equally.

    Mistake 4: Inconsistency
    Stretching once a week after an intense workout won’t move the needle. Flexibility requires consistent stimulus to adapt. Fix it: treat flexibility like brushing your teeth — a daily non-negotiable, even if it’s just 10 minutes. The ACSM specifically highlights frequency as the key variable in flexibility improvement.

    Mistake 5: Stretching through sharp or acute pain
    There’s a difference between the productive discomfort of a deep stretch and pain that signals tissue damage. Flexibility work should feel like a sustained, manageable pull — never a sharp, stabbing, or burning sensation. Fix it: if you feel sharp pain, back off immediately and consult a physical therapist before continuing.

    What Supports Your Flexibility: Nutrition and Recovery Habits

    Flexibility training doesn’t happen in a vacuum. Several nutritional and lifestyle factors directly affect how well your muscles and connective tissue respond to stretching.

    Hydration matters more than most people think. Fascia and connective tissue are water-dependent structures. Dehydrated tissues are stiffer, less pliable, and more injury-prone. The National Academies of Sciences, Engineering, and Medicine recommends approximately 3.7 liters of total daily water intake for men and 2.7 liters for women (from all food and beverage sources combined).

    Protein and collagen synthesis. Connective tissues — tendons, ligaments, and fascia — are largely made of collagen. The Academy of Nutrition and Dietetics highlights that adequate protein intake supports tissue repair and remodeling. Some research, including a study published in the American Journal of Clinical Nutrition, suggests that vitamin C-enriched collagen supplements taken before training may support collagen synthesis in tendons and ligaments — though more research is needed.

    Anti-inflammatory foods. Chronic low-grade inflammation can increase muscle stiffness and reduce range of motion over time. Diets rich in omega-3 fatty acids (from salmon, sardines, walnuts, and flaxseed), colorful vegetables, and polyphenol-rich foods like blueberries and olive oil are associated with lower systemic inflammation according to research cited by Harvard Health Publishing.

    Magnesium. This essential mineral plays a role in muscle relaxation and neuromuscular function. According to the NIH, many American adults fall short of recommended magnesium intake. Foods like spinach, pumpkin seeds, black beans, and almonds are excellent dietary sources.

    Sleep and recovery. Much of the tissue adaptation from flexibility training happens during sleep. Consistently poor sleep can impair connective tissue recovery and increase perceived muscle tightness. Prioritizing 7-9 hours per night (per the National Sleep Foundation) is a legitimate part of your flexibility strategy.

    How Long Until You See Real Results — and What to Track

    Flexibility gains are real, measurable, and often faster to achieve than most people expect — but they do require patience and consistency.

    Research published in the Journal of Strength and Conditioning Research found that participants who stretched 5 days per week for 6 weeks showed significant improvements in hamstring flexibility compared to those who stretched 2-3 days per week. The takeaway: frequency is the most powerful lever you can pull.

    Realistic timelines:

    • Week 1-2: Reduced muscle tightness and tension. You’ll feel it, even if you can’t measure it.
    • Week 3-4: Noticeable improvement in range of motion for key areas like hamstrings, hip flexors, and shoulders.
    • Week 6-8: Measurable flexibility gains. This is when most people start seeing objective changes (can reach further, move more freely).
    • Month 3+: Sustained improvement in functional movement, posture, and reduction in everyday aches and stiffness. Results vary based on age, starting flexibility, and consistency.

    What to track:

    • Sit-and-reach test: A classic benchmark for hamstring and lower back flexibility. Measure weekly.
    • Shoulder flexibility: Can you clasp your hands behind your back? Note which side is tighter.
    • Hip flexibility: How far can you drop into a hip flexor lunge before feeling the stretch? Track progressively.
    • Subjective tightness rating: Rate morning stiffness on a scale of 1-10. This simple self-measure is surprisingly valuable over time.

    If you’re not seeing any improvement after 8 weeks of consistent effort, consider consulting a physical therapist. Some stiffness is related to joint structure, past injuries, or neuromuscular patterns that benefit from professional assessment.

    Frequently Asked Questions About Flexibility Training

    Is it too late to start flexibility training after 40 or 50?
    Absolutely not. While connective tissue does become less elastic with age, research consistently shows that adults of all ages respond positively to regular stretching. A study in the Journal of Aging and Physical Activity found significant flexibility improvements in adults aged 40-70 after a 12-week stretching program. Starting later simply means starting — and every week of consistency moves you forward.

    How long should I hold each stretch?
    The ACSM recommends holding static stretches for 10-30 seconds at minimum, building toward 60 seconds as you progress. Shorter holds (under 10 seconds) provide minimal lasting benefit. For most adults, 30-45 seconds per stretch, repeated 2-3 times, is the practical sweet spot.

    Can flexibility training help with lower back pain?
    For many adults, yes — particularly when the pain is related to tight hip flexors, hamstrings, or thoracic stiffness. The Mayo Clinic notes that targeted stretching is a common component of back pain management programs. However, some back conditions require specific movement precautions, so always consult your healthcare provider before beginning if you have existing back issues.

    Should I stretch every day?
    Daily stretching is ideal and generally safe. Unlike strength training, flexibility training doesn’t require recovery days between sessions — gentle daily stretching can actually accelerate progress. The exception is if a specific area is acutely sore or injured, in which case rest and professional guidance are appropriate.

    Does yoga count as flexibility training?
    Yes, with important nuance. Yoga incorporates static flexibility work, dynamic movement, balance, and sometimes strength — making it an excellent complementary practice. Research published in PLOS ONE found that regular yoga practice significantly improved flexibility and balance in adults. However, yoga alone may not address all tight areas systematically, which is why a dedicated stretching routine remains valuable alongside it.

    The Takeaway: Small Stretches, Big Payoffs

    Flexibility training isn’t glamorous. It won’t make headlines the way a new HIIT protocol does. But day after day, it quietly does something profound — it keeps your body moving freely, reduces pain, improves your posture, and makes every other form of exercise more effective and enjoyable.

    You don’t need an hour-long yoga class or a personal trainer on day one. You need 10 consistent minutes, a clean stretch sequence, and the patience to show up regularly. Start with the beginner routine in this guide. Do it after your next workout or right before bed tonight.

    Your future self — the one who bends down without groaning, reaches overhead without wincing, and moves through the day with ease — will thank you for the small, boring, completely life-changing choice you made today.


    Wellness Disclaimer: This article is for informational and educational purposes only. The content is not intended to replace professional medical, nutritional, or fitness advice. Always consult a qualified healthcare provider, registered dietitian, or certified fitness professional before starting a new health program or making significant changes to your lifestyle.

    Content reviewed by our wellness editorial team, with references to peer-reviewed research and guidelines from leading health organizations.

  • Isometric Training: Build Real Strength Without Moving

    Isometric Training: Build Real Strength Without Moving

    You don’t always have to move to get stronger — and the research behind isometric training might change how you think about exercise entirely.

    Introduction

    Picture this: you’re holding a plank and your entire body is shaking, but you’re not moving an inch. Yet somehow, you’re burning muscle energy, building strength, and improving endurance — all while completely still. That’s isometric training in action, and it’s one of the most underrated tools in fitness today.

    Most people associate getting stronger with lifting, pushing, or pulling — movements you can see. But isometric exercises, where your muscles contract without changing length or joint angle, offer a surprisingly powerful alternative that fits almost any fitness level, schedule, or training environment.

    Whether you’re a beginner looking for a low-impact entry point, a busy professional with limited gym time, or someone returning from injury, isometric training deserves a serious look. In this guide, you’ll learn how it works, what the science actually says, and how to build it into your routine — starting today.

    Why Isometric Training Matters More Than You Think

    We live in a culture obsessed with visible effort — more reps, more weight, more sweat. Isometric training flies under the radar because it looks, well, boring. But the physiological benefits are anything but.

    According to research published in the Journal of Human Hypertension, isometric exercise — particularly wall sits and handgrip exercises — produced greater reductions in resting blood pressure than aerobic training or dynamic resistance exercise in several controlled trials. That’s a significant finding for adults managing cardiovascular risk.

    Beyond heart health, isometrics are uniquely effective at building strength in specific joint angles, improving neuromuscular activation, and enhancing postural endurance. Athletes use them to break through strength plateaus. Physical therapists rely on them for safe, early-stage rehabilitation. And for everyday adults, they offer a practical way to maintain muscle mass and joint stability without equipment or high impact.

    If you’ve been skipping this method, you’ve been leaving results on the table.

    The Science Behind Isometric Training: How It Actually Works

    During an isometric contraction, your muscle fibers are fully engaged — they’re generating force — but the muscle length doesn’t change. Think of pushing against a wall that won’t move. You’re working hard, but no joint movement occurs.

    This creates a unique training stimulus. Because you’re sustaining tension for a set duration (typically 20–60 seconds), your muscles face prolonged metabolic stress, which drives muscle fiber recruitment and endurance adaptations. Unlike dynamic training, where muscles cycle in and out of peak tension, isometrics force sustained activation throughout the hold.

    One important myth to bust: Many people believe isometric training only builds strength at the specific angle you train. While there is a degree of angle-specificity — research from the American College of Sports Medicine (ACSM) confirms strength gains are greatest within about 15 degrees of the trained joint angle — this doesn’t make isometrics less valuable. It just means smart programming uses multiple positions to cover full range of motion.

    A study published in the European Journal of Applied Physiology found that isometric training performed at longer muscle lengths (think a deep squat hold vs. a shallow one) produced greater overall muscle hypertrophy and carryover to dynamic strength. This means the angle you choose genuinely matters — and training at a stretched position tends to deliver more transferable results.

    Isometrics also have a measurable effect on tendon stiffness and joint stability, which is why they’re commonly used in managing tendinopathies, including patellar tendon issues in runners and rotator cuff rehabilitation, as noted in guidelines from the National Academy of Sports Medicine (NASM).

    How to Get Started: Practical Isometric Training Steps

    The good news: you need almost nothing to begin. No barbells, no machines, no gym membership. Here’s how to approach isometric training based on your current fitness level.

    Beginner: Build the Foundation

    • Wall Sit: Back flat against the wall, thighs parallel to the floor. Hold for 20–30 seconds. This targets quads, glutes, and hamstrings with zero joint stress.
    • Dead Hang: Grip a pull-up bar with both hands and simply hang. Builds grip strength, shoulder stability, and spinal decompression. Start with 15–20 seconds.
    • Glute Bridge Hold: Hips raised, core braced. Hold at the top for 20–30 seconds. Activates glutes and challenges lower back endurance.
    • Plank: Forearms or hands, body in a straight line. 20–40 second holds. Builds deep core stability more effectively than crunches for most beginners.

    Aim for 3 rounds of each hold, 3–4 days per week. Rest 30–60 seconds between sets.

    Intermediate: Add Intensity and Range

    • Single-Leg Wall Sit: Elevate one foot while performing a wall sit. Significantly increases unilateral demand.
    • Isometric Push-Up Hold: Lower to 90 degrees and hold for 15–30 seconds. Challenges chest, shoulders, and triceps with intense static tension.
    • Copenhagen Plank Hold: Side plank with top leg elevated on a bench. Targets adductors and lateral core — often undertrained.
    • Paused Deadlift at the Knee: Use light to moderate weight; pause for 3–5 seconds just below or at the knee. Builds strength in a critical power position.

    Advanced: Integrate with Dynamic Training

    • Use isometric overcoming contractions: push or pull against an immovable object (a loaded barbell against safety pins) with maximum effort for 5–8 seconds. This activates near-maximal motor unit recruitment and is used by strength coaches for peak force output.
    • Program functional isometrics within compound lifts — pause squats, paused bench, or dead stop deadlifts — to improve both strength and technique simultaneously. For more on compound movement programming, check out our guide on Compound Exercises: Your Full-Body Strength Shortcut.

    Common Mistakes That Sabotage Isometric Results

    Isometric training looks simple — hold still, done. But there are several ways people consistently undermine their results. Here are the most common mistakes and how to fix them.

    1. Holding your breath
    This is extremely common. When people strain against resistance, the natural tendency is to hold the breath (the Valsalva maneuver). While brief breath-holds are used in advanced strength training, sustained breath-holding during longer isometric holds significantly elevates blood pressure. Fix it: breathe slowly and consistently throughout every hold. Inhale through the nose, exhale through the mouth.

    2. Using passive posture instead of active tension
    A plank where you’re sagging through the hips or a wall sit where you’re barely activating your glutes gives you a fraction of the benefit. The muscle must be under intentional, active tension. Fix it: squeeze every muscle involved — consciously brace, activate, and generate force even when you’re not moving.

    3. Only training one joint angle
    If you always hold your plank at the same position or always do your wall sit at a shallow angle, your strength gains plateau quickly. Fix it: cycle through different joint positions. For example, vary your squat hold from 45 degrees to 90 degrees across your training week.

    4. Skipping progressive overload
    Many people hold the same 30-second plank for months and wonder why nothing changes. Isometrics need progression too. Fix it: increase hold duration, add resistance (a weight plate on your back during a plank), or reduce base support (single-leg variations). For a complete framework on advancing any training method, explore our Progressive Overload Training Guide.

    5. Ignoring recovery
    Because isometrics don’t feel as demanding as heavy lifting, people sometimes train too frequently without recovery. But the muscular and neurological demand is real. Fix it: treat isometric sessions like resistance training days — allow 24–48 hours of recovery for the targeted muscle groups.

    What to Eat to Support Isometric Training Performance

    Isometric training may not burn the same caloric load as a high-intensity circuit, but the nutritional demands for muscle recovery and performance are still significant.

    Protein: The Academy of Nutrition and Dietetics recommends 1.2–2.0 grams of protein per kilogram of body weight per day for active adults engaged in resistance training. Isometric training creates meaningful muscle protein synthesis demands, especially when training to near-failure on longer holds. Prioritize lean sources: chicken breast, eggs, Greek yogurt, lentils, tofu, and cottage cheese.

    Carbohydrates: Even low-intensity isometric sessions deplete glycogen over time, particularly during high-volume holds. A small carbohydrate-containing snack 60–90 minutes before training — like a banana with nut butter or oatmeal — supports performance without spiking blood sugar unnecessarily.

    Magnesium: This mineral supports muscle relaxation, reduces cramping, and improves sleep quality for recovery. The NIH Office of Dietary Supplements notes that many adults fall short of the recommended 320–420 mg/day. Foods rich in magnesium include almonds, black beans, spinach, pumpkin seeds, and dark chocolate.

    Hydration: Sustained muscle contractions generate heat. Even without visible sweating, you lose fluids during isometric holds. The USDA Dietary Guidelines recommend approximately 3.7 liters of total water intake daily for men and 2.7 liters for women, including water from food sources.

    What to limit: High-sodium processed foods can contribute to blood pressure elevation, which matters because isometric exercise already creates a transient blood pressure spike during effort. Keep sodium intake in check, especially if you’re using isometrics for cardiovascular health benefits.

    How Long Until You See Results — and What to Track

    Realistic expectations matter. Isometric training produces results, but the timeline depends on your baseline fitness, training frequency, and how well you progress your sessions over time.

    Weeks 1–2: You’ll notice improved body awareness and postural endurance. Holds that felt impossible at 20 seconds will become manageable at 30. This is primarily neuromuscular — your nervous system learning to recruit muscle fibers more efficiently.

    Weeks 3–6: Measurable gains in localized strength at trained angles. You may notice improved stability during dynamic movements (better squat depth, more controlled push-ups). Research from Harvard Health Publishing notes that consistent isometric training shows functional strength improvements within 4–6 weeks for most sedentary to moderately active adults.

    Weeks 6–12: Structural adaptations begin — modest but measurable improvements in muscle cross-sectional area, particularly when training at longer muscle lengths. Blood pressure reductions, if applicable, are often measurable at the 6–8 week mark based on the research referenced earlier.

    What to track:

    • Hold duration per exercise (seconds per set)
    • Number of sets completed without form breakdown
    • Resting heart rate and, if relevant, blood pressure readings
    • Subjective stability and posture improvements during daily activity
    • Performance in related dynamic exercises (e.g., squat max after regular pause squat holds)

    When to reassess: If you’ve been training consistently for 8 weeks with no progress in hold duration or functional strength, it’s time to reassess your programming. Consider adding variety in joint angles, increasing resistance, or consulting a certified personal trainer or physical therapist for individualized guidance.

    For those interested in pairing isometrics with mobility work to maximize joint function, our guide on Mobility Training for Adults provides an excellent complement to this approach.

    Frequently Asked Questions

    Is isometric training safe for people with high blood pressure?
    Isometric exercises cause a temporary spike in blood pressure during the hold itself, so people with uncontrolled hypertension should consult their physician before starting. That said, regular isometric training — particularly grip and leg-based holds — has been associated with meaningful reductions in resting blood pressure over time. If you have diagnosed hypertension, get medical clearance first and start conservatively.

    Can isometric training replace my regular strength training?
    It can supplement it powerfully, but a complete replacement isn’t ideal for most adults. Dynamic training develops strength across the full range of motion and builds more overall muscle mass. Isometrics are best used alongside dynamic training — as a plateau-breaker, rehabilitation tool, or when access to equipment is limited.

    How long should I hold each isometric exercise?
    For most adults, holds of 20–60 seconds per set are effective. Beginners should start with 15–20 seconds and build up. Advanced trainees using maximal effort overcoming isometrics (pushing against an immovable object) typically work in 5–10 second bursts. The intensity of the contraction dictates the ideal duration — maximum effort holds are short, submaximal holds are longer.

    Will isometric training help with back pain?
    For many people, yes — particularly when back pain is related to poor core endurance or muscular weakness rather than structural damage. The Mayo Clinic notes that isometric core exercises like the plank are frequently recommended in physical therapy for back pain management. However, always work with a qualified physical therapist or physician before using exercise as back pain treatment.

    Can I do isometrics every day?
    Light isometric work — like brief plank holds or dead hangs — can be done daily as part of a warm-up or movement break. But higher-intensity isometric training targeting the same muscle groups should follow the same recovery rules as resistance training: allow 24–48 hours of rest between intense sessions for those muscles.

    Conclusion

    Isometric training won’t win any dramatic highlight reels — there’s no barbell flying overhead, no dramatic drop set. But what it lacks in visual excitement, it more than makes up for in results. Stronger joints, better posture, improved blood pressure, and measurable gains in functional strength — all with minimal equipment and minimal injury risk.

    The best part? You can start today. A 20-second wall sit. A 30-second plank. A dead hang from a door frame bar. Small, still, and surprisingly powerful.

    Progress, as always, comes from consistency over perfection. Pick two or three of the exercises from this guide, commit to three sessions per week, and build from there. Still matters.


    Wellness Disclaimer: This article is for informational and educational purposes only. The content is not intended to replace professional medical, nutritional, or fitness advice. Always consult a qualified healthcare provider, registered dietitian, or certified fitness professional before starting a new health program or making significant changes to your lifestyle.

    Author Line: Content reviewed by our wellness editorial team, with references to peer-reviewed research and guidelines from leading health organizations.
  • Plyometric Training: Power, Speed & Results for Adults

    Plyometric Training: Power, Speed & Results for Adults

    You don’t have to be an athlete to train like one — and plyometrics might be the missing piece your fitness routine has been waiting for.

    Why Most Adults Overlook Plyometric Training

    Think about the last time you had to move fast — catching yourself from a fall, sprinting to grab the elevator, or lunging to catch something off a shelf. Those split-second movements require a quality most gym routines completely ignore: power.

    Plyometric training — also called "jump training" or explosive training — is built around exactly that. And while it’s commonly associated with elite athletes and NFL combine drills, the science increasingly shows it’s one of the most effective tools adults of any fitness level can use to build strength, burn calories, and protect long-term joint and bone health.

    Yet most people over 30 avoid it entirely. Maybe it looks too intense. Maybe they assume their knees can’t handle it. Maybe they just don’t know where to start.

    This guide is here to change that. You’ll learn what plyometric training actually is, what the research says about its benefits, how to start safely — whether you’re a complete beginner or someone ready to level up — and what mistakes to avoid along the way.

    No Olympic experience required.

    Why Plyometric Training Matters More Than You Think

    Here’s something most gym-goers don’t know: your muscles have two speeds. There’s the slow, controlled force you use during a typical squat or bicep curl — and then there’s the explosive, rapid-fire force that fires during a jump, sprint, or quick change of direction.

    That second speed — called rate of force development (RFD) — naturally declines with age if you don’t specifically train it. According to research published in the Journal of Strength and Conditioning Research, explosive power tends to decrease faster than general strength as adults age, often beginning as early as the mid-30s.

    This matters for more than athletic performance. Explosive leg power is strongly linked to fall prevention, functional independence, and even metabolic health. A study supported by the National Institute on Aging found that lower-body power — not just strength — was one of the strongest predictors of mobility and quality of life in aging adults.

    Plyometric training directly targets this quality. By training your muscles to generate force quickly, you’re building a physical reserve that pays dividends in everyday movement, injury prevention, and body composition.

    The American College of Sports Medicine (ACSM) includes power training as a recommended component of a well-rounded adult fitness program — not just for athletes, but for general health and functional fitness.

    The Science Behind Plyometrics: How It Actually Works

    Plyometric exercises work through what’s called the stretch-shortening cycle (SSC). Here’s the simplified version: when a muscle rapidly lengthens (like when you sink into a squat before a jump), it stores elastic energy — similar to a rubber band being pulled back. When it then quickly contracts (the jump itself), it releases that stored energy with added force.

    The result is more power output than a slow, deliberate muscle contraction alone could generate.

    Over time, consistent plyometric training improves the efficiency of this cycle. Your neuromuscular system — the connection between your brain and your muscles — learns to recruit more muscle fibers, faster. This is why plyometrics can improve speed, agility, and overall athletic ability even without adding significant muscle mass.

    Busting a common myth: Many adults assume plyometrics are too hard on the joints. But research tells a more nuanced story. A 2020 review in the British Journal of Sports Medicine found that progressive, properly loaded plyometric training can actually strengthen tendons and improve cartilage health when introduced gradually. The key word is progressive — the problem isn’t plyometrics, it’s starting too hard, too fast.

    Low-impact plyometric variations also exist, making this training style accessible even for those with mild knee or hip concerns. More on that below.

    How to Get Started with Plyometric Training

    Before anything else: a foundation of basic strength matters. If you’re not yet comfortable with bodyweight squats, lunges, and push-ups performed with good form, spend 4-6 weeks building that base first. You can explore compound exercises for full-body strength as a solid starting point.

    Once you’re ready, here’s how to structure your introduction to plyometrics:

    Beginner Level (Weeks 1-4)

    • Box step-ups with a power emphasis: Drive off the standing leg explosively instead of stepping slowly. Great for building hip and glute power without high impact.
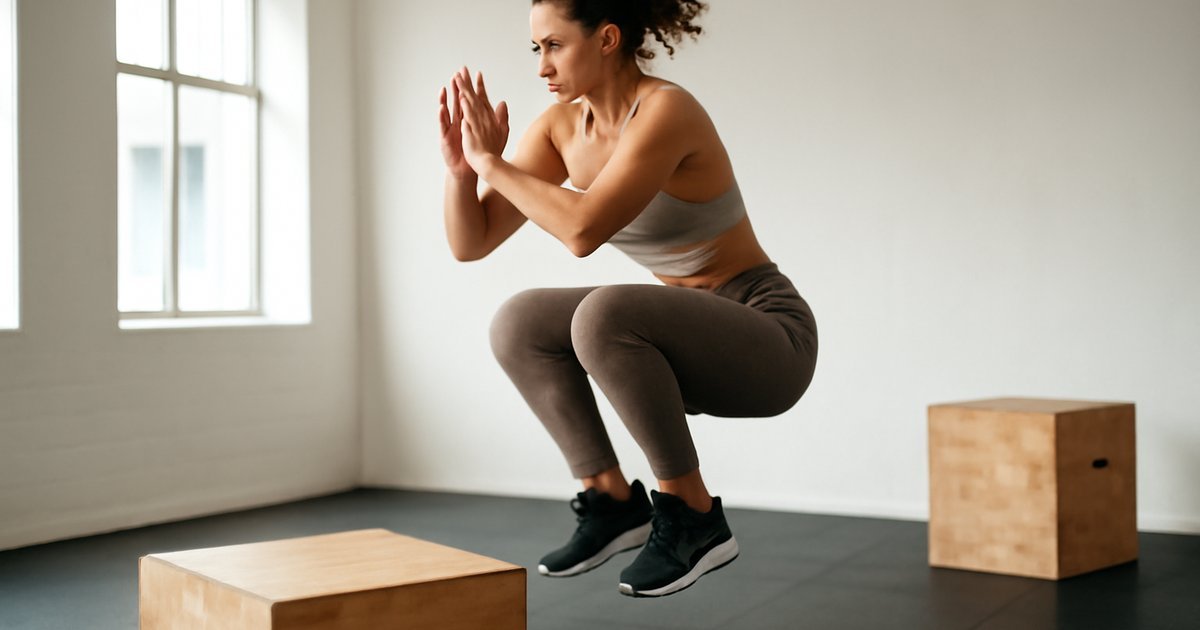
    • Squat jumps (low amplitude): Drop only slightly into the squat and jump just a few inches off the ground. Focus on landing softly, absorbing force through the hips and knees.
    • Standing long jump: Jump forward and stick the landing. This teaches deceleration — critical for joint safety.
    • Lateral shuffles: Quick, side-to-side steps that train lateral power and coordination.

    Volume: 2 days per week, 2-3 sets of 6-8 reps per exercise. Allow 48 hours of recovery between sessions.

    Intermediate Level (After 4-6 Weeks)

    • Box jumps (12-18 inch box): Step down — don’t jump down — to minimize eccentric stress on your joints.
    • Broad jumps: Maximize horizontal distance and stick each landing for 2-3 seconds before resetting.
    • Split jumps (scissor lunges): Alternate legs mid-air. Excellent for unilateral power and hip stability.
    • Lateral bounds: Single-leg jumps side to side, landing on the opposite foot.

    Volume: 2-3 days per week, 3 sets of 8-10 reps. Prioritize quality over quantity — plyometrics should never be done to fatigue.

    Advanced Level

    • Depth jumps, hurdle hops, single-leg box jumps, and reactive drills — these are best introduced with guidance from a certified strength and conditioning coach.

    Pairing plyometric work with a smart overall training plan is key. If you haven’t yet built a consistent fitness routine, check out this guide on building a sustainable workout routine before adding explosive training to the mix.

    Common Mistakes That Sabotage Your Results

    Plyometrics are highly effective — but also easy to get wrong. Here are the most frequent errors adults make, and how to course-correct:

    1. Skipping the landing mechanics. This is the biggest one. Many people focus entirely on how high or how far they jump — and completely ignore the landing. Poor landings (knees caving in, torso collapsing forward, heels hitting first) are where most plyometric injuries happen. Fix: Practice landing drills in isolation. Step off a low box and absorb the impact — knees tracking over toes, soft bend in hips and knees, chest up.

    2. Doing plyometrics when fatigued. Unlike steady-state cardio, plyometrics require your nervous system to be fresh. Doing box jumps at the end of a long strength session — or on poor sleep — dramatically increases injury risk and reduces power output. Fix: Always do plyometric work at the beginning of your training session, after a proper warm-up but before other heavy lifting.

    3. Progressing too fast, too soon. Enthusiasm is great — but jumping from beginner squat jumps to depth jumps in two weeks is a recipe for tendon overuse injuries. Fix: Follow the 10% rule — don’t increase intensity, volume, or height by more than 10% per week. Your tendons adapt more slowly than your muscles.

    4. Neglecting the warm-up. Cold muscles and connective tissue don’t absorb impact efficiently. Fix: Spend 8-10 minutes on dynamic warm-up movements — leg swings, high knees, hip circles, and light jogging — before any plyometric session. For a full mobility and warm-up approach, this guide to mobility training is worth bookmarking.

    What to Eat to Support Plyometric Training

    Explosive training has specific nutritional demands that differ somewhat from traditional endurance or strength training.

    Carbohydrates are your primary fuel source. Plyometrics rely heavily on the phosphocreatine and glycolytic energy systems — both of which are fueled by carbohydrates. The Academy of Nutrition and Dietetics recommends that adults engaged in high-intensity training consume 45-65% of daily calories from carbohydrates, with a pre-workout meal prioritizing easily digestible carbs 1-2 hours before training.

    • Good pre-session options: oatmeal with banana, whole grain toast with peanut butter, or a small portion of brown rice with lean protein.

    Protein supports muscle repair and tendon recovery. Research consistently supports 0.7-1.0 grams of protein per pound of body weight for active adults engaged in resistance and power training. Prioritize high-quality sources: chicken breast, eggs, Greek yogurt, salmon, legumes, or cottage cheese.

    Don’t skip post-workout nutrition. The 30-60 minute window after explosive training is ideal for a protein-carbohydrate combination to support glycogen replenishment and muscle protein synthesis. A simple option: a Greek yogurt parfait with berries, or a protein shake with a banana.

    Collagen and vitamin C for tendon support. Emerging research — including a study published in the American Journal of Clinical Nutrition — suggests that consuming 15 grams of collagen peptides with vitamin C approximately 30-60 minutes before exercise may support connective tissue adaptation. Results vary, and this remains an area of active research.

    Stay hydrated. Even mild dehydration (as little as 2% body weight) can impair neuromuscular performance, which directly affects your power output and reaction time during explosive movements.

    How Long Until You See Results — and What to Track

    Plyometric training produces results on multiple timelines, and it helps to know what to expect so you don’t abandon ship too early.

    Weeks 1-2: You’ll notice improved coordination and body awareness during explosive movements. These are neurological adaptations — your brain is learning to recruit muscle fibers more efficiently. Don’t expect dramatic physical changes yet.

    Weeks 3-6: Noticeable improvements in jump height, landing stability, and overall quickness. Many adults also begin feeling more energized in daily movement — stairs feel easier, posture improves, and workouts feel more dynamic.

    Weeks 6-12: Measurable changes in lower-body power, body composition (particularly in combination with proper nutrition), and cardiovascular conditioning. Research published in the Journal of Sports Science and Medicine found significant improvements in vertical jump performance and sprint speed in non-athlete adults after just 8 weeks of twice-weekly plyometric training.

    What to track:

    • Standing vertical jump height (measure monthly)
    • Standing broad jump distance
    • How you feel on stairs, during sports, or during quick movements in daily life
    • Recovery time between sets (should improve over weeks)
    • Body weight and circumference measurements if body composition is a goal

    When to reassess or seek professional guidance: If you experience persistent joint pain (not to be confused with normal muscle soreness), sharp discomfort during landings, or pain that lingers more than 48 hours, stop and consult a sports medicine physician or physical therapist before continuing.

    Frequently Asked Questions

    Is plyometric training safe for adults over 40?
    Yes — with appropriate progression. Adults over 40 may need a longer warm-up, more recovery time between sessions, and a more gradual introduction to impact. Starting with low-amplitude variations and building over 6-8 weeks is key. A 2019 study in the Journal of Aging and Physical Activity found that older adults who completed 12 weeks of modified plyometric training improved power output and balance without significant injury rates.

    How many days per week should I do plyometrics?
    For most adults, 2-3 days per week is optimal, with at least 48 hours between sessions. Your tendons and nervous system need more recovery time than your cardiovascular system does. More frequent training doesn’t accelerate results — it tends to increase injury risk instead.

    Can I do plyometrics if I have bad knees?
    It depends on the cause of your knee issues. Mild patellofemoral discomfort or general "achy knees" may actually improve with properly progressed plyometric training due to improved neuromuscular control and tendon strengthening. However, if you have a diagnosed condition — like severe osteoarthritis or a recent ligament injury — consult a physical therapist or orthopedic specialist before starting. Low-impact variations (lateral shuffles, banded jumps in water, step-up variations) may still be appropriate.

    Do I need equipment to do plyometrics at home?
    Not at all. Many effective plyometric movements — squat jumps, broad jumps, lateral bounds, split jumps, and skater hops — require nothing but your body and a safe, non-slip surface. If you want to progress further, a 12-18 inch plyo box is a worthwhile investment, but it’s absolutely not required to get started.

    Will plyometrics help me lose weight?
    Plyometric training is a high-intensity activity that can contribute meaningfully to calorie burn and body composition improvement — but it’s not a standalone solution. When combined with consistent nutrition habits and overall training volume, it can support fat loss while preserving or increasing lean muscle mass. Body composition changes typically become noticeable after 8-12 weeks of consistent effort paired with adequate protein intake.

    Start Where You Are — Then Build

    Plyometric training isn’t just for athletes, young adults, or people in peak physical condition. It’s a scientifically validated approach to building power, protecting your joints, improving body composition, and moving better in everyday life — all things that matter deeply as you move through your 30s, 40s, and 50s.

    You don’t need to do box jumps on day one. You just need to start somewhere. A few squat jumps, a lateral shuffle, a power step-up — done consistently and progressively — can completely change how your body feels and functions over time.

    The best version of explosive training isn’t the most dramatic. It’s the one you build carefully, sustain over months, and actually enjoy.

    Pick one beginner movement from this guide and add it to your next workout. That’s your only goal today.


    Wellness Disclaimer: This article is for informational and educational purposes only. The content is not intended to replace professional medical, nutritional, or fitness advice. Always consult a qualified healthcare provider, registered dietitian, or certified fitness professional before starting a new health program or making significant changes to your lifestyle.

    Author Line: Content reviewed by our wellness editorial team, with references to peer-reviewed research and guidelines from leading health organizations.
  • Resistance Band Training: Build Strength Anywhere

    Resistance Band Training: Build Strength Anywhere

    You don’t need a gym membership, expensive equipment, or hours of free time to build real, lasting strength — and resistance bands might be the most underestimated tool in modern fitness.

    Why Resistance Band Training Matters More Than You Think

    Most people assume that serious strength training requires barbells, dumbbells, and a gym locker. But here’s the thing: a set of resistance bands that fits in your gym bag can deliver a workout that challenges your muscles just as effectively — and in some cases, even more safely — than traditional free weights.

    According to the American College of Sports Medicine (ACSM), resistance training is one of the most important forms of exercise for adults, associated with improved muscle mass, metabolic health, bone density, and functional independence as we age. The problem? Millions of adults skip it entirely because access feels complicated.

    That’s where resistance bands change the game. Research published in the Journal of Human Kinetics found that elastic resistance training produces muscle strength and mass gains comparable to those achieved with conventional weight training. Same results, lower barrier to entry.

    Whether you’re a complete beginner or someone returning to fitness after a break, resistance band training offers a practical, joint-friendly, and genuinely effective path to building strength — on your schedule, in your living room, hotel room, or backyard.

    The Science Behind Resistance Bands: How They Actually Work

    Understanding why resistance bands work so well starts with a concept called variable resistance. Unlike dumbbells or barbells — which provide a constant load throughout a movement — resistance bands increase tension as they stretch. This means your muscles face the greatest challenge at the peak of contraction, exactly where they’re strongest and most capable of handling load.

    This progressive tension mirrors the natural strength curve of your muscles, which is one reason bands feel different (and sometimes harder) than free weights at equivalent resistance levels.

    A 2019 meta-analysis published in the SAGE Open Medicine journal reviewed 23 studies and concluded that elastic resistance training is equally effective as conventional resistance training for improving strength in both younger and older adults. For older populations especially, the lower compressive joint forces make bands a particularly smart option.

    The common myth to bust here: “Bands are only for warm-ups or physical therapy.” In reality, when used with proper tension and progressive loading, resistance bands can challenge even experienced athletes. Powerlifters and elite coaches have been using them for decades to build explosive strength and overcome sticking points.

    Bands also engage your stabilizer muscles more actively than machines — because there’s no fixed path of motion, your body has to work harder to control the movement. That translates into better real-world functional strength. For a deeper understanding of how progressive challenge drives results, check out our guide on Progressive Overload: The Key to Never-Ending Fitness Gains.

    How to Get Started with Resistance Band Training

    Getting started is simpler than most people expect. Here’s a clear, step-by-step path organized by experience level.

    Step 1: Choose the Right Bands

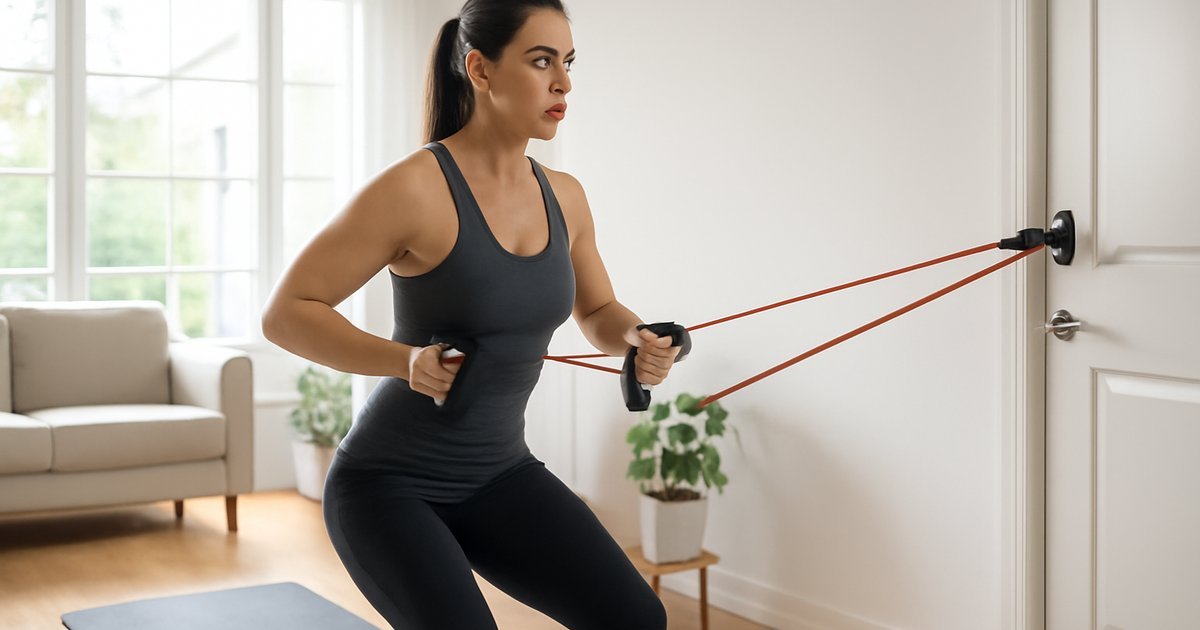
    Resistance bands come in several formats — loop bands, tube bands with handles, and therapy bands (flat sheets). For a full-body training program, a set of tube bands with handles (light, medium, and heavy) or a set of loop bands in varying resistances gives you the most versatility.

    As a beginner, start lighter than you think you need. You can always add resistance — building proper form first protects you from injury and sets you up for long-term progress.

    Step 2: Master These Foundational Movements

    Start with these six exercises that cover your entire body:

    • Banded Squat — step on the band, hold handles at shoulder height, squat to parallel (lower body)
    • Banded Deadlift — hinge at the hips with band under feet for posterior chain strength
    • Banded Chest Press — anchor band behind you, press forward at chest height (chest and triceps)
    • Banded Row — anchor at a low point, row toward your torso for upper back and biceps
    • Banded Overhead Press — step on band, press overhead for shoulders
    • Pallof Press — anchor at chest height, press straight out to challenge core stability

    Beginner routine: 2-3 sets of 12-15 reps per exercise, 3 days per week with at least one rest day between sessions.

    Intermediate option: Increase band tension, slow down the eccentric (lowering) phase to 3-4 seconds, or add supersets for efficiency.

    Advanced option: Combine bands with bodyweight movements (banded push-ups, banded pull-ups), add unilateral exercises (single-leg deadlifts, single-arm rows), and implement periodization — varying volume and intensity week over week. For a structured approach to long-term programming, our article on Build Your Sustainable Workout Routine: A Lifelong Guide walks you through exactly how to do that.

    Common Mistakes That Sabotage Your Results

    Resistance band training looks simple — and in many ways it is. But a few common errors can quietly stall your progress or increase injury risk.

    Mistake #1: Using too little resistance.
    This is the most frequent issue, especially for people who underestimate bands compared to traditional weights. If you can complete 15 reps without any real challenge in the last 3-4 repetitions, the band is too light. Progressive overload applies to bands just as it does to barbells — you need to consistently challenge the muscle for it to adapt and grow stronger.

    Mistake #2: Letting the band snap back uncontrolled.
    The eccentric phase — the return to the starting position — is where a significant portion of muscle growth is stimulated. Letting the band pull you back quickly means you’re skipping half the work. Control the return movement deliberately. This is where gains are often made, not lost.

    Mistake #3: Anchoring improperly.
    Using a door anchor that isn’t secure, wrapping a band around a sharp edge, or anchoring at the wrong height for the exercise can compromise both safety and movement mechanics. Always check that your anchor point is stable before loading the band with full force. Door anchors should be placed on the hinge side and tested before each set.

    Mistake #4: Ignoring full range of motion.
    Because bands feel lighter at the start of a movement, people often rush through the beginning and only work the end range where tension peaks. Moving through the full range — from full extension to full contraction — ensures the whole muscle is being trained and supports flexibility alongside strength.

    Mistake #5: Never replacing worn bands.
    Resistance bands degrade over time, especially with regular use. A band that’s fraying, discolored, or losing elasticity should be retired. Snapped bands during a workout can cause real injury. Inspect bands before each session and replace them every 6-12 months depending on use frequency.

    What to Pair with Resistance Band Training for Best Results

    Bands are incredibly effective on their own, but pairing them with the right nutrition and complementary movement habits amplifies what they can do.

    Protein intake: According to the Academy of Nutrition and Dietetics, adults engaged in regular resistance training benefit from consuming 1.2 to 1.7 grams of protein per kilogram of body weight per day. This supports muscle repair and growth following training sessions. Practical sources include eggs, Greek yogurt, lean poultry, legumes, and cottage cheese.

    Hydration: Even mild dehydration (as little as 1-2% of body weight in fluid loss) has been shown in research from the American College of Sports Medicine to impair muscular endurance and strength output. Aim for at least half your body weight in ounces of water daily — more if you’re training in heat.

    Recovery and mobility: Strength training without adequate recovery is counterproductive. The USDA Physical Activity Guidelines recommend that adults include at least two days of muscle-strengthening activity per week — but recovery days between those sessions are just as important. Light walking, stretching, and sleep are the underrated pillars of any resistance training plan.

    Pairing your resistance training with a solid mobility practice can also help you move better during exercises and reduce injury risk over time. Our Complete Guide to Mobility Training is a great complement to any band-based strength routine.

    How Long Until You See Results — and What to Track

    One of the most common questions: "How long before I actually feel a difference?"

    Here’s an honest, research-grounded answer: most people notice improvements in muscular endurance and energy within 2-3 weeks of consistent training. Visible changes in muscle tone and strength typically begin to emerge between 4 and 8 weeks — depending on training frequency, intensity, nutrition, sleep quality, and your individual starting point.

    Harvard Health Publishing notes that neurological adaptations (your nervous system learning to recruit muscle fibers more efficiently) are responsible for the initial strength gains in the first 4 weeks. Actual muscle hypertrophy — physical growth of muscle tissue — becomes more prominent after that initial adaptation period.

    What to track for progress:

    • Reps and resistance level — can you complete more reps or use a heavier band this week vs. last week?
    • Energy and recovery — are workouts feeling less exhausting over time?
    • Body measurements — waist, hips, arms — more reliable than scale weight for tracking body composition shifts
    • Functional benchmarks — can you carry groceries, climb stairs, or play with your kids without fatigue more easily?

    Results vary significantly based on age, hormonal status, training history, and consistency. If you’ve been training consistently for 8-12 weeks with proper nutrition and sleep and aren’t seeing any progress, it may be time to consult a certified personal trainer or a registered dietitian to assess what might be missing.

    Frequently Asked Questions About Resistance Band Training

    Can resistance bands actually build muscle, or are they only good for toning?
    "Toning" is largely a fitness industry myth — what most people want is a combination of reduced body fat and increased muscle definition. Resistance bands absolutely can build muscle, provided you’re using adequate tension and applying progressive overload over time. The research is clear: elastic resistance produces similar muscle and strength gains as free weights. The key word is consistent progressive challenge.

    Are resistance bands safe for people with joint pain or arthritis?
    Generally, yes — and this is one of the biggest advantages of bands over heavy free weights. The lower compressive forces on joints make them a popular recommendation in physical therapy and rehabilitation. That said, if you have a diagnosed joint condition, always consult your physician or a physical therapist before beginning any new exercise program. They may recommend specific modifications.

    How many days per week should I train with resistance bands?
    For most adults, 3 to 4 days per week is an effective and sustainable frequency. The ACSM recommends at least two days per week of muscle-strengthening activity for general health. If you’re training full-body each session, include at least one rest or active recovery day between sessions to allow muscles to repair and grow.

    Do I need to combine bands with other equipment?
    Not at all. A complete, effective training program can be built entirely around resistance bands. However, if you have access to bodyweight exercises (push-ups, pull-ups, dips), combining them with bands adds useful variety and can address certain muscle groups more effectively. Bands pair especially well with compound movement patterns that train multiple muscle groups at once.

    What’s the best way to progress when a band starts feeling too easy?
    You have several options: move up to a higher resistance band, slow down your reps (especially the eccentric phase), decrease rest time between sets, add more sets or reps, or shift to unilateral (single-limb) variations of the same exercise. All of these apply the principle of progressive overload — the foundation of any lasting strength program.

    Start Where You Are — It’s Enough

    You don’t need to overhaul your entire life to start building real strength. You just need a few bands, 30 minutes three times a week, and the willingness to show up consistently.

    Resistance band training isn’t a compromise — it’s a genuinely powerful training tool that has been validated by research, used by elite athletes, and recommended by rehabilitation specialists worldwide. It fits your schedule, respects your joints, and travels anywhere you do.

    The best workout is always the one you’ll actually do. And the best place to start is exactly where you are right now.

    Pick up a set of bands this week, run through those six foundational movements, and give yourself 30 days of consistent effort. The difference it makes might surprise you.


    Wellness Disclaimer: This article is for informational and educational purposes only. The content is not intended to replace professional medical, nutritional, or fitness advice. Always consult a qualified healthcare provider, registered dietitian, or certified fitness professional before starting a new health program or making significant changes to your lifestyle.

    Content reviewed by our wellness editorial team, with references to peer-reviewed research and guidelines from leading health organizations including the American College of Sports Medicine, Academy of Nutrition and Dietetics, Harvard Health Publishing, and the USDA Physical Activity Guidelines.

  • Functional Fitness: Train Your Body for Real Life

    Functional Fitness: Train Your Body for Real Life

    Functional Fitness: Train Your Body for Real Life

    Most people work out to look better — but the real game-changer is training to move better every single day.

    Picture this: you’re carrying groceries up three flights of stairs, and halfway up, your lower back tightens up. Or you reach across the car seat for your bag and feel a pull in your shoulder. Or you simply squat down to pick something up off the floor and your knees protest the entire way.

    These aren’t signs that you’re out of shape in the traditional gym sense. They’re signs that your fitness routine — however dedicated you are — might not be preparing your body for the movements that actually matter most.

    That’s exactly where functional fitness training comes in. Unlike isolated machine exercises that target one muscle at a time, functional fitness builds the kind of strength, stability, and coordination your body uses in real-life situations. In this guide, you’ll learn what functional fitness really means, what the research says about it, how to start (no matter your current fitness level), and the mistakes that keep most people from seeing results.

    Why Functional Fitness Matters More Than You Think

    Here’s a striking reality: according to the American College of Sports Medicine (ACSM), musculoskeletal injuries — many of which are preventable — are among the most common reasons adults miss work, reduce activity levels, and experience a declining quality of life as they age. A significant portion of those injuries happen during everyday activities, not intense exercise.

    Functional fitness trains the movement patterns your body relies on constantly: pushing, pulling, hinging, squatting, rotating, and carrying. When these patterns are strong and coordinated, your body handles daily demands with less strain and far fewer injuries.

    Research published in the Journal of Strength and Conditioning Research found that functional movement training significantly improved balance, mobility, and lower-body strength in adults across age groups — with particularly notable benefits in those over 40. That matters because after age 30, adults naturally begin losing muscle mass and neuromuscular coordination at a rate of roughly 1% per year if left untrained.

    The payoff isn’t just physical. Functional fitness connects directly to your daily confidence — moving through your day without pain, keeping up with your kids, lifting without wincing, and aging with strength rather than limitation.

    The Science Behind Functional Fitness and How It Actually Works

    Functional fitness is rooted in one key idea: your body is designed to move in integrated patterns, not isolated muscle contractions. Traditional gym machines — like the leg extension or seated chest press — isolate individual muscles in controlled planes of motion. That has its place. But real-world movement is almost always multi-joint, multi-plane, and requires your core, stabilizers, and primary movers to all coordinate at once.

    When you perform a deadlift, for example, your glutes, hamstrings, spinal erectors, lats, and core all activate simultaneously. That mirrors what happens when you lift a heavy box off the floor. A leg extension machine doesn’t replicate that integration.

    One common myth: functional fitness means avoiding weights entirely and just doing bodyweight or balance work. Not true. Functional training can and often should include barbells, kettlebells, dumbbells, and resistance bands. The defining factor isn’t the equipment — it’s whether the movement pattern translates to real-life function.

    A study published in JAMA Internal Medicine reinforced this point, showing that resistance training focused on compound, multi-joint movements produced superior improvements in physical performance and activities of daily living compared to isolated machine-based training — particularly in adults over 50.

    Functional fitness also places a strong emphasis on core stability, which the Mayo Clinic defines as the coordinated activation of the muscles surrounding the spine and pelvis — not just the six-pack muscles. A stable core is the foundation for nearly every movement your body performs.

    How to Get Started with Functional Fitness

    The beauty of functional training is that it scales. You can start with zero equipment and no gym membership, then progress steadily as your body adapts.

    The 6 foundational movement patterns to train:

    1. Squat — Sit-to-stand, bodyweight squat, goblet squat, barbell back squat
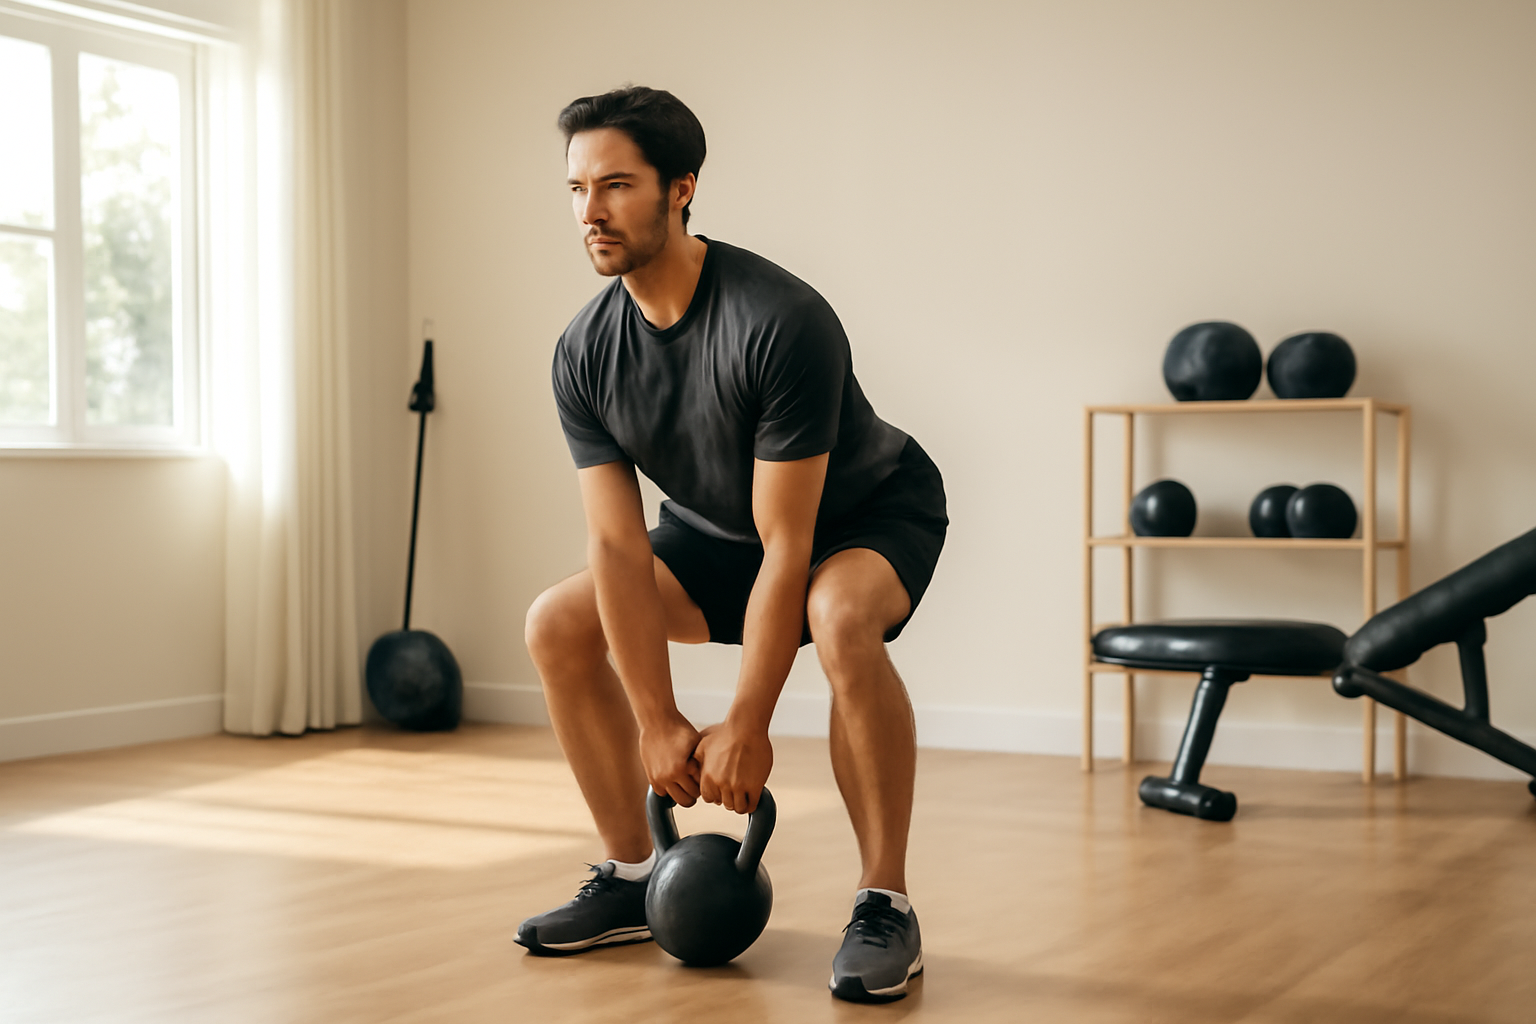
    2. Hinge — Romanian deadlift, kettlebell swing, conventional deadlift
    3. Push — Push-up, dumbbell press, overhead press
    4. Pull — Resistance band row, dumbbell row, pull-up or lat pulldown
    5. Carry — Farmer’s carry with dumbbells or kettlebells
    6. Rotate / Anti-rotate — Pallof press, woodchop, cable rotation

    Beginner entry point (2-3 days per week):

    • Bodyweight squats — 3 sets of 10
    • Glute bridges — 3 sets of 12 (hinge pattern foundation)
    • Push-ups (on knees if needed) — 3 sets of 8-10
    • Resistance band rows — 3 sets of 12
    • Farmer’s carry with light dumbbells — 3 sets of 30 seconds
    • Dead bug (core anti-rotation) — 3 sets of 8 per side

    Intermediate option (3-4 days per week): Add goblet squats, single-leg Romanian deadlifts, dumbbell overhead press, and renegade rows. Increase load gradually — the ACSM recommends increasing resistance by no more than 10% per week to reduce injury risk.

    Advanced progression: Barbell deadlifts, barbell squats, Turkish get-ups, and loaded carries with heavier implements. Consider working with a certified strength and conditioning specialist (CSCS) to fine-tune form at heavier loads.

    If you’re building your routine at home, check out this resource on Home Workout Plans: Get Fit Without the Gym for equipment-free approaches that integrate beautifully with functional training principles.

    Common Mistakes That Sabotage Functional Fitness Results

    Even motivated adults consistently make a handful of errors when starting functional fitness. Recognizing them upfront can save you months of frustration.

    Mistake #1: Skipping the mobility work
    Functional fitness demands a baseline of mobility to perform movements safely. Jumping into loaded squats or hinges when your hips and ankles are tight is a setup for compensation patterns that lead to injury. The fix: spend 5-10 minutes before each session on targeted mobility work — hip 90/90 stretches, ankle circles, thoracic rotations. Our Stretching Routines: Flexibility, Recovery and Daily Mobility guide is a perfect companion here.

    Mistake #2: Prioritizing load over movement quality
    Adding weight before your movement pattern is solid is one of the fastest routes to injury. A wobbly squat with 135 lbs is far less valuable — and far more dangerous — than a crisp, controlled bodyweight squat. The fix: film yourself from the side occasionally, or work with a coach even for a session or two to get baseline form feedback.

    Mistake #3: Neglecting the carry pattern
    The farmer’s carry is arguably the most underrated functional exercise in existence. It trains grip strength, core stability, shoulder positioning, and gait — all at once. Yet most people never do it. The fix: add farmer’s carries to every session. Even 20-30 seconds with moderate dumbbells delivers serious functional carry-over to daily life.

    Mistake #4: Training only in one plane of motion
    Real life happens in all directions — sideways, diagonally, rotationally. Most gym routines only train forward-back movements. The fix: include lateral band walks, side lunges, rotational cable exercises, or even simple medicine ball throws to train your body in multiple planes.

    Mistake #5: Ignoring single-leg and single-arm work
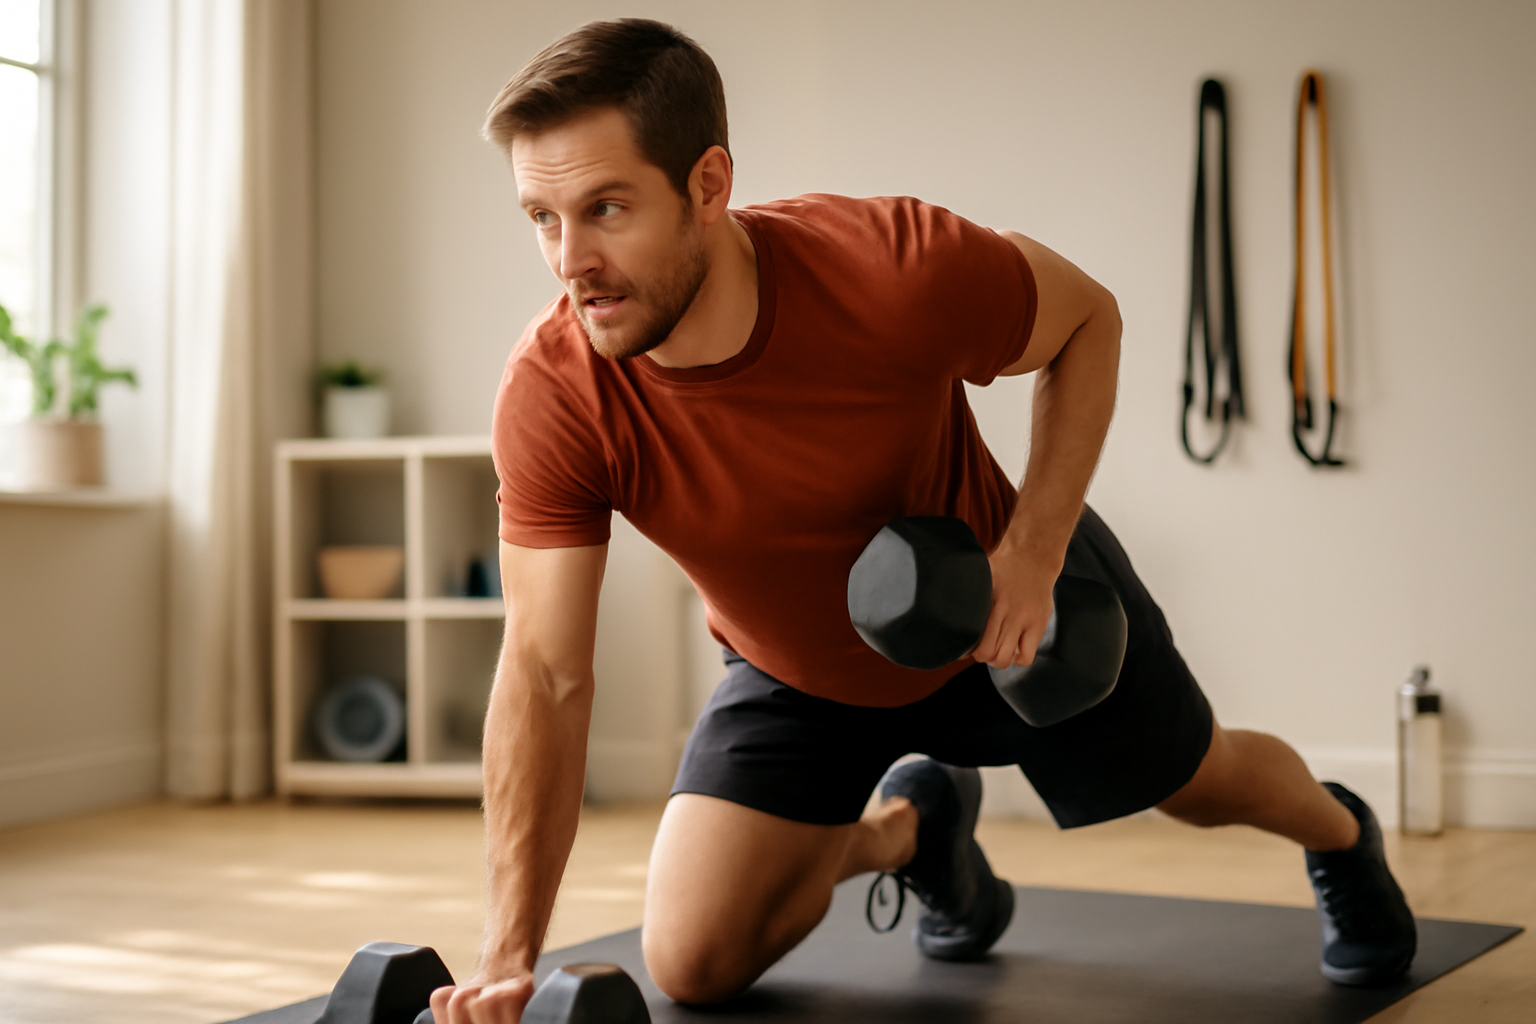
    Your body almost never uses both limbs equally at the same time in real life. Walking, climbing stairs, reaching — these are unilateral movements. The fix: integrate split squats, single-leg deadlifts, and single-arm rows into your training at least once per week.

    What to Eat to Support Functional Fitness Training

    Functional fitness places real demands on your muscles, joints, and nervous system. Nutrition isn’t optional — it’s a core part of the result.

    Protein: The Academy of Nutrition and Dietetics recommends 1.2 to 2.0 grams of protein per kilogram of body weight per day for active adults. For a 165-lb adult, that’s roughly 90-150g of protein daily. Prioritize lean sources: chicken, turkey, fish, eggs, Greek yogurt, legumes, and cottage cheese.

    Carbohydrates: Functional training sessions — especially those incorporating compound lifts and carries — are glycogen-demanding. Don’t under-fuel. The USDA Dietary Guidelines recommend that 45-65% of daily calories come from carbohydrates for active individuals. Opt for whole grains, sweet potatoes, oats, and fruit.

    Anti-inflammatory foods: Joint health is central to functional training longevity. Harvard Health Publishing highlights omega-3 fatty acids (found in salmon, sardines, walnuts, and flaxseed) and polyphenol-rich foods (berries, leafy greens, olive oil) as key supporters of reducing systemic inflammation that can slow recovery and increase injury risk.

    Hydration: Even mild dehydration — as little as 2% of body weight — can impair muscle coordination and increase perceived exertion, according to research cited by the NIH. Aim for at least half your body weight in ounces of water daily, more on training days.

    What to limit: Ultra-processed foods high in refined sugars and trans fats contribute to chronic inflammation that undermines recovery. The AHA recommends keeping added sugar under 36g/day for men and 25g/day for women.

    How Long Until You See Results — and What to Track

    Results from functional fitness training are different from traditional fitness metrics — and that’s actually a good thing. You’re not just watching a number on a scale or a bicep measurement. You’re tracking how you function.

    Weeks 1-3: You’ll likely notice improved body awareness — better posture, less lower back tightness after sitting, smoother movement in daily tasks. This is neuromuscular adaptation: your nervous system learning to recruit muscles more efficiently. Don’t be discouraged if the mirror hasn’t changed yet.

    Weeks 4-8: Strength gains become measurable. You’ll be able to carry more, squat deeper, and hinge without pain. Research published in the Journal of Aging and Physical Activity found that significant improvements in functional movement scores occur within 6-8 weeks of consistent training in previously sedentary adults.

    Months 3-6: Body composition changes become visible. Lean muscle develops, posture improves noticeably, and activities of daily living feel dramatically easier. This is also when injury rates typically drop in people who train consistently.

    What to track:

    • Movement quality (how does your squat feel vs. week 1?)
    • Load progression (are you lifting more with the same or better form?)
    • Daily energy levels and recovery speed
    • Pain or discomfort during daily activities (ideally, this decreases)
    • Balance and stability (can you stand on one leg for 30+ seconds?)

    If you’re also interested in how functional strength training intersects with body composition goals, the article on Body Recomposition: Lose Fat and Build Muscle Together is a valuable next read.

    When to reassess: If you’re not seeing any improvement in movement quality or strength after 6-8 weeks, consider consulting a certified personal trainer or physical therapist to evaluate your movement baseline and programming.

    Frequently Asked Questions

    Is functional fitness better than traditional weight training?
    It’s not an either/or. Functional fitness prioritizes movement patterns over isolated muscles, which offers superior carry-over to daily life. That said, traditional strength training has immense value — especially for building foundational muscle mass. The most effective approach for most adults combines both. Results vary based on your goals, age, and starting point.

    Can older adults safely do functional fitness training?
    Absolutely — and in many ways, older adults stand to benefit most. The ACSM specifically recommends functional movement training as a priority for adults over 50 to preserve independence, reduce fall risk, and maintain quality of life. Start at an appropriate intensity and progress gradually. Working with a professional familiar with older adult fitness is always a smart move.

    How many days per week should I do functional fitness training?
    Two to three days per week is an effective and sustainable starting point, with at least one rest or active recovery day between sessions. As you progress, three to four days per week allows for greater adaptation. Overtraining is a real risk — more is not always better, and recovery is where adaptation actually happens.

    Do I need special equipment for functional fitness?
    No. Many of the most effective functional exercises — squats, lunges, push-ups, planks, carries — can be done with minimal or no equipment. Resistance bands, a pair of dumbbells, and a kettlebell or two cover a huge range of functional training options. A full commercial gym is helpful but absolutely not required.

    Can functional fitness help with lower back pain?
    For many people, yes — but with an important caveat. Strengthening the posterior chain (glutes, hamstrings, spinal erectors) and improving core stability are well-established strategies for reducing non-specific lower back pain, according to research from Harvard Health Publishing and the NIH. However, if you have a diagnosed spinal condition, always consult your physician or physical therapist before starting a new program.

    Start Moving Like Your Life Depends On It — Because It Does

    Functional fitness isn’t a trend or a gym marketing concept. It’s the most honest form of training there is: preparing your body to handle the life you actually live, not just the one you live in a gym.

    You don’t need to overhaul everything at once. Pick one movement pattern — start with a squat or a hinge — and do it well, three times a week. Add a carry. Work on your core stability. Over weeks and months, the cumulative effect is real, measurable, and deeply practical.

    Small, consistent steps built on good movement beat sporadic intensity every single time. Your body is built to move. Give it the training it was designed for.

    This article is for informational and educational purposes only. The content is not intended to replace professional medical, nutritional, or fitness advice. Always consult a qualified healthcare provider, registered dietitian, or certified fitness professional before starting a new health program or making significant changes to your lifestyle.

    Content reviewed by our wellness editorial team, with references to peer-reviewed research and guidelines from leading health organizations.
  • Body Recomposition: Lose Fat and Build Muscle Together

    Body Recomposition: Lose Fat and Build Muscle Together

    Body Recomposition: Lose Fat and Build Muscle Together

    You don't always have to choose between getting leaner and getting stronger — here's what the science actually says.

    Most people walk into a gym with one of two goals: lose fat or build muscle. Trainers, fitness apps, and even well-meaning friends usually treat these as separate journeys — bulk first, cut later. But what if you're not chasing extremes? What if you just want to look and feel better, move stronger, and shed the extra weight that crept on over the last few years?

    That's where body recomposition comes in — and it's more achievable than most people realize.

    Body recomposition refers to the process of simultaneously reducing body fat and increasing lean muscle mass. It sounds like it defies basic biology (aren't those two opposite goals?), but research shows it's entirely possible — especially for certain groups of people.

    In this guide, you'll learn what body recomposition really means, who benefits most, how to structure your training and nutrition, and what realistic timelines look like. No extreme diets, no conflicting advice — just an evidence-based roadmap you can actually follow.

    Why Body Recomposition Matters More Than You Think

    Here's a number that puts things in perspective: according to the Centers for Disease Control and Prevention (CDC), over 73% of American adults are overweight or obese — yet many of them also have low muscle mass. This condition, sometimes called "skinny fat" by fitness professionals or more clinically described as "normal-weight obesity," means people can have excess fat and insufficient muscle even at a seemingly average weight.

    The scale alone doesn't tell the full story. Two people at 160 pounds can have dramatically different body compositions — and that difference matters enormously for metabolic health, strength, energy levels, and long-term disease risk.

    Research published in the American Journal of Clinical Nutrition has consistently linked higher muscle mass with better insulin sensitivity, reduced cardiovascular risk, and improved mobility as we age. Meanwhile, excess body fat — particularly visceral fat around the midsection — is associated with chronic inflammation and metabolic dysfunction.

    Body recomposition addresses both sides of the equation at once. It's not just about aesthetics — it's about building a body that functions well, resists disease, and supports your quality of life for decades.

    And for adults in the 25–60 age range, this approach is often more sustainable than aggressive cutting or bulking cycles that require dramatic caloric swings and significant lifestyle disruption.

    The Science Behind Body Recomposition: How It Actually Works

    The common belief is that fat loss requires a calorie deficit and muscle gain requires a calorie surplus — making them mutually exclusive. That logic holds in extremes (elite bodybuilders, for example), but it doesn't apply to most everyday people.

    Body recomposition works through a process called substrate partitioning — your body's ability to use stored body fat as fuel for building and repairing muscle tissue. When you train with resistance exercise while eating adequate protein, your body can pull energy from fat stores to power muscle protein synthesis.

    A landmark study published in the American Journal of Physiology — Endocrinology and Metabolism found that participants who ate a high-protein diet and performed resistance training simultaneously lost fat and gained muscle over a 4-week period — even while in a modest caloric deficit. This challenged the long-held notion that you can't do both at once.

    The myth worth busting: Body recomposition doesn't require eating at maintenance calories. A small deficit (around 200–300 calories below your TDEE — total daily energy expenditure) combined with high protein intake and consistent resistance training creates the conditions for simultaneous fat loss and muscle gain.

    Who benefits most? Research suggests body recomposition is most effective for:

    • Beginners to resistance training (sometimes called "newbie gains")
    • People returning to exercise after a long break
    • Individuals with higher body fat percentages
    • Those who have been sedentary but maintain adequate protein intake

    Advanced athletes with already-low body fat percentages will find simultaneous recomposition much harder — though not impossible. Results vary significantly depending on genetics, training history, hormonal status, and sleep quality.

    How to Get Started: Practical Steps for Body Recomposition

    Getting started doesn't require a complicated program or expensive equipment. Here's a practical framework organized by experience level.

    Step 1: Set Your Protein Target First

    Protein is the non-negotiable foundation of body recomposition. The Academy of Nutrition and Dietetics recommends 1.2–2.0 grams of protein per kilogram of body weight for active adults. For recomposition specifically, research supports aiming toward the higher end — roughly 0.7–1.0 gram per pound of bodyweight daily.

    If you weigh 170 pounds, that's approximately 120–170 grams of protein per day, spread across meals.

    Step 2: Create a Modest Caloric Deficit

    Use a TDEE calculator to estimate your daily calorie burn, then subtract 200–300 calories. This small deficit supports fat loss without compromising muscle protein synthesis or leaving you chronically fatigued.

    Step 3: Prioritize Resistance Training

    This is the engine of body recomposition. The American College of Sports Medicine (ACSM) recommends resistance training at least 2–3 days per week for general health — but for recomposition, 3–4 sessions per week targeting all major muscle groups tends to produce better results.

    For beginners, full-body workouts 3x per week using compound movements (squats, deadlifts, rows, presses) are highly effective. If you're new to strength training, our Strength Training for Beginners: Your Complete Starter Guide is a great place to start.

    Step 4: Add Strategic Cardio

    Cardio supports fat loss and cardiovascular health without undermining muscle gains — as long as it's not excessive. Aim for 2–3 moderate-intensity cardio sessions per week (20–40 minutes each). Walking, cycling, and swimming are excellent low-impact options that don't tax recovery. For a deeper comparison of cardio styles, check out our article on HIIT vs Steady-State Cardio: Which One Is Right for You?

    Intermediate & Advanced Note: If you've been training for over a year, consider periodized programming — alternating phases of slightly higher and slightly lower calorie intake — to continue progressing. At this stage, working with a certified personal trainer or registered dietitian can help fine-tune your approach.

    Common Mistakes That Sabotage Body Recomposition Results

    Body recomposition is a slower, steadier process than aggressive bulk-and-cut cycles — and that slower pace can lead people to make mistakes that stall progress entirely. Here are the most common ones:

    Mistake 1: Not Eating Enough Protein

    This is the single most common reason people fail to gain muscle while losing fat. Without sufficient amino acids, your body can't repair and build muscle tissue — even if your training is perfect. Many people underestimate how much protein they're actually eating. Tracking intake for even 2–3 weeks using a free app like MyFitnessPal can be eye-opening.

    Mistake 2: Doing Too Much Cardio, Too Little Lifting

    Many people default to running or cycling for fat loss while treating weights as optional. But cardio alone doesn't stimulate muscle protein synthesis. For body recomposition, resistance training must be the priority — cardio is the support, not the star.

    Mistake 3: Being Too Aggressive with the Caloric Deficit

    Cutting calories too drastically (more than 500–700 per day) puts your body in a state where muscle tissue becomes a fuel source. This is the opposite of what you want. A conservative deficit protects lean mass while still promoting fat loss. If you feel exhausted, constantly hungry, or your workouts are suffering, your deficit may be too steep.

    Mistake 4: Judging Progress Only by the Scale

    During body recomposition, the scale can stay flat or even go up slightly — even while you're losing fat and gaining muscle. Muscle is denser than fat, so body composition can improve significantly without a dramatic change in bodyweight. Track progress using measurements, progress photos, how your clothes fit, and strength benchmarks in your workouts.

    Mistake 5: Skipping Recovery and Sleep

    Muscle is built during rest, not during workouts. According to the National Sleep Foundation, adults need 7–9 hours of sleep per night for optimal hormonal function — including testosterone and growth hormone, both of which are critical for muscle repair. Chronic poor sleep impairs fat-burning capacity and increases cortisol, which can promote fat storage.

    What to Eat to Support Body Recomposition

    You don't need a rigid meal plan — but you do need a nutritional framework that supports both fat loss and muscle growth simultaneously.

    Protein Sources (prioritize these):

    • Chicken breast, turkey, lean beef (4–6 oz per meal)
    • Eggs and egg whites (2–4 whole eggs or egg white combinations)
    • Greek yogurt (1 cup = 15–20g protein)
    • Cottage cheese, low-fat ricotta
    • Salmon, tuna, cod, tilapia
    • Legumes: lentils, black beans, edamame (good plant-based options)
    • Whey or plant-based protein powder when whole food intake falls short

    Carbohydrates (time them strategically):

    Carbs are not the enemy — they fuel resistance training performance. The USDA Dietary Guidelines recommend that carbohydrates make up 45–65% of total caloric intake for most adults. For recomposition, focus on complex, fiber-rich carbs and time them around workouts.

    • Oats, brown rice, quinoa, sweet potatoes
    • Fruits (berries, apples, bananas pre-workout)
    • Whole grain bread and pasta in moderate portions

    Healthy Fats (don't eliminate them):

    • Avocado, olive oil, nuts, seeds
    • Fatty fish (salmon, mackerel) for omega-3 anti-inflammatory benefits
    • Keep fat intake at roughly 25–35% of total calories

    What to Limit: Ultra-processed foods, alcohol, and added sugars don't just add empty calories — they actively interfere with recovery, sleep quality, and hormonal balance. You don't need to eliminate them entirely, but reducing their frequency will make your body recomposition efforts noticeably more effective.

    How Long Until You See Results — and What to Track

    This is where realistic expectations matter most. Body recomposition is slower than either aggressive fat loss or dedicated muscle-building phases — and that's by design. You're doing two things at once, after all.

    Realistic Timelines:

    • Weeks 1–4: Neuromuscular adaptations (you get stronger without much visible change). Bloating may decrease. Energy during workouts improves.
    • Weeks 4–8: Noticeable strength gains. Some people begin to see changes in how clothes fit. Scale may remain relatively stable.
    • Months 3–6: Visible changes in muscle definition and fat reduction become more apparent, especially with consistent training and nutrition adherence.
    • 6–12+ months: Significant body composition changes for most people who remain consistent.

    Research in the Journal of Strength and Conditioning Research found that meaningful body composition changes typically require at least 8–12 weeks of consistent resistance training and adequate protein intake to be measurable by body composition testing.

    What to Track:

    • Waist, hip, and thigh circumference (monthly)
    • Progress photos (every 4 weeks, same lighting and time of day)
    • Strength benchmarks (can you lift heavier? More reps?)
    • Energy levels and sleep quality (weekly self-check)
    • Body fat percentage if accessible via DEXA scan or reliable skinfold testing

    When to Reassess: If you've been consistent for 12 weeks and see zero measurable changes in any metric, it's worth consulting a registered dietitian or certified personal trainer to review your program. Hormonal imbalances, thyroid issues, or other health factors can sometimes interfere — and a professional can help identify what's happening.

    Frequently Asked Questions

    Can I do body recomposition without going to a gym?

    Yes — resistance training at home using bodyweight exercises, resistance bands, or dumbbells can absolutely support body recomposition, especially for beginners. The key is progressive overload: consistently challenging your muscles with increasing difficulty over time. Check out our guide on Home Workout Plans: Get Fit Without the Gym for practical options.

    Is body recomposition possible after 40?

    Absolutely — though it may progress more slowly due to hormonal changes, particularly declining testosterone and estrogen levels. Research published in the Journal of Gerontology confirms that adults over 40 can still build muscle and lose fat with resistance training. Protein intake becomes even more important with age to offset age-related muscle loss (sarcopenia).

    Do I need protein supplements for body recomposition?

    Not necessarily. Whole food protein sources are always preferable. However, if you consistently struggle to hit your protein target through food alone, a quality whey or plant-based protein supplement can help fill the gap. Supplements are not a replacement for a balanced diet — they're a convenience tool.

    How do I know if I'm losing fat and gaining muscle at the same time?

    The most reliable methods are DEXA scans or hydrostatic weighing, which measure body fat percentage and lean mass separately. More practically, pay attention to whether you're getting stronger in your workouts (a sign of muscle growth) while your waist circumference is shrinking (a sign of fat loss) — even if the scale doesn't move much.

    Can women do body recomposition?

    Yes — and research consistently shows women respond very well to resistance training for body recomposition. Women won't develop bulky muscle mass from typical resistance training due to lower baseline testosterone levels. What they do gain is strength, definition, metabolic efficiency, and improved bone density — all significant health benefits backed by the American College of Sports Medicine.

    Start Where You Are, Stay Consistent

    Body recomposition isn't a quick fix — and that's actually good news. It's a sustainable approach that builds the body you want while supporting real, long-term health. No extreme calorie slashing, no eliminating food groups, no grueling two-a-day workouts required.

    The formula is genuinely simple, even if it takes time: lift weights consistently, eat enough protein, stay in a modest caloric deficit, sleep well, and track the right metrics. Small, consistent steps will always outperform intense, unsustainable sprints.

    Start today by calculating your protein target and planning three resistance training sessions this week. That's it. Build from there.


    This article is for informational and educational purposes only. The content is not intended to replace professional medical, nutritional, or fitness advice. Always consult a qualified healthcare provider, registered dietitian, or certified fitness professional before starting a new health program or making significant changes to your lifestyle.

    Content reviewed by our wellness editorial team, with references to peer-reviewed research and guidelines from leading health organizations.
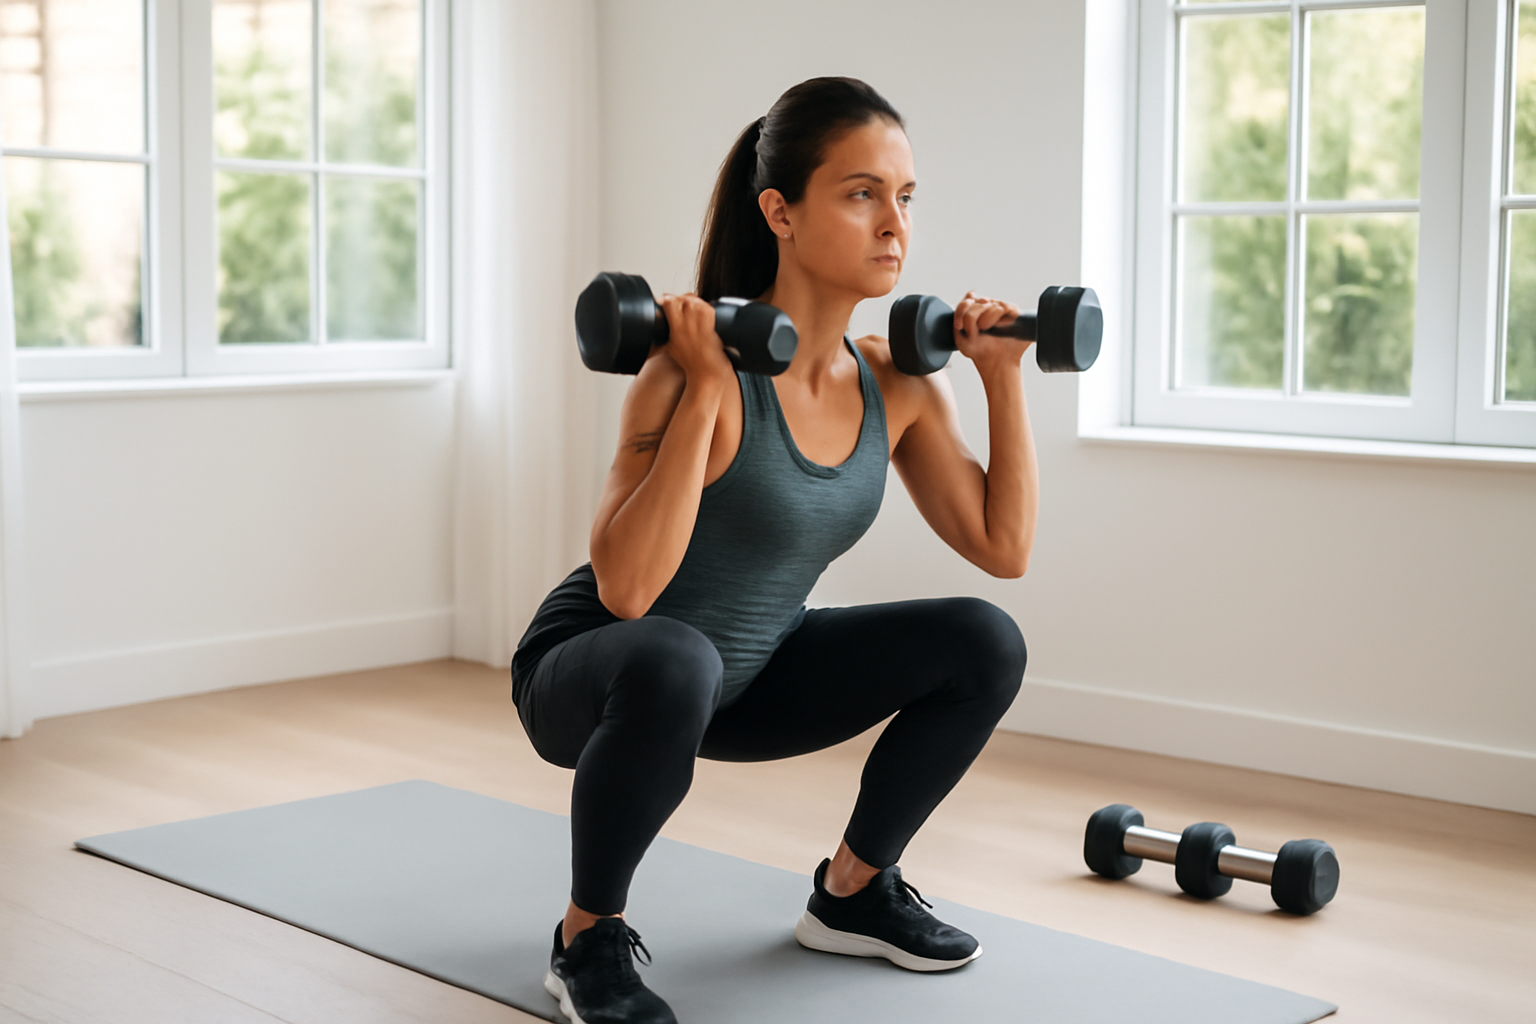
  • Strength Training for Beginners: Your Complete Starter Guide

    Strength Training for Beginners: Your Complete Starter Guide

    Strength Training for Beginners: Your Complete Starter Guide

    You don’t need to be an athlete, own a gym membership, or know what a deadlift is to start getting stronger — you just need a plan that actually fits your life.

    Here’s a number that might surprise you: according to the Centers for Disease Control and Prevention, fewer than 25% of American adults meet the recommended guidelines for muscle-strengthening activity. That means three out of four people are missing out on one of the most powerful tools for long-term health — and most of them aren’t skipping it because they don’t care. They’re skipping it because no one ever showed them where to start.

    Strength training has a reputation problem. It sounds intimidating. It looks complicated on social media. And if you’ve ever walked into a weight room and felt completely lost, you know exactly what that wall of confusion feels like.

    But here’s the truth: building strength doesn’t require a personal trainer, expensive equipment, or hours in the gym. What it does require is understanding the basics — and that’s exactly what this guide is for. By the end, you’ll know why strength training matters beyond just looking fit, how your muscles actually adapt to resistance, and how to start safely without burning out in week two.

    Why Strength Training Matters More Than You Think

    Most people start lifting weights because they want to look better. That’s a completely valid reason — but it’s honestly one of the smaller benefits on the list.

    The American College of Sports Medicine (ACSM) recommends that adults engage in resistance training at least two days per week for each major muscle group. That recommendation isn’t just about muscle size. It’s grounded in decades of research linking regular strength work to reduced risk of type 2 diabetes, improved cardiovascular health, stronger bones, better joint stability, and even lower rates of depression and anxiety.

    One landmark finding published in the British Journal of Sports Medicine found that muscle-strengthening activities were associated with a 10 to 17 percent reduction in all-cause mortality, cardiovascular disease, and cancer — independent of aerobic activity. In other words, lifting weights adds value even if you’re already walking or running regularly.

    For adults over 35, there’s another critical factor: sarcopenia. This is the age-related loss of muscle mass that begins in your mid-30s and accelerates through your 40s and 50s if you’re not actively working against it. Strength training is the most effective tool we have to slow that process down.

    And for your daily life? Carrying groceries, climbing stairs, picking up your kids or grandkids — these all become easier when your muscles are trained to handle load. Functional strength is real-life strength.

    How Strength Training Actually Works

    Here’s the basic biology, simplified: when you place a muscle under resistance — whether that’s a dumbbell, a resistance band, your own bodyweight, or a barbell — you create tiny microscopic tears in the muscle fibers. This sounds alarming, but it’s the signal your body needs to rebuild that tissue stronger than before. The process is called muscle protein synthesis, and it happens primarily during rest and recovery.

    One common myth worth busting right away: lifting weights will make you "bulk up" fast. For the vast majority of people — especially women and anyone over 40 — building significant muscle mass takes months to years of consistent, progressive training combined with deliberate nutrition strategies. What you’ll notice in the first 4 to 8 weeks isn’t dramatic size change. It’s improved tone, better posture, and a sense of strength in movements you do every day.

    The key principle behind all strength progress is called progressive overload — the gradual increase of stress placed on the body during exercise over time. This can mean adding more weight, doing more reps, resting less between sets, or increasing range of motion. Research published in the Journal of Strength and Conditioning Research consistently shows that progressive overload is the single most important variable in long-term strength development.

    Your nervous system also adapts. In the early weeks of training, a large portion of your strength gains come not from bigger muscles but from your brain learning to recruit muscle fibers more efficiently. This is why beginners often feel dramatically stronger after just a few weeks, even before significant muscle changes occur.

    How to Get Started: Practical Steps for Every Level

    Starting strong means starting smart. Here’s how to build a foundation that lasts:

    Step 1 — Choose your format. You have three main options: bodyweight training (push-ups, squats, lunges), free weights (dumbbells, kettlebells, barbells), or machines. For most beginners, a combination of bodyweight and light dumbbells is the most accessible starting point — no gym required.

    Step 2 — Focus on compound movements first. Compound exercises work multiple muscle groups at once, giving you the most return on your time. The five foundational movements are: squat, hinge (like a deadlift or Romanian deadlift), push (push-up or chest press), pull (row or lat pulldown), and carry (farmer’s carry or simply walking with weights). These patterns cover nearly every major muscle group.

    Step 3 — Start with 2 days per week, then build to 3. The ACSM recommends two days minimum for beginners, with at least 48 hours of rest between sessions for the same muscle group. Two full-body sessions per week is an excellent starting structure — simple, effective, and sustainable.

    For beginners: 2 sets of 10-12 reps per exercise, moderate weight (you should feel effort on the last 2-3 reps but maintain good form). Rest 60-90 seconds between sets.

    For intermediate lifters (6+ months of consistent training): 3-4 sets of 8-12 reps, progressing weight by 5% when you can complete all reps cleanly. Consider a split routine (upper/lower or push/pull/legs).

    Step 4 — Warm up and cool down. Spend 5-10 minutes on dynamic movement before lifting — leg swings, arm circles, bodyweight squats. After training, 5 minutes of light stretching helps manage soreness and supports recovery.

    Step 5 — Track your sessions. A simple notebook or phone note works fine. Write down what you lifted, how many reps, and how it felt. This is your map for progressive overload.

    Common Mistakes That Sabotage Results

    These are easy to make — and knowing them in advance keeps you ahead of the curve.

    Mistake 1: Skipping the basics to chase advanced moves. Many beginners want to jump straight to Olympic lifts or complex barbell work before mastering fundamental movement patterns. The result is usually poor form, frustration, and injury risk. Spend your first 4-6 weeks building clean, consistent mechanics on simple exercises. The fancy stuff will come — and it will come faster when your foundation is solid.

    Mistake 2: Going too heavy, too fast. Ego lifting — choosing weight that’s too heavy to maintain proper form — is one of the leading causes of beginner injuries. The goal in your first few months is skill acquisition and habit formation, not maximum load. Choose a weight where the last two reps of each set feel genuinely challenging but your form doesn’t break down. As Harvard Health Publishing notes, using proper technique from the start dramatically reduces long-term injury risk.

    Mistake 3: Ignoring recovery. Muscles don’t grow during your workout — they grow during the 24 to 48 hours afterward. Beginners who train every single day without adequate rest often find themselves stalled or chronically sore. Prioritize sleep (7-9 hours is the National Sleep Foundation’s recommendation for adults) and allow at least one full rest day between strength sessions targeting the same muscle groups.

    Mistake 4: Treating nutrition as optional. Strength training without adequate protein is like building a house without enough lumber. You’re creating the stimulus, but not supplying the material. The Academy of Nutrition and Dietetics recommends 1.2 to 1.7 grams of protein per kilogram of body weight per day for active adults engaged in resistance training. Many beginners underestimate how much this matters.

    Mistake 5: Inconsistency disguised as variety. Constantly switching programs every two weeks because you saw something new online is one of the most common reasons people plateau. Consistency in a simple, progressive program almost always beats novelty. Give any well-designed program at least 8 to 12 weeks before evaluating whether it’s working.

    What to Eat to Support Your Strength Training

    You don’t need a complicated diet plan to support your training — but a few nutritional principles make a meaningful difference.

    Protein is the priority. Aim for 25 to 40 grams of protein per meal, spread across 3 to 4 meals daily. High-quality sources include chicken breast (about 30g per 3.5 oz), Greek yogurt (15-20g per cup), eggs (6g per egg), canned tuna (25g per 3 oz), tofu (10g per half-cup), and legumes like lentils (18g per cooked cup). The USDA Dietary Guidelines support a variety of protein sources, including both animal and plant-based options.

    Don’t fear carbohydrates. Carbs are your muscles’ preferred fuel source during resistance training. Complex carbs — oats, sweet potatoes, brown rice, quinoa, whole grain bread — provide sustained energy and support glycogen replenishment after workouts. Cutting carbs aggressively while strength training typically results in low energy, poor performance, and slower recovery.

    Timing matters somewhat — but not as much as total intake. Consuming a meal or snack with both protein and carbohydrates within 1-2 hours after training supports muscle recovery, according to research referenced by the Academy of Nutrition and Dietetics. But if your total daily intake is on track, don’t stress about hitting an exact post-workout window to the minute.

    Hydration is non-negotiable. Even mild dehydration (1-2% of body weight) can significantly impair strength performance. Aim for at least half your body weight in ounces of water daily, with additional intake on training days.

    What to limit: Ultra-processed foods, excessive added sugar, and alcohol — not because they’re forbidden, but because they consistently undercut recovery, sleep quality, and energy levels over time.

    How Long Until You See Results — and What to Track

    This is one of the most searched questions about strength training, and the honest answer involves a realistic timeline.

    Weeks 1-3: You’ll likely feel stronger — but this is mostly neurological adaptation, not muscle growth. Your nervous system is becoming more efficient at recruiting muscle fibers. You may feel more energized after workouts and notice improved posture.

    Weeks 4-8: Muscle tone becomes more visible, especially if you’re also moderating diet. Clothes may fit differently before the scale changes. This is normal and expected — muscle is denser than fat tissue.

    Months 3-6: Meaningful strength gains and visible changes in muscle definition become more noticeable. Research published in the Journal of Physiology shows that measurable hypertrophy (muscle growth) typically becomes statistically significant after 8-12 weeks of consistent resistance training.

    What to track: Rather than relying solely on the scale, track how much weight you’re lifting over time (progressive overload log), how your clothes fit, your energy levels during workouts, and your resting recovery (sleep quality, soreness duration). These are more meaningful early indicators than body weight alone.

    Results vary significantly based on your starting point, age, sleep quality, nutrition, and training consistency. If you’re not seeing any strength progression after 8 weeks, consider consulting a certified personal trainer to assess your program and form.

    Frequently Asked Questions

    Do I need to go to a gym to start strength training?
    No. Bodyweight exercises — push-ups, squats, lunges, glute bridges, planks — can build real functional strength at home with zero equipment. A set of resistance bands or adjustable dumbbells adds significant versatility for under $50. The gym becomes more valuable as you advance and need heavier loads, but it’s not a requirement to get started.

    Is strength training safe for people over 50?
    Yes — and for adults over 50, it’s especially important. The NIH notes that strength training helps preserve bone density, reduce fall risk, maintain joint health, and counteract age-related muscle loss. The approach may need to be modified (lighter starting loads, more emphasis on mobility), ideally with guidance from a certified professional familiar with older adult fitness.

    How sore should I be after a workout?
    Some muscle soreness 24 to 48 hours after training — known as delayed onset muscle soreness (DOMS) — is normal and expected when starting out. Sharp pain during exercise, or soreness that lasts more than 72 hours, is a signal to reduce intensity or check your form. Soreness gradually decreases as your body adapts over the first few weeks.

    How much protein do I really need if I’m strength training?
    The Academy of Nutrition and Dietetics recommends 1.2 to 1.7 grams of protein per kilogram of body weight daily for active adults doing resistance training. For a 160-pound person, that’s roughly 87 to 123 grams per day. Most Americans already get adequate protein — the key is distributing it across meals rather than loading it all at dinner.

    Can strength training help with weight loss?
    Yes, though it works differently than cardio. Resistance training builds lean muscle, which increases your resting metabolic rate over time. A 2022 analysis published in Obesity Reviews found that strength training alone produces modest weight loss, and the effects are significantly enhanced when combined with aerobic activity and appropriate caloric intake. Body composition often improves even when scale weight changes slowly.


    The Bottom Line

    Strength training is one of the most evidence-backed investments you can make in your long-term health — and it genuinely doesn’t require perfection to work. Two honest sessions per week, with basic compound movements, progressive effort, and enough protein and sleep, is enough to change how you feel, move, and age.

    The best program is the one you actually do. Start simple. Start today. Pick two exercises you already know how to do — even just a squat and a push-up — and commit to doing them consistently for three weeks. That’s your foundation.

    Small steps, done consistently, build strength that lasts a lifetime.


    Wellness Disclaimer: This article is for informational and educational purposes only. The content is not intended to replace professional medical, nutritional, or fitness advice. Always consult a qualified healthcare provider, registered dietitian, or certified fitness professional before starting a new health program or making significant changes to your lifestyle.

    Content reviewed by our wellness editorial team, with references to peer-reviewed research and guidelines from leading health organizations.