Tag: fitness for adults

  • Barre Workout for Adults: Tone, Strength & Flexibility

    Barre Workout for Adults: Tone, Strength & Flexibility

    You don’t need a ballet background — or even good coordination — to get a seriously effective workout from barre.

    Picture this: you’re standing at a sturdy chair, doing tiny pulsing movements with your thighs burning like you just ran a mile — and you haven’t moved more than an inch. That’s the paradox of barre workouts, and it’s exactly why millions of adults have added this low-impact, high-intensity method to their fitness routine.

    Barre training has evolved far beyond its dance-studio roots. Today, it’s one of the most accessible and effective ways for adults to build muscular endurance, improve posture, and develop the kind of functional strength that makes everyday life easier. Whether you’re completely new to structured exercise or looking to complement your existing routine, barre offers something genuinely different — and the science backs it up.

    In this guide, you’ll learn what barre workouts actually do to your body, how to start safely, the most common mistakes beginners make, and what realistic results look like over time. No tutus required.

    Why Barre Workouts Matter More Than You Think

    Most people assume barre is just a trendy fitness class for dancers. In reality, it’s a discipline rooted in rehabilitation science, ballet technique, and resistance training — a combination that produces measurable results for adults at nearly every fitness level.

    What makes barre particularly valuable is its emphasis on isometric contractions and small-range-of-motion movements. Rather than large, dynamic lifts, barre targets muscles through sustained holds and micro-pulses that keep fibers under tension far longer than typical reps. This prolonged time under tension is a key driver of muscular endurance and hypertrophy, according to research published in the Journal of Strength and Conditioning Research.

    According to the American College of Sports Medicine (ACSM), adults should engage in muscle-strengthening activities at least two days per week. Barre qualifies — and because it’s low-impact and joint-friendly, it’s especially relevant for the 54 million Americans dealing with some form of arthritis or joint discomfort, per the CDC.

    Beyond strength, barre builds something that most gym programs overlook: body awareness. The controlled, precise movements train your nervous system to engage the right muscles at the right time — a quality that directly reduces injury risk in daily life, whether you’re carrying groceries or climbing stairs.

    The Science Behind How Barre Actually Works

    Here’s the most common misconception about barre: because the movements are small and there’s no heavy lifting, people assume it’s not a "real" workout. That’s simply not true — and the physiology explains why.

    Barre’s signature technique — the isometric hold followed by rapid micro-pulses — creates a sustained recruitment of slow-twitch and fast-twitch muscle fibers simultaneously. A 2021 study published in the International Journal of Exercise Science found that isometric training at moderate intensities produced significant gains in muscular endurance and functional strength in adults aged 30–60, comparable to traditional resistance training protocols.

    The "shake" you feel during a barre hold isn’t weakness — it’s your muscle fibers reaching fatigue and recruiting deeper motor units to compensate. That’s exactly the mechanism that drives strength and endurance adaptations over time.

    Barre also has a meaningful cardiovascular component. A study from the Journal of Dance Medicine and Science found that a 60-minute barre class elevated participants’ heart rates to 55–75% of maximum heart rate — well within the aerobic training zone recommended by the American Heart Association for cardiovascular health.

    The myth to bust: Barre will make women "bulky." Because barre uses bodyweight and light resistance at high repetitions, it builds lean muscular endurance — not large muscle mass. The hormonal and mechanical conditions that drive significant hypertrophy simply aren’t present in a standard barre session.

    How to Get Started with Barre Training

    One of barre’s biggest advantages is how accessible it is from day one. You don’t need special equipment, a dance background, or even a class — though all of those can help.

    What you’ll need to begin:

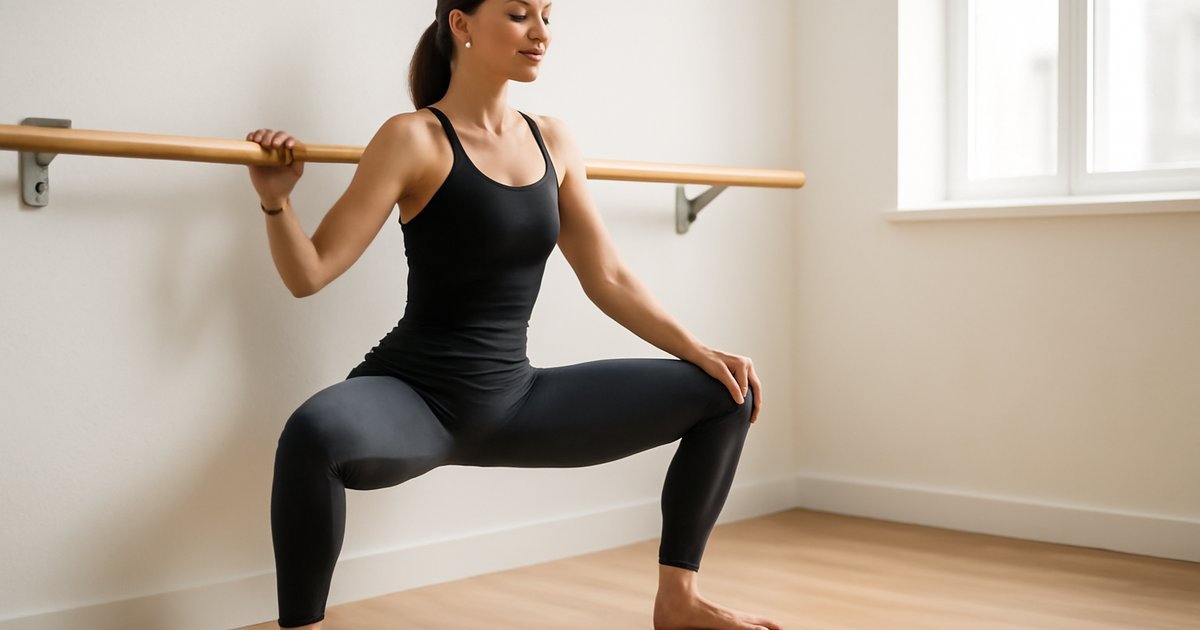
    • A sturdy chair, countertop, or wall to use as your "barre"
    • Non-slip socks or bare feet on a yoga mat
    • Comfortable, form-fitting clothing so you can see your alignment
    • Optional: light resistance bands or 2–5 lb dumbbells for upper body work

    Beginner Level — Weeks 1–3:

    1. Start with 2 sessions per week. Give your muscles — especially your hips, inner thighs, and core — time to adapt. Delayed onset muscle soreness (DOMS) from barre can be surprisingly intense for new practitioners.
    2. Focus on alignment first. A neutral spine, engaged core, and level hips are the foundation of every barre exercise. Form matters far more than depth or range of motion.
    3. Try a beginner-friendly 20-minute routine. Key movements: parallel and turnout plié squats, relevé holds, glute bridges, and tabletop leg lifts. Hold each position for 30–45 seconds before pulsing.
    4. Use a mirror if possible. Barre is highly technique-dependent. Visual feedback helps you catch misalignments early.

    Intermediate Level — Weeks 4–8:

    1. Increase sessions to 3–4 per week and extend class duration to 45–60 minutes.
    2. Introduce arabesque holds, passé balance work, and single-leg variations to build stability and challenge your core more deeply.
    3. Add a resistance band around your thighs during glute and hip work to increase intensity without adding impact.

    Advanced Options: Incorporate elevated barre work (on demi-pointe), increased time under tension (60+ second holds), and flowing sequences that elevate heart rate. Consider classes that blend barre with Pilates or HIIT for greater metabolic demand. If you’re looking for complementary low-impact training, Pilates for Adults pairs particularly well with barre programming.

    Common Mistakes That Sabotage Your Barre Results

    Barre looks deceptively simple — and that’s exactly what makes it easy to do wrong. These mistakes are incredibly common, even among people who’ve been practicing for months.

    1. Gripping the barre too tightly.
    The chair or barre is there for light balance support — not to bear your weight. When you grip it hard, you shift load away from your legs and core, reducing the exercise’s effectiveness by a significant margin. Fix it: rest just two or three fingers on the surface, as if you’re lightly touching a banister.

    2. Letting the lower back arch during seat work.
    During glute exercises like arabesque lifts or hydrant pulses, many people arch the lumbar spine to get more range of motion. This strains the lower back and disengages the glutes entirely. Fix it: actively tuck your pelvis slightly and maintain a "long spine" throughout. Smaller range with better form will always produce better results.

    3. Not engaging the core consistently.
    Barre is fundamentally a core workout disguised as a lower body workout. If your abdominals aren’t actively braced throughout every movement, you’re missing half the training stimulus. Fix it: before each exercise, take a breath in, exhale, and draw your navel gently toward your spine. Maintain that engagement throughout.

    4. Rushing through the pulses.
    The micro-pulse is barre’s defining technique, and it only works when done slowly and with control. Fast, sloppy pulses use momentum instead of muscle. Fix it: think "one inch up, one inch down" with complete muscular control on both the up and down phase.

    5. Skipping the stretching segment.
    Barre classes always end with targeted stretching — and it’s not optional filler. The muscles you’ve worked through sustained contractions need lengthening to recover properly and maintain flexibility. According to the American College of Sports Medicine, post-exercise stretching held for 15–30 seconds significantly improves flexibility over time. Don’t leave early. If mobility is a priority for you, pairing barre with a dedicated foam rolling recovery routine can further accelerate your progress.

    What to Eat to Support Your Barre Training

    Barre is a muscular endurance workout, which means your nutritional focus should support muscle recovery and sustained energy — not extreme caloric restriction.

    Protein: The Academy of Nutrition and Dietetics recommends 1.2–1.7 grams of protein per kilogram of body weight for adults engaged in regular resistance training. For a 150 lb adult, that’s approximately 82–116 grams per day. Good sources: Greek yogurt, eggs, chicken breast, lentils, cottage cheese, and edamame.

    Pre-workout fuel (1–2 hours before): A small meal combining complex carbohydrates and protein supports performance during sustained isometric work. Examples: a banana with almond butter, oatmeal with berries, or whole-grain toast with cottage cheese.

    Post-workout recovery (within 45 minutes): Pair fast-digesting carbohydrates with protein to replenish glycogen and support muscle repair. A fruit-and-protein smoothie, Greek yogurt with fruit, or a rice cake with turkey and avocado all work well.

    Hydration: Even though barre isn’t high-sweat like a spin class, you’re still losing fluid through sustained muscular effort. The National Academies recommends approximately 2.7 liters (91 oz) of total water daily for women and 3.7 liters (125 oz) for men — more if you’re active.

    What to avoid: Heavy meals within 60 minutes of class — they can cause discomfort during core and abdominal work. Also minimize refined sugar before sessions, as blood sugar spikes followed by crashes will undermine endurance during long isometric holds.

    How Long Until You See Results — and What to Track

    This is where honesty matters most, because barre results are real — but they don’t show up the way many people expect.

    Weeks 1–2: You’ll likely feel increased muscular soreness, especially in your inner thighs, glutes, and postural muscles. This is normal and a sign that you’re activating underused muscle groups. Don’t expect visible changes yet.

    Weeks 3–6: Most practitioners report noticeable improvements in posture, core stability, and balance. Harvard Health Publishing notes that muscular endurance improvements are often felt before they’re visible — you’ll notice you can hold positions longer and with less shaking.

    Weeks 6–12: With consistent 3–4 sessions per week, you can expect visible muscle tone, particularly in the glutes, thighs, and arms. Body composition changes are modest compared to higher-intensity training, but postural transformation can be significant and lasting.

    What to track:

    • How long you can hold a barre position before form breaks down
    • Posture improvements (photograph your side profile monthly)
    • Balance — can you hold a single-leg relevé for 15, 30, then 45 seconds?
    • Energy levels and how you feel during daily activities
    • Range of motion in hips, hamstrings, and shoulders

    When to reassess: If after 8 weeks of consistent training you feel no improvement in strength or endurance, consider increasing session frequency, adding resistance bands, or consulting a certified fitness professional to review your form. Results vary significantly depending on your baseline fitness, nutrition, and recovery quality. For a different kind of low-impact challenge that complements barre well, consider exploring Balance Training for Adults.

    Frequently Asked Questions About Barre Workouts

    Is barre good for weight loss?
    Barre can contribute to a healthy weight management strategy, but it’s not primarily a calorie-burning workout. A 60-minute class burns approximately 300–400 calories on average, according to estimates from the American Council on Exercise. Its bigger contribution to body composition is building lean muscle mass, which supports a healthier metabolic rate over time. Pair barre with cardio training and a balanced diet for weight loss goals.

    Can men benefit from barre training?
    Absolutely. Barre addresses flexibility deficits, hip mobility, and postural imbalances that are extremely common in men — particularly those who do heavy lifting or sit for long periods. The hip flexor, inner thigh, and spinal stabilizer work in barre directly addresses weak points in most male athletic profiles. The only barrier is perception, not physiology.

    How is barre different from Pilates?
    Both disciplines emphasize core stability, controlled movement, and postural alignment — but their methods differ. Pilates uses specialized equipment (or a mat) and focuses heavily on spinal mobility and deep core engagement. Barre uses a vertical support structure, incorporates more standing lower-body work, and often includes a more significant cardiovascular element. Many adults find them highly complementary.

    Is barre safe if I have knee or hip issues?
    For many people with mild joint discomfort, barre’s low-impact nature makes it a safer option than high-intensity training. However, some movements — like deep plié squats or wide turnout positions — can stress vulnerable joints if done incorrectly. Always consult your physician or physical therapist before starting if you have a diagnosed condition, and work with a certified instructor who can modify exercises appropriately.

    Do I need to take classes, or can I practice barre at home?
    Both work. Online platforms and apps offer guided barre classes that are very effective for home practice. That said, in-person instruction is valuable early on because form feedback is difficult to self-correct. If you start at home, use a mirror and record yourself occasionally to check alignment.

    Start Small, Stay Consistent, See Real Change

    Barre isn’t a fitness trend — it’s a time-tested method that builds the kind of strength, stability, and body control that makes you feel better in your everyday life. The "burn" is real, the results are real, and the barrier to entry is remarkably low.

    You don’t need to be flexible, coordinated, or in peak shape to begin. You just need a chair, a small patch of floor, and the willingness to show up consistently. Two sessions this week is a better starting point than waiting for the perfect moment.

    Start with one 20-minute beginner routine today. Notice how your body feels afterward. That’s your data point — and your first step toward something genuinely sustainable.


    This article is for informational and educational purposes only. The content is not intended to replace professional medical, nutritional, or fitness advice. Always consult a qualified healthcare provider, registered dietitian, or certified fitness professional before starting a new health program or making significant changes to your lifestyle.

    Content reviewed by our wellness editorial team, with references to peer-reviewed research and guidelines from leading health organizations.

  • Rowing Machine Workout for Adults: Full-Body Results

    Rowing Machine Workout for Adults: Full-Body Results

    Rowing Machine Workout for Adults: Full-Body Results

    Most people walk right past the rowing machine at the gym — and it might be the single biggest fitness mistake they’re making.

    You’ve probably seen it sitting in the corner of your gym, slightly dusty, largely ignored while the treadmills and ellipticals are packed. The rowing machine doesn’t get the marketing love it deserves — and that’s a shame, because study after study confirms it’s one of the most efficient, low-impact, full-body workouts available to adults of any fitness level.

    Here’s the truth: a single rowing session engages roughly 86% of the muscles in your body. That includes your legs, glutes, core, back, shoulders, and arms — all working together in one fluid, rhythmic motion. Whether your goal is fat loss, cardiovascular conditioning, muscle endurance, or simply getting more done in less time, rowing machine workouts deliver.

    This guide is for adults aged 25 to 60 who want a smarter approach to cardio — something that doesn’t beat up your joints, doesn’t bore you to tears, and actually produces measurable results. We’ll cover the science, the technique, the most common mistakes, and how to build a rowing routine that fits your real life.

    Why Rowing Machine Workouts Matter More Than You Think

    If you’ve been sticking to the same cardio machine for years and feeling like your results have plateaued, you’re not alone. Most adults fall into a routine that stops challenging their body after a few weeks. The rowing machine breaks that pattern in a uniquely effective way.

    According to the American College of Sports Medicine (ACSM), total-body cardiovascular exercise — the kind that recruits both upper and lower body simultaneously — produces superior caloric expenditure and cardiovascular adaptation compared to single-limb exercises like cycling or walking. Rowing fits that profile perfectly.

    A 155-pound adult rowing at moderate intensity can burn approximately 260 to 316 calories in 30 minutes, depending on stroke rate and resistance, according to data from Harvard Health Publishing. At vigorous intensity, that number climbs significantly higher.

    But calorie burn is only part of the story. Rowing also strengthens the posterior chain — the often-neglected muscles along your back, glutes, and hamstrings that are critical for posture, injury prevention, and long-term mobility. For desk workers and anyone who spends hours seated, this is particularly valuable.

    And because rowing is non-weight-bearing and low-impact on the joints, it’s an excellent option for adults managing knee discomfort, hip tightness, or recovering from lower-body strain — though individual suitability always depends on your specific situation and should be evaluated by a healthcare professional.

    The Science Behind Rowing: How It Actually Works

    One of the biggest misconceptions about rowing is that it’s primarily an upper-body workout — something for rowers and athletes. In reality, proper rowing technique is about 60% legs, 20% core, and 20% arms. If you’re only feeling it in your shoulders and biceps, your form needs attention.

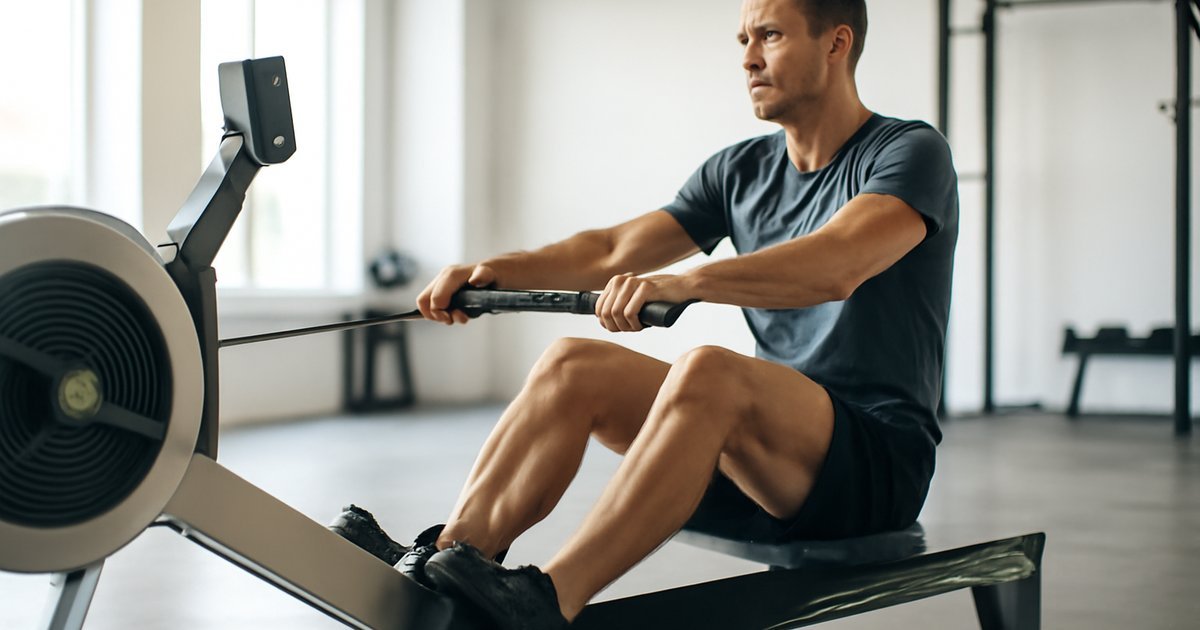
    The rowing stroke follows a four-phase sequence: the catch, the drive, the finish, and the recovery. In the catch phase, you’re coiled at the front of the machine with knees bent, shins vertical, and core engaged. The drive initiates with a powerful leg press — not a pull. As your legs extend, your core braces and your torso leans back slightly. Only then do your arms draw the handle toward your lower ribcage. The finish, recovery, and return to the catch complete the cycle.

    A study published in the Journal of Strength and Conditioning Research found that indoor rowing at moderate intensity produced significant improvements in VO2 max — a key marker of cardiovascular fitness — after just 8 weeks of consistent training. Participants also showed measurable improvements in muscle endurance across the back, core, and lower body.

    The myth that rowing is bad for your back deserves a direct rebuttal: when performed with proper form, rowing actually strengthens the muscles that support spinal health. The problem arises when people round their lower back or yank with their arms — a technique error, not an inherent risk of the exercise itself.

    Another advantage of rowing is its built-in intensity control. By adjusting the damper setting (resistance on air rowers) and your stroke rate (strokes per minute, or SPM), you can dial this workout from a gentle aerobic session to a high-intensity interval challenge — all on the same machine.

    How to Get Started: Practical Steps for Every Level

    The rowing machine has a slight learning curve, but most adults feel comfortable with the basic mechanics within two or three sessions. Here’s how to approach it based on where you’re starting from.

    Before Your First Session:

    • Adjust the footplates so the strap crosses over the widest part of your foot (the ball of your foot).
    • Set the damper between 3 and 5 for beginners — higher isn’t always better; it mimics rowing a heavier boat and requires more strength than new rowers typically have.
    • Sit tall, shoulders relaxed, and grip the handle loosely — not with a white-knuckle squeeze.

    Beginner: Weeks 1–3

    • Row for 10 to 15 minutes at a comfortable, conversational pace (18–22 SPM).
    • Focus entirely on form — legs drive first, then core, then arms on the way out; reverse that order on the way back.
    • Take 60-second rest breaks every 5 minutes if needed.
    • Aim for 2 to 3 sessions per week.

    Intermediate: Weeks 4–8

    • Extend sessions to 20–30 minutes of continuous rowing.
    • Introduce stroke rate variation: 2 minutes at 22 SPM, 1 minute at 26–28 SPM, repeat.
    • Begin tracking your 500-meter split time (displayed on the monitor) as a benchmark for improvement.
    • Add a second rowing day, targeting 3 to 4 sessions per week.

    Advanced: Beyond Week 8

    • Incorporate structured interval sessions: 8 x 250 meters with 90 seconds rest, or 4 x 500 meters with 2 minutes rest.
    • Experiment with pyramid workouts: row 1 minute hard, 1 minute easy; 2 minutes hard, 2 minutes easy; up to 5 minutes hard, then back down.
    • Consider pairing rowing with interval training principles to structure progressive sessions that keep your body adapting.

    Common Mistakes That Sabotage Your Rowing Results

    Even enthusiastic beginners fall into predictable traps on the rowing machine. The good news: every one of these is fixable once you know what to look for.

    Mistake 1: Using your arms before your legs.
    This is the most widespread form error in rowing. If you pull the handle toward you before your legs are fully extended, you lose the primary power source of the stroke — your legs — and put all the strain on your arms and lower back. The fix: think "legs, lean, arms" on the drive, and "arms, lean, legs" on the recovery. Drill this sequence slowly until it becomes automatic.

    Mistake 2: Setting the damper too high.
    A damper set at 10 feels more intense, which leads many beginners to assume it’s more effective. It’s not — at least not the way you’d hope. A high damper creates excessive drag, which slows your stroke and prioritizes raw strength over cardiovascular efficiency. Most experienced rowers train at a damper setting of 3 to 5. It feels lighter but requires a faster, more powerful stroke — which is actually harder on your cardiovascular system.

    Mistake 3: Rowing at one constant pace every session.
    Steady, low-effort rowing has its place — but doing nothing else means your body adapts quickly and your fitness stalls. Varying your intensity across sessions (some easy, some moderate, some hard intervals) is what drives continued improvement, according to principles outlined by the ACSM’s guidelines on aerobic training progression.

    Mistake 4: Ignoring posture during fatigue.
    As you get tired, the lower back tends to round and the shoulders hunch forward. This is when injury risk rises. If your form breaks down significantly, it’s better to stop, rest 60 to 90 seconds, and resume with proper mechanics than to grind through poor movement patterns. Fatigued, sloppy rowing is how people develop back soreness that gets attributed to the machine rather than the technique.

    Mistake 5: Skipping the warm-up.
    Jumping onto the rower and immediately hammering hard intervals is a recipe for muscle soreness and potential strain. Spend the first 3 to 5 minutes at an easy pace (18–20 SPM) to lubricate joints, raise core temperature, and establish your stroke rhythm before adding intensity.

    What to Eat Before and After Rowing Workouts

    Rowing is a metabolically demanding exercise that uses both aerobic and anaerobic energy systems, so fueling appropriately makes a real difference in performance and recovery.

    Pre-workout (1–2 hours before): Aim for a small, balanced meal with moderate carbohydrates and protein. A bowl of oatmeal with a hard-boiled egg, or Greek yogurt with fruit, gives you sustained energy without digestive discomfort during the session. The Academy of Nutrition and Dietetics recommends 1 to 4 grams of carbohydrate per kilogram of body weight in the hours before moderate-intensity exercise.

    If rowing first thing in the morning: A small carbohydrate snack 30 minutes before — half a banana, a slice of whole grain toast — can support performance without heaviness. Some people row well in a fasted state; results vary significantly depending on your fitness level and morning intensity.

    Post-workout (within 30–60 minutes): Prioritize protein for muscle repair and carbohydrates to replenish glycogen. A protein shake with a piece of fruit, or a chicken and rice bowl, are practical choices. Research published in the Journal of the International Society of Sports Nutrition supports consuming 20 to 40 grams of protein after resistance-based and endurance exercise to optimize muscle protein synthesis.

    Hydration: Rowing produces significant sweat output, especially during intense sessions. The USDA Dietary Guidelines and ACSM both recommend maintaining consistent fluid intake throughout the day, and replacing fluid losses during and after exercise. A practical starting point: drink 16 to 20 ounces of water 1 to 2 hours before rowing, and continue hydrating throughout your session.

    How Long Until You See Results — and What to Track

    Realistic timelines matter. Setting honest expectations keeps you consistent when early progress feels invisible.

    Weeks 1–2: You’ll feel the workout — muscle fatigue, elevated heart rate, and possibly some soreness in your lats, glutes, and core. This is normal adaptation. Don’t judge your progress by how you feel yet.

    Weeks 3–4: Most beginners notice improved cardiovascular endurance — sessions that felt difficult start to feel more manageable. Your stroke becomes more fluid and efficient. If you’re tracking your 500-meter split time, you’ll likely see it drop.

    Weeks 6–8: This is typically when visible and measurable changes appear — improved posture, a stronger back and core, and for those also managing their nutrition, potential changes in body composition. A study in the Journal of Strength and Conditioning Research noted meaningful cardiovascular improvements after 8 weeks of consistent rowing at 3 sessions per week.

    What to track:

    • 500-meter split time — your average time to row 500 meters; a key rowing performance benchmark
    • Total meters per session — a simple indicator of volume
    • Resting heart rate — drops as your cardiovascular fitness improves
    • How you feel at a fixed effort level — if 22 SPM feels easier than it did three weeks ago, that’s progress

    If you’re combining rowing with strength training, consider pairing it with foundational movements. Resources on dumbbell training for adults and kettlebell training complement rowing well, addressing muscle groups that rowing doesn’t isolate as directly.

    When to reassess or seek guidance: if you experience persistent lower back pain, sharp joint discomfort, or your performance stops improving after 8 to 10 weeks of consistent effort, consult a certified personal trainer or physical therapist to evaluate your form and programming.

    Frequently Asked Questions

    Is the rowing machine good for weight loss?
    Rowing can absolutely support a weight loss goal, primarily because it burns a meaningful number of calories while also building muscle — and more muscle means a higher resting metabolic rate over time. That said, exercise alone rarely produces significant fat loss without corresponding attention to nutrition. Rowing works best as part of a broader lifestyle approach that includes a balanced, moderate calorie intake.

    Is rowing safe if I have lower back problems?
    It depends on the nature and severity of your back issue. For many adults with mild chronic lower back tightness, rowing with correct form actually strengthens the supporting muscles and reduces discomfort over time. However, if you have a diagnosed disc injury, spinal stenosis, or acute back pain, you should get clearance from your physician or physical therapist before rowing. Never push through sharp or radiating back pain.

    How many days a week should I row?
    For general fitness, 3 to 4 days per week is a solid target for most adults. This allows enough volume for cardiovascular adaptation while giving your muscles — especially the back and legs — adequate recovery time. Beginners may do well starting with 2 days per week and building up gradually.

    Can rowing replace all my cardio?
    For many people, yes — rowing covers all the bases of cardio fitness: aerobic endurance, muscular endurance, and high-intensity conditioning. However, varied movement patterns are always beneficial for long-term health. Mixing rowing with walking, cycling, or other low-impact activities keeps your body adaptable and reduces overuse patterns.

    What’s a good rowing workout for complete beginners?
    Start with a simple 15-minute session: 3 minutes easy rowing at 18–20 SPM, 1 minute slightly harder at 22–24 SPM, and repeat this pattern three times. Keep the damper between 3 and 5, focus entirely on letting your legs lead the stroke, and track how your body feels throughout. Simple, structured, and sustainable is the right starting point.

    Start Rowing — One Stroke at a Time

    The rowing machine isn’t a secret, but it might as well be — because most people walk past it without ever experiencing what it can do for their fitness. Full-body engagement, low joint impact, scalable intensity, and genuine cardiovascular challenge. It checks every box a busy adult needs from a workout.

    You don’t need to be an athlete or a competitive rower to benefit. You just need to show up, learn the stroke, and stay consistent. Progress on the rowing machine is measurable, tangible, and — for most people — surprisingly fast.

    Your action step for today: if you have access to a rowing machine, commit to one 10-minute form-focused session this week. Just focus on the sequence — legs, core, arms. Everything else builds from there.


    This article is for informational and educational purposes only. The content is not intended to replace professional medical, nutritional, or fitness advice. Always consult a qualified healthcare provider, registered dietitian, or certified fitness professional before starting a new health program or making significant changes to your lifestyle.

    Content reviewed by our wellness editorial team, with references to peer-reviewed research and guidelines from leading health organizations.

  • Interval Training for Adults: Burn Fat and Build Fitness

    Interval Training for Adults: Burn Fat and Build Fitness

    Interval Training for Adults: Burn Fat and Build Fitness

    If your workouts feel like they’re taking forever but delivering too little — interval training might be exactly what your routine has been missing.

    You’ve probably heard it before: someone swears they transformed their fitness in half the time by switching up how they train. And while that kind of claim usually deserves a healthy dose of skepticism, there’s a version of it that holds up to science. Interval training — the practice of alternating between periods of higher effort and active recovery — has decades of research behind it, and it consistently delivers measurable improvements in cardiovascular health, fat metabolism, and endurance for everyday adults.

    But there’s a lot of noise out there about what interval training actually is, how hard it needs to be, and whether it’s safe if you’re not already in great shape. Spoiler: it’s far more flexible than most people realize.

    In this guide, you’ll learn the real science behind interval training, how to get started regardless of your current fitness level, the most common mistakes that stall progress, and what realistic results actually look like. No hype, no extreme promises — just practical guidance grounded in evidence.

    Why Interval Training Matters More Than You Think

    The most common reason adults give up on exercise is time. And it’s a legitimate barrier — between work, family, and everything else life throws at you, carving out 60 to 90 minutes for a workout five days a week simply isn’t realistic for most people.

    This is where interval training earns its reputation. Research published in the Journal of Physiology found that short bouts of higher-intensity interval work — even as brief as 10 minutes of actual effort within a 20-minute session — produced comparable cardiovascular adaptations to 45 minutes of moderate continuous exercise in sedentary adults.

    Beyond time efficiency, interval training triggers a phenomenon often called excess post-exercise oxygen consumption, or EPOC. This refers to the elevated rate at which your body continues to consume oxygen — and burn calories — after a session ends. The American College of Sports Medicine (ACSM) notes that higher-intensity interval work tends to produce a greater EPOC response than steady-state cardio, meaning your body keeps working even after you’ve stepped off the treadmill.

    For adults in their 30s, 40s, and 50s, interval training also plays a meaningful role in preserving cardiovascular health. The American Heart Association recommends at least 150 minutes per week of moderate-intensity aerobic activity — and structured intervals can help you hit that target without spending hours in the gym.

    The Science Behind Interval Training: How It Actually Works

    Interval training isn’t just a trendy workout format — it’s a specific physiological stimulus. When you push your body beyond its comfortable aerobic zone for a sustained period, then allow it to partially recover before pushing again, you’re forcing adaptations that steady-state exercise at a single pace simply doesn’t produce at the same rate.

    At the cellular level, intervals stress your mitochondria — the energy-producing structures inside your muscle cells. A landmark study from McMaster University, published in the Journal of Applied Physiology, demonstrated that interval training significantly increased mitochondrial density in skeletal muscle, improving the body’s ability to generate energy aerobically over time. More mitochondria means better endurance, more efficient fat oxidation, and improved overall stamina.

    One persistent myth worth busting: you have to go all-out for intervals to work. In reality, the “intensity” required is relative to your personal fitness baseline. Research shows that working at 70-85% of your maximum heart rate during work intervals — challenging but not maximal — is enough to drive meaningful adaptation in most adults. You don’t need to feel like you’re about to pass out for the training to count.

    Another commonly misunderstood point: intervals are not exclusively a running or cycling thing. Interval principles apply to swimming, rowing, elliptical work, walking (yes, walking intervals are legitimate), and even strength circuit training. The structure — work hard, recover, repeat — is what defines it, not the specific modality.

    How to Get Started With Interval Training

    The biggest mistake beginners make is going too hard too soon. Interval training has a lower floor than most people assume — meaning you can start very conservatively and still see real results.

    Here’s a practical framework to get you started:

    Step 1: Choose Your Modality

    Pick an activity you can sustain for 20-30 minutes: walking, jogging, cycling, swimming, rowing, or even jump rope. The best modality is the one you’ll actually do consistently. If you’re new to exercise or returning after a long break, walking intervals are a legitimate and effective starting point — and you can explore cycling-based interval approaches as you progress.

    Step 2: Start With a Simple 1:2 Work-to-Rest Ratio (Beginner)

    For your first two to three weeks, alternate 30 seconds of increased effort with 60 seconds of easy recovery. Aim for 6 to 8 rounds, bookended by a 5-minute warm-up and 5-minute cooldown. Total session time: around 20-25 minutes.

    Step 3: Progress to a 1:1 Ratio (Intermediate)

    After three to four weeks, when your recovery improves, match your work and rest periods: 45 seconds on, 45 seconds easy, or 1 minute on and 1 minute recovery. Increase rounds to 8-12. ACSM guidelines suggest progressing volume before intensity — more rounds before harder effort.

    Step 4: Explore Structured Protocols (Advanced)

    More structured formats like Tabata (20 seconds on, 10 seconds off, 8 rounds) or traditional HIIT protocols (3-4 minutes hard, 3 minutes easy, repeated 4-6 times) are well-documented in research and appropriate once you’ve built a base. If you’re interested in combining intervals with strength work, resistance band training pairs well with interval-style circuits.

    Step 5: Keep Frequency Realistic

    Two to three interval sessions per week is enough for most adults. More is not always better — adequate recovery between sessions is where much of the adaptation actually happens.

    Common Mistakes That Sabotage Your Interval Training Results

    Even well-intentioned exercisers make these errors regularly — and most of them are easy to correct once you know what to look for.

    Mistake 1: Skipping the Warm-Up
    Jumping into high-effort intervals cold dramatically increases injury risk and blunts performance. Your body needs 5-8 minutes of gradually increasing activity to prep joints, prime the cardiovascular system, and signal your muscles to shift into a higher gear. A rushed warm-up isn’t just ineffective — it’s a common cause of avoidable strain, especially in adults over 40.

    Mistake 2: Making Every Session a Max-Effort Session
    This is one of the most widespread errors in interval training. Going all-out every time leads to accumulated fatigue, poor form in later rounds, and eventually, overtraining symptoms like chronic soreness, poor sleep, and declining performance. Your harder sessions should be genuinely hard — but not every session should hit that ceiling. Alternate between moderate-intensity interval days and more vigorous ones.

    Mistake 3: Neglecting Recovery Intervals
    The recovery portion of interval training isn’t filler — it’s part of the stimulus. Cutting rest short might feel productive, but it prevents your heart rate from returning to the target recovery zone, making the next work interval less effective. Honor your rest periods. They’re doing more than you think.

    Mistake 4: Doing Too Much Too Soon
    Increasing duration, intensity, and frequency simultaneously in the first few weeks is a recipe for burnout and injury. Apply the 10% rule as a starting guideline: don’t increase total weekly volume by more than 10% from one week to the next. It feels slow at first, but it compounds effectively over weeks.

    Mistake 5: Ignoring How You Feel
    Heart rate monitors and fitness trackers are helpful, but your perceived exertion and how your body feels day to day are equally important signals. Interval training should feel challenging but controlled during work periods — if you’re dizzy, nauseous, or feel sharp pain at any point, stop and reassess. Results vary significantly based on individual baseline fitness and health history.

    What to Eat to Support Your Interval Training

    Interval training is more metabolically demanding than a casual walk, and your nutrition should reflect that — without overcomplicating it.

    Before Your Session: A small carbohydrate-containing snack 30-60 minutes before training can improve performance and reduce fatigue. The Academy of Nutrition and Dietetics recommends easily digestible options like a banana with nut butter, oatmeal, or a small whole-grain toast with light toppings. Avoid heavy, high-fat meals within two hours of a session.

    After Your Session: Post-interval recovery depends on protein for muscle repair and carbohydrates to replenish glycogen. Research published in the Journal of the International Society of Sports Nutrition suggests consuming 20-40 grams of protein within an hour or two after a training session supports muscle protein synthesis. Greek yogurt, eggs, a protein shake, or grilled chicken with complex carbs are practical choices.

    Hydration: Even moderate interval sessions can produce significant sweat loss. The ACSM recommends drinking approximately 17-20 oz of water 2-3 hours before exercise, and continuing to hydrate during and after your session based on thirst and body weight changes. For sessions longer than 45-60 minutes, a small amount of electrolytes may help replace sodium and potassium lost through sweat.

    Avoid: Training fasted if you’re newer to intervals — while some experienced athletes train without eating beforehand, beginners often find that low blood sugar mid-session leads to dizziness and poor performance. The USDA Dietary Guidelines support fueling appropriately around physical activity for most adults.

    How Long Until You See Results and What to Track

    Managing expectations is one of the most important parts of any fitness program. Interval training is effective — but it follows a timeline, and that timeline varies by person.

    Week 1-2: You’re likely to notice session-to-session improvements in how you feel during recovery periods. Your heart rate will start returning toward its resting level faster between intervals — this is a real, measurable sign of cardiovascular adaptation.

    Week 3-6: Most adults report improved stamina during daily activities (climbing stairs, carrying groceries), better energy levels on non-training days, and a gradual improvement in how hard they can push during work intervals without feeling destroyed. Research from the British Journal of Sports Medicine suggests that significant cardiovascular markers — including VO2 max improvements — begin to appear within 4-6 weeks of consistent interval training.

    Week 6-12: Body composition changes, if they occur, typically become more visible in this range — particularly when paired with consistent nutrition habits. Muscle tone in the legs and core often improves noticeably. Sleep quality frequently improves as well, particularly when sessions are scheduled earlier in the day.

    What to Track: Resting heart rate (lower over time = good), rate of perceived exertion at a standard effort level (should feel easier over weeks), and session duration before fatigue sets in. You can also track how quickly your heart rate recovers between intervals as a simple performance marker.

    When to Reassess: If after 8 weeks you’re not seeing any improvements in recovery speed or stamina, consider whether you’re doing enough sessions per week, progressing gradually, or sleeping and eating adequately. A session with a certified personal trainer or a check-in with your physician can help identify whether something else is at play.

    Frequently Asked Questions About Interval Training

    Is interval training safe for beginners or people who are out of shape?
    Yes — with appropriate modifications. The key is starting at a low effort level and using a conservative work-to-rest ratio (1:2 or even 1:3). Walking intervals, for example, are a genuinely effective entry point. If you have a cardiovascular condition, hypertension, or joint issues, check with your healthcare provider before starting any new exercise program.

    How is interval training different from HIIT?
    HIIT (High-Intensity Interval Training) is a specific type of interval training where the work periods are performed at near-maximal effort. Interval training is the broader category that includes moderate-intensity intervals, tempo intervals, and other structured formats. HIIT tends to be more demanding and requires more recovery — it’s not always the right starting point for beginners.

    Can I do interval training every day?
    It’s generally not recommended, especially at moderate to high intensity. Your body needs time between sessions to repair and adapt. Two to three sessions per week is a well-supported frequency for most adults, with other days dedicated to lighter activity, strength training, or rest. You can explore Zone 2 cardio as a complement to your interval days — it trains a different energy system and supports recovery.

    Will interval training help me lose weight?
    Interval training can support fat loss when combined with appropriate nutrition — but it’s not a standalone weight management solution. The calorie burn per session can be meaningful, and the EPOC effect adds some additional burn post-session. However, dietary habits, sleep quality, and overall activity levels all play significant roles. Results vary considerably based on individual factors.

    What’s the best time of day to do interval training?
    Research is mixed on whether morning or afternoon training is definitively superior. What matters most is consistency — the best time is the time you can stick to. Many people find that morning sessions help with energy levels throughout the day, while others perform best in the early afternoon when body temperature and muscle function tend to peak.

    Start Small, Stay Consistent, and Let the Science Work

    Interval training isn’t a magic formula — but it is one of the most efficient, flexible, and well-researched tools available for improving your fitness as a busy adult. Whether you’re starting with 20-minute walking intervals or working up to structured HIIT protocols, the underlying principle remains the same: challenge your body, let it recover, and repeat consistently over time.

    You don’t need to overhaul your entire routine tomorrow. Start with two sessions this week using a 1:2 work-to-rest ratio for 20 minutes. Track how your recovery feels between intervals. Give it four weeks before evaluating. Small, consistent steps compound into real, lasting fitness improvements — and that’s a promise the research backs up.

    This article is for informational and educational purposes only. The content is not intended to replace professional medical, nutritional, or fitness advice. Always consult a qualified healthcare provider, registered dietitian, or certified fitness professional before starting a new health program or making significant changes to your lifestyle.

    Content reviewed by our wellness editorial team, with references to peer-reviewed research and guidelines from leading health organizations.
  • Cycling Training for Adults: Build Endurance, Burn Fat

    Cycling Training for Adults: Build Endurance, Burn Fat

    Cycling Training for Adults: Build Endurance, Burn Fat

    Whether you haven’t touched a bike in years or you ride casually on weekends, structured cycling training can completely transform your fitness — and it’s more beginner-friendly than most people expect.

    Introduction

    Picture this: you hop on a bike for what feels like a moderate ride, and ten minutes in, you’re gasping for air, wondering how something that looked so easy on the trail is wiping you out this fast. Sound familiar?

    You’re not alone. Millions of American adults cycle occasionally, but very few train with any real structure. The result? Plateaued fitness, frustrating fatigue, and missed results. According to the American College of Sports Medicine, cycling is one of the most effective low-impact cardiovascular activities for adults of all fitness levels — yet most people never tap into its full potential because they don’t know how to train smart.

    This guide isn’t about becoming a competitive cyclist or logging 200 miles a week. It’s about using cycling — indoors or outdoors — as a structured fitness tool to build real endurance, burn fat efficiently, strengthen your lower body, and protect your joints for the long haul.

    By the end of this article, you’ll understand the science behind cycling fitness, know how to build a beginner-to-intermediate training plan, avoid the most common mistakes, and track your progress in a way that actually motivates you to keep going.

    Why Cycling Training Matters More Than You Think

    Cycling is often seen as a leisure activity — something you do at the park on a Sunday or on a stationary bike while watching TV. But structured cycling training is a completely different experience, and the health benefits go well beyond burning a few calories.

    Research published in the Journal of the American Heart Association found that regular cycling significantly reduces the risk of cardiovascular disease, with habitual cyclists showing lower rates of hypertension, obesity, and metabolic syndrome compared to sedentary adults. The American Heart Association recommends at least 150 minutes of moderate-intensity aerobic activity per week — and cycling is one of the most sustainable ways to hit that target.

    Beyond heart health, cycling engages the quadriceps, hamstrings, glutes, calves, and even the core — all without the joint impact of running. For adults over 35 who are navigating knee discomfort, back pain, or post-injury recovery, this makes cycling a genuinely smart training choice.

    And here’s what most people miss: cycling outdoors or on a smart trainer also has measurable mental health benefits. A study in JAMA Internal Medicine linked regular moderate exercise — including cycling — to significant reductions in depressive symptoms and perceived stress in adults aged 25 to 60.

    In short, if you’re looking for an exercise that builds cardio fitness, burns fat, strengthens your legs, protects your joints, and supports your mental well-being — cycling deserves a serious spot in your weekly routine.

    The Science Behind Cycling Fitness: How It Actually Works

    One of the biggest myths about cycling is that it’s "mostly legs." While your lower body is definitely doing the heavy lifting, effective cycling training demands full-body engagement — and the physiological adaptations it triggers are impressive.

    When you cycle at moderate to vigorous intensity, your body increases cardiac output — the volume of blood your heart pumps per minute — to deliver oxygen to working muscles. Over weeks of consistent training, your heart becomes more efficient: it pumps more blood per beat, your resting heart rate drops, and your VO2 max (the maximum amount of oxygen your body can use during exercise) improves. The American College of Sports Medicine considers VO2 max one of the strongest predictors of long-term health and longevity.

    From a fat-burning perspective, cycling at moderate intensity (roughly 60-75% of your maximum heart rate) taps heavily into fat as a fuel source. A study in the Journal of Sports Science and Medicine confirmed that sustained moderate-intensity cycling is highly effective at improving fat oxidation in both trained and untrained adults.

    Busting a common myth: Many people believe that going harder and faster always burns more fat. In reality, your body burns a higher percentage of calories from fat at moderate intensities than at very high intensities. This is the principle behind Zone 2 training — a concept worth exploring if you want to train smarter, not just harder. (You can read more about this in our guide on Zone 2 Cardio: The Science-Backed Way to Train Smarter.)

    Muscle adaptation is the other side of the equation. Regular cycling builds endurance muscle fibers (Type I), improves neuromuscular efficiency in the legs and hips, and — when combined with resistance work — can contribute to meaningful lower-body strength over time.

    How to Get Started: Your Cycling Training Plan

    Starting a structured cycling routine doesn’t require expensive gear or hours of free time. What it requires is consistency, a progressive approach, and a basic understanding of intensity.

    Step 1: Establish Your Baseline

    Before you build a plan, you need to know where you’re starting. Go for a 20-minute easy ride — indoors or outdoors — at a pace where you can hold a conversation but feel slightly breathless. Note how you feel at the end. This is your starting point.

    Step 2: Use a Simple 3-Day Weekly Structure (Beginner)

    • Day 1 — Easy Endurance Ride: 30-40 minutes at comfortable pace (Zone 2 effort, conversational). Focus on smooth pedaling and breathing.
    • Day 2 — Rest or light activity (walking, stretching)
    • Day 3 — Interval Ride: 20-30 minutes total. Alternate 2 minutes of moderate effort with 3 minutes easy recovery. Repeat 4-6 times.
    • Day 4 — Rest
    • Day 5 — Longer Ride: 45-60 minutes at easy to moderate pace. Build this ride by 5-10 minutes each week.

    Step 3: Add Intensity Progressively (Intermediate)

    Once you’ve completed 4-6 weeks at the beginner level, you can introduce longer intervals (4-5 minutes at moderately hard effort), hill repeats if cycling outdoors, or resistance increases on a stationary bike. Apply the principle of progressive overload — gradually increasing your training stimulus week over week. For a deeper dive on this principle, check out our guide on Progressive Overload: The Key to Never-Ending Fitness Gains.

    Indoor vs. Outdoor Cycling

    Both have genuine value. Indoor cycling (spin bikes, smart trainers) offers controlled intensity and convenience — ideal for early mornings or bad weather. Outdoor cycling adds terrain variety, balance demands, and mental refreshment. If you can do both, alternate between them. Results depend on your consistency, not your location.

    Common Mistakes That Sabotage Your Cycling Progress

    Even motivated cyclists fall into the same traps. Here are the most common ones — and exactly how to fix them.

    Mistake 1: Always Riding at the Same Pace

    This is the number one mistake. Riding at the same moderate intensity every session feels safe and comfortable, but your body adapts quickly and stops progressing. You need variation — easy rides, interval sessions, and longer endurance rides — to keep triggering adaptation.

    Fix it: Follow a structured plan that alternates intensity levels. Use the simple 3-day structure above as your framework.

    Mistake 2: Skipping Recovery

    More miles does not always mean more results. Muscles repair and grow stronger during rest, not during the workout itself. Overtraining in cycling is a real phenomenon — symptoms include persistent fatigue, elevated resting heart rate, irritability, and declining performance.

    Fix it: Schedule at least 2 full rest or active recovery days per week. Sleep is part of your training. According to the National Sleep Foundation, adults need 7-9 hours per night for optimal physical recovery.

    Mistake 3: Poor Bike Fit

    Riding with your seat too low, handlebars too far, or cleats misaligned doesn’t just feel uncomfortable — it increases injury risk and reduces efficiency. A poorly fitted bike forces your body to compensate with every pedal stroke, leading to knee pain, lower back strain, and hip discomfort.

    Fix it: Get a professional bike fit if cycling outdoors. On a stationary bike, ensure your knee has a slight bend at the bottom of the pedal stroke (not fully extended or heavily bent). Your hips should not rock side to side.

    Mistake 4: Neglecting Fueling and Hydration

    Many adults underestimate how much water they lose during cycling, especially in warmer conditions. Dehydration of even 2% of body weight has been shown to measurably reduce aerobic performance, according to research cited by the American College of Sports Medicine.

    Fix it: Drink 16-20 oz of water in the hour before your ride. Sip during your ride — aim for 6-8 oz every 15-20 minutes. For rides over 60 minutes, consider adding a small carbohydrate source (banana, energy chews, or sports drink).

    What to Eat to Support Cycling Training

    Cycling performance is directly tied to what you put in your body — both before and after you ride.

    Before Your Ride

    For rides under 45 minutes, a light snack 30-60 minutes prior works well. Good options include a banana with a tablespoon of peanut butter, a small bowl of oatmeal with fruit, or a slice of whole-grain toast with honey. Avoid heavy meals or high-fat foods close to your ride.

    During Your Ride

    For rides under 60 minutes, water is typically sufficient. For rides over 60 minutes at moderate to high intensity, the Academy of Nutrition and Dietetics recommends consuming 30-60 grams of carbohydrates per hour to sustain performance and prevent glycogen depletion.

    After Your Ride

    Post-ride recovery nutrition is critical for muscle repair and adaptation. Aim to eat within 30-60 minutes of finishing. A combination of protein (20-30 grams) and carbohydrates (30-50 grams) is ideal. Examples: Greek yogurt with fruit and granola, a chicken and rice bowl, or a protein smoothie with banana and oats.

    The USDA Dietary Guidelines reinforce that overall dietary quality — adequate protein, complex carbohydrates, healthy fats, and a variety of fruits and vegetables — supports long-term athletic performance and recovery far more than any single supplement or "performance food."

    How Long Until You See Results? What to Track

    Realistic expectations matter. Cycling fitness doesn’t happen overnight, but the timeline is encouraging if you’re consistent.

    Weeks 1-2: Foundation Phase

    You’ll likely notice reduced breathlessness during moderate efforts. Your legs may feel heavy after rides — this is normal. Track your average heart rate and perceived effort (1-10 scale) during each session.

    Weeks 3-6: Adaptation Phase

    Your body is adapting. Most beginners notice they can ride longer at the same intensity or complete intervals that felt impossible at the start. Track your average speed (outdoor) or resistance level (indoor) as a performance benchmark.

    Weeks 6-12: Performance Phase

    Meaningful cardiovascular improvements, improved fat utilization, and measurable strength gains in the lower body typically emerge in this window. If body composition is a goal, changes often become visible around weeks 8-12 when combined with consistent nutrition.

    What to Track

    • Resting heart rate (lower over time = improved cardiovascular fitness)
    • Perceived exertion at a fixed pace (should decrease as fitness improves)
    • Ride duration and distance over time
    • Energy levels and sleep quality (often the earliest positive signals)

    If you’re not seeing any improvement after 8-10 weeks of consistent training, consider consulting a certified personal trainer or sports medicine professional to reassess your approach. Results vary significantly based on baseline fitness, training consistency, nutrition, and sleep quality.

    Frequently Asked Questions

    Is cycling enough exercise on its own, or do I need to add strength training?

    Cycling is an excellent cardiovascular workout, but it doesn’t fully address upper body strength, bone density, or functional movement patterns. The American College of Sports Medicine recommends combining aerobic training with at least two days of resistance exercise per week for comprehensive health benefits. You don’t need to choose between the two — consider pairing your cycling sessions with a simple bodyweight or dumbbell routine. Check out our guide on Dumbbell Training for Adults: Build Strength and Burn Fat for an easy complement to your cycling plan.

    How many days per week should I cycle as a beginner?

    Three structured rides per week is an ideal starting point for most beginners. This allows for sufficient training stimulus while leaving room for recovery. As your fitness improves over 4-6 weeks, you can add a fourth session. Rushing to daily riding without adequate recovery is one of the fastest ways to end up burned out or injured.

    Can cycling help with weight loss?

    Yes — cycling can be an effective part of a weight management strategy when combined with a balanced nutritional approach and adequate recovery. A 155-pound adult burns approximately 260-300 calories during a 30-minute moderate-intensity cycling session, according to Harvard Health Publishing. However, weight loss results depend heavily on your overall caloric balance, diet quality, sleep, and training consistency. There are no guarantees, but cycling consistently does create real caloric expenditure over time.

    Is indoor cycling as effective as riding outdoors?

    Both can produce excellent results. Indoor cycling offers consistent, controlled intensity and is highly convenient — making it easier to stay consistent in poor weather or with a tight schedule. Outdoor riding adds terrain variety, fresh air, and greater mental engagement. The best choice is whichever one you’ll actually do consistently. If possible, mix both.

    I have knee pain. Is cycling safe for me?

    Cycling is generally considered a low-impact activity and is often recommended for people managing knee discomfort — but proper bike fit is essential. Riding with your saddle too low can increase compressive forces on the knee. If you have an existing knee condition, consult your healthcare provider or a physical therapist before starting. They can help determine the appropriate intensity, bike setup, and any modifications needed for your specific situation.

    Your Next Pedal Stroke Starts Today

    Cycling training is one of the most accessible, joint-friendly, and genuinely enjoyable ways to build real cardiovascular fitness — and you don’t have to be an athlete to benefit. Whether you ride outdoors on early mornings or spin indoors during your lunch break, the key is structure, consistency, and patience.

    You don’t need to ride hard every day. You don’t need fancy gear. You need a simple plan, the willingness to show up three times a week, and enough self-compassion to keep going when progress feels slow.

    The best cycling training is the kind you’ll actually do. Start with one ride this week. Keep it easy. Notice how you feel. Then do it again.


    Wellness Disclaimer: This article is for informational and educational purposes only. The content is not intended to replace professional medical, nutritional, or fitness advice. Always consult a qualified healthcare provider, registered dietitian, or certified fitness professional before starting a new health program or making significant changes to your lifestyle.

    Author Line: Content reviewed by our wellness editorial team, with references to peer-reviewed research and guidelines from leading health organizations.
  • Dumbbell Training for Adults: Build Strength and Burn Fat

    Dumbbell Training for Adults: Build Strength and Burn Fat

    Dumbbell Training for Adults: Build Strength and Burn Fat

    You don’t need a fancy gym setup or expensive machines — two dumbbells and a plan can completely change your body and energy levels.

    If you’ve ever walked into a gym and felt overwhelmed by all the equipment, you’re not alone. Rows of machines, cable setups, and complicated racks can make the idea of strength training feel inaccessible. But here’s what most people don’t realize: dumbbells are one of the most versatile, science-supported tools in all of fitness — and they work just as well at home as they do in a gym.

    Dumbbell training for adults is having a well-deserved moment, and the research backs it up. Whether your goal is to build lean muscle, improve your metabolic health, reduce joint pain, or simply feel stronger moving through daily life, a well-designed dumbbell workout program can deliver meaningful, lasting results.

    In this guide, you’ll learn exactly how dumbbell training works, why it’s especially effective for adults over 25, how to get started safely, and what common mistakes to avoid. No fluff — just practical, evidence-backed guidance you can apply starting today.

    Why Dumbbell Training Matters More Than You Think

    Here’s a stat that puts things in perspective: according to the American College of Sports Medicine (ACSM), adults begin losing 3 to 5 percent of muscle mass per decade after age 30 — a process called sarcopenia. By age 60, some individuals have lost as much as 30 percent of their total muscle mass if they haven’t been actively training.

    That’s not just a cosmetic issue. Muscle loss is directly tied to reduced metabolism, increased risk of type 2 diabetes, poor bone density, and a higher likelihood of injury from everyday activities. Resistance training — including dumbbell work — is one of the most effective interventions known to slow this decline.

    What makes dumbbells particularly valuable is the way they engage your stabilizer muscles. Unlike fixed machines, which lock your body into a guided path, dumbbells require your joints, tendons, and smaller muscle groups to work together to control the movement. This means you’re building functional strength — the kind that translates to carrying groceries, playing with kids, or staying injury-free on the trail.

    Research published in the Journal of Strength and Conditioning Research found that free-weight training produced significantly greater activation of stabilizer muscles compared to machine-based training, without sacrificing overall strength gains. That’s a compelling reason to grab a pair of dumbbells and get to work.

    How Dumbbell Training Actually Works

    Let’s clear up a common myth first: lifting weights won’t make you bulky unless you’re eating a significant caloric surplus and training specifically for hypertrophy over many months. For most adults, consistent dumbbell training leads to a leaner, more defined physique — not an oversized one.

    Here’s what’s actually happening inside your body when you train with dumbbells. When you create mechanical tension by lifting a load — say, performing a dumbbell row — you create microscopic damage to your muscle fibers. Your body responds by repairing those fibers stronger than before, a process driven by satellite cells and protein synthesis. Over time, this leads to increased muscle density, improved neuromuscular coordination, and a higher resting metabolic rate.

    According to Harvard Health Publishing, adding just 10 pounds of lean muscle can increase your resting metabolism by approximately 100 calories per day. That may not sound like much, but over weeks and months, it adds up considerably.

    Dumbbell training also supports cardiovascular health when structured correctly. Circuit-style dumbbell workouts — where you move from one exercise to the next with minimal rest — can keep your heart rate elevated and deliver metabolic conditioning benefits similar to moderate-intensity cardio. This dual-purpose efficiency is one reason busy adults often prefer it over isolated cardio sessions.

    One thing to keep in mind: results vary significantly based on your starting point, training frequency, recovery quality, and nutrition. Dumbbell training is a powerful tool, but it works best as part of a broader wellness approach.

    How to Get Started: A Practical Step-by-Step Plan

    Getting started with dumbbell training doesn’t require perfection — it requires consistency and a sensible structure. Here’s how to build a foundation that sticks.

    Step 1 — Choose your starting weights wisely.
    For most beginners, a range of two to three dumbbell pairs works well: a lighter set (8–12 lbs), a moderate set (15–20 lbs), and a heavier set (25–35 lbs). Adjustable dumbbells are a space-efficient and cost-effective option if you’re training at home. The right weight for any given exercise is one where the last 2–3 reps feel challenging but your form remains solid.

    Step 2 — Start with a 3-day-per-week full-body program.
    Beginners benefit most from training the full body each session rather than splitting by muscle group. A simple structure might look like this: Day 1 (Monday), Day 2 (Wednesday), Day 3 (Friday), with rest or light activity on the days in between. This frequency allows adequate recovery while building the motor patterns you need to progress.

    Step 3 — Master the foundational movement patterns first.
    Before chasing heavy weights, focus on learning five essential movement patterns:

    • Push — Dumbbell chest press, overhead press
    • Pull — Dumbbell rows, reverse fly
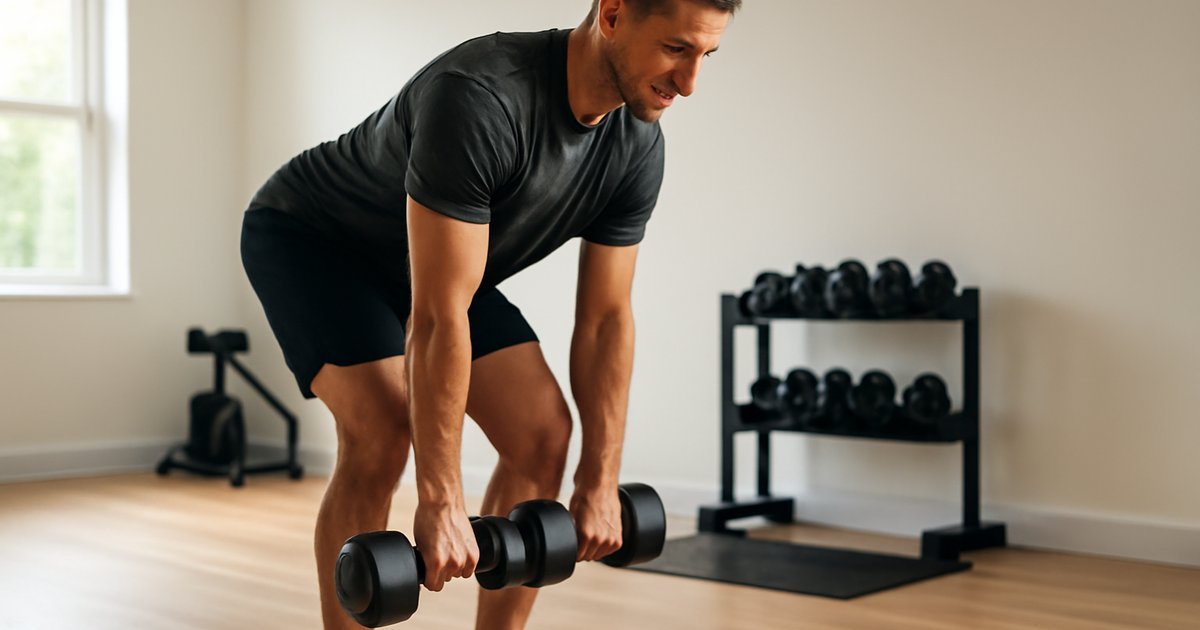
    • Hinge — Romanian deadlift, single-leg deadlift
    • Squat — Goblet squat, split squat
    • Carry — Farmer’s carry, suitcase carry

    A well-rounded dumbbell session includes at least one exercise from each category, hitting your upper and lower body while keeping the core engaged throughout. For a strong foundation in total-body movement, our guide on compound exercises for full-body strength pairs perfectly with this approach.

    Beginner sample session (30–40 minutes):

    • Goblet Squat — 3 sets x 10 reps
    • Dumbbell Romanian Deadlift — 3 sets x 10 reps
    • Dumbbell Chest Press — 3 sets x 10 reps
    • Bent-Over Row — 3 sets x 10 reps per arm
    • Farmer’s Carry — 3 sets x 30 seconds

    Intermediate upgrade: Add supersets (pairing a push with a pull), increase weight by 5% when you can complete all reps with clean form, and incorporate unilateral movements (single-arm, single-leg) to address muscle imbalances. For those ready to challenge their endurance alongside strength, the principles in Zone 2 cardio training can complement your dumbbell sessions effectively.

    Common Mistakes That Sabotage Your Dumbbell Training Results

    Even motivated adults make these missteps — and they can stall progress faster than you’d expect.

    Mistake #1 — Using weight that’s too light for too long.
    This is by far the most common issue, especially among women who are concerned about getting bulky. If your last rep of a set feels effortless, the weight isn’t creating enough stimulus to trigger adaptation. The fix: apply progressive overload — gradually increase your resistance, reps, or sets over time. Our detailed guide on progressive overload training walks you through how to do this systematically without risking injury.

    Mistake #2 — Skipping the warm-up.
    Jumping straight into heavy sets with cold muscles and stiff joints dramatically raises your injury risk. A 5–8 minute dynamic warm-up — think leg swings, arm circles, hip hinges, and bodyweight squats — prepares your nervous system and increases range of motion. This matters even more as you get into your 30s, 40s, and beyond.

    Mistake #3 — Neglecting the posterior chain.
    Most people instinctively train what they can see in the mirror — chest, biceps, quads. But your posterior chain (glutes, hamstrings, upper back, rear delts) is just as important for posture, injury prevention, and total-body strength. Make sure every training week includes Romanian deadlifts, rows, and reverse flies.

    Mistake #4 — Training without adequate rest between sessions.
    Muscle isn’t built in the gym — it’s built during recovery. According to the ACSM, most adults need 48 to 72 hours of recovery between sessions targeting the same muscle groups. Training the same muscles daily without rest can lead to overtraining, elevated cortisol, and regression rather than progress.

    Mistake #5 — Inconsistent breathing.
    Holding your breath during lifts (especially heavier ones) spikes internal pressure and reduces stability. The general rule: exhale on the exertion phase (when you lift or press), inhale on the return. Practicing this deliberately makes it automatic over time.

    What to Eat to Support Dumbbell Training Results

    Training without adequate nutrition is like building a house without materials. Your muscles need specific fuel to repair, grow, and perform.

    Protein is your top priority. The Academy of Nutrition and Dietetics recommends that adults engaged in regular resistance training consume 1.2 to 1.7 grams of protein per kilogram of body weight per day. For a 160-pound adult, that’s roughly 87 to 123 grams of protein daily. High-quality sources include lean chicken and turkey, eggs, Greek yogurt, cottage cheese, canned tuna, legumes, and tofu.

    Don’t neglect carbohydrates. Carbs are your muscles’ primary energy source. Low-carb approaches may blunt performance and recovery, particularly if you’re training at moderate to high intensity. Focus on whole-food carbs: oats, brown rice, sweet potatoes, quinoa, and fruit.

    Healthy fats support hormonal balance. Dietary fat plays a direct role in testosterone and estrogen regulation — hormones that affect muscle-building capacity. The USDA Dietary Guidelines recommend 20–35% of total calories from fat, prioritizing unsaturated sources like olive oil, avocados, nuts, and fatty fish.

    Timing matters — a little. While total daily protein intake is the bigger lever, consuming a protein-rich meal or snack within 1–2 hours post-workout can support muscle protein synthesis. A Greek yogurt with berries, a protein shake with milk, or eggs on whole-grain toast are all solid options.

    Hydration: Even mild dehydration (1–2% of body weight) can reduce strength output and cognitive performance during training. Aim for at least half your body weight in ounces of water daily, and more on training days.

    How Long Until You See Results — and What to Track

    Honest answer: noticeable physical changes typically take 6 to 12 weeks of consistent training and adequate nutrition. But that doesn’t mean nothing is happening before that.

    In the first 2–4 weeks, the primary adaptations are neurological. Your brain is learning to recruit muscle fibers more efficiently, which is why many beginners feel stronger before they look different. Strength gains during this phase can be significant — sometimes 10 to 20 percent increases in working weight — even without visible muscle growth.

    Visible changes in muscle definition and body composition typically become apparent after 8–12 weeks when training is combined with adequate protein and a reasonable caloric intake. Research published in Sports Medicine confirms that untrained adults can expect meaningful improvements in strength, lean mass, and functional capacity within a 12-week progressive resistance program.

    What to track:

    • Working weights per exercise (are they going up over time?)
    • Reps completed at a given weight
    • Energy levels and recovery quality
    • Body measurements (waist, hips, arms) — more reliable than scale weight alone
    • How everyday tasks feel (climbing stairs, carrying bags, posture)

    If you’ve been training consistently for 12 weeks with no perceptible improvement in any of these areas, consider reassessing your program, nutrition, sleep quality, or consulting a certified personal trainer or registered dietitian for personalized guidance.

    Frequently Asked Questions About Dumbbell Training

    Can I build serious muscle with just dumbbells?
    Absolutely — especially in the beginner to intermediate range. Dumbbells allow for a wide range of loads, movements, and tempos that can drive significant muscle and strength gains. Advanced lifters may eventually benefit from adding barbells or other tools for maximal loading, but most adults can achieve excellent results with dumbbells alone.

    How heavy should my dumbbells be?
    This depends entirely on the exercise and your current fitness level. A general rule: if you can complete more than 15 reps with perfect form and feel minimal fatigue, go heavier. If you can’t complete 8 reps with proper technique, drop down. Investing in an adjustable set or two to three pairs of different weights gives you the most flexibility.

    Is dumbbell training safe for people with joint issues?
    For many people with mild to moderate joint concerns, dumbbell training can actually improve joint stability and reduce pain over time by strengthening the muscles that support the joint. That said, this depends on the specific condition. If you have a diagnosed joint issue — knee osteoarthritis, shoulder impingement, or similar — consult a physical therapist or sports medicine physician before starting a program.

    How many days per week should I train with dumbbells?
    For most adults, 3 full-body sessions per week is an excellent starting point and sustainable long-term. As you advance, you might move to a 4-day upper/lower split. More than 5 days per week of resistance training is generally unnecessary for general health and wellness goals, and recovery becomes increasingly important with age.

    Do I need to stretch after dumbbell workouts?
    Post-workout stretching can support flexibility and reduce muscle soreness — and it’s a good habit to build. Spend 5–10 minutes on static stretches targeting the muscles you just worked. For a deeper approach to improving mobility alongside your strength training, explore our guide on flexibility training for adults.

    Start Simple, Stay Consistent, and Let the Results Follow

    Dumbbell training isn’t a shortcut or a trend — it’s one of the most time-tested, research-supported methods for building strength, improving body composition, and protecting your long-term health. The barrier to entry is low, the equipment is affordable, and the benefits compound over time in ways that go far beyond aesthetics.

    You don’t need to overhaul your entire life to start. Pick up a pair of dumbbells. Learn the five foundational movement patterns. Train three days a week. Eat enough protein. Sleep well. Track your progress. Then do it again next week.

    Small, consistent actions are what separate people who transform their health from those who stay stuck. Today is a great day to take the first step.


    This article is for informational and educational purposes only. The content is not intended to replace professional medical, nutritional, or fitness advice. Always consult a qualified healthcare provider, registered dietitian, or certified fitness professional before starting a new health program or making significant changes to your lifestyle.

    Content reviewed by our wellness editorial team, with references to peer-reviewed research and guidelines from leading health organizations.

  • Kettlebell Training for Adults: Strength, Power & Results

    Kettlebell Training for Adults: Strength, Power & Results

    Kettlebell Training for Adults: Strength, Power & Results

    One piece of equipment, a few feet of space, and a training method that builds real-world strength from head to toe — kettlebells might be the most underrated tool in the gym.

    If you’ve walked past those cannonball-shaped weights at your gym and never picked one up, you’re not alone. Most adults either gravitate toward machines or dumbbells, leaving the kettlebell rack untouched. But here’s what the research and decades of athletic training have confirmed: kettlebell training delivers a unique combination of strength, cardiovascular conditioning, and functional movement that very few training methods can match.

    According to research published in the Journal of Strength and Conditioning Research, kettlebell training significantly improves aerobic capacity, muscular strength, and dynamic balance simultaneously — making it one of the most efficient training tools available for time-pressed adults. Whether you’re 28 and building your first real fitness routine or 55 and looking for a joint-friendly way to stay strong and energized, kettlebells can meet you where you are.

    In this guide, you’ll learn exactly how kettlebell training works, why it’s different from conventional weight training, how to start safely, and what realistic results look like over time.

    Why Kettlebell Training Matters More Than You Think

    Here’s a surprising fact: most traditional gym routines train your body in isolated, linear patterns — a bicep curl moves in one direction, a leg press pushes straight forward. Real life doesn’t work that way. You twist, hinge, rotate, and carry things at odd angles every single day.

    Kettlebell training is built around multi-planar, full-body movements — swings, cleans, presses, and Turkish get-ups that mirror the way your body actually moves. This functional approach means every rep is building strength you’ll actually use, not just in the gym but in daily life.

    A landmark study conducted at the University of Wisconsin-La Crosse found that a 20-minute kettlebell workout burned an average of 400 calories — equivalent to running at a 6-minute-per-mile pace. That’s exceptional caloric expenditure in a short window, and it doesn’t require a treadmill, a track, or even leaving your living room.

    Beyond calorie burn, the American Council on Exercise (ACE) has highlighted kettlebell training as an effective method for improving core strength, grip strength, and posterior chain development — areas that are chronically underdeveloped in most sedentary adults. This matters because a strong posterior chain (glutes, hamstrings, lower back) is one of the most reliable predictors of injury prevention and long-term mobility.

    For adults over 40 especially, the hip-hinge patterns central to kettlebell training can help counteract the muscle loss and postural decline that come with prolonged sitting and aging.

    How Kettlebell Training Actually Works

    One common misconception is that kettlebells are just dumbbells with handles in awkward places. They’re not. The offset center of gravity — the weight sits below the handle rather than being evenly distributed — fundamentally changes how your muscles recruit and stabilize during each movement.

    When you swing a kettlebell, your body can’t cheat. Your core, hips, and shoulder stabilizers have to fire continuously to control the momentum. This creates what exercise scientists call reactive neuromuscular demand — your nervous system has to work harder, which translates to better motor control, coordination, and muscular endurance over time.

    The two primary movement categories in kettlebell training are:

    • Ballistic movements — swings, cleans, snatches. These are explosive, high-velocity movements that train power, cardiovascular conditioning, and posterior chain strength simultaneously.
    • Grind movements — presses, squats, Turkish get-ups. These are slow, controlled movements that build raw strength, stability, and neuromuscular coordination.

    A well-designed kettlebell program uses both categories. Research published in PLOS ONE found that combining ballistic and grind movements in the same training session produced greater improvements in both strength and aerobic endurance compared to programs using only one type.

    Myth to bust: Many beginners assume they need heavy kettlebells to see results. In reality, most adults benefit far more from mastering technique with a moderate weight than from swinging heavy bells with poor form. The American College of Sports Medicine (ACSM) consistently emphasizes that form integrity is the primary driver of safe, effective strength adaptation — not load.

    How to Get Started With Kettlebell Training

    Starting with kettlebells requires less equipment and space than almost any other training system — but it does require attention to movement quality. Here’s how to build a solid foundation.

    Step 1 — Choose the Right Starting Weight

    For most beginners, the Academy of Nutrition and Dietetics and fitness professionals recommend:

    • Women: Start with a 8–12 kg (18–26 lb) kettlebell
    • Men: Start with a 12–16 kg (26–35 lb) kettlebell

    These are general starting points. If you’re coming off a period of inactivity or have joint concerns, start lighter. If you have a strong lifting background, you may start heavier — but resist the urge to rush progression.

    Step 2 — Master the Foundational Movements First

    Before any program, nail these three basics:

    1. The Hip Hinge — Bend at the hips with a neutral spine, pushing your hips back rather than squatting down. This is the foundation of every swing, clean, and deadlift.
    2. The Goblet Squat — Hold the kettlebell at chest height and squat with a tall chest and knees tracking over toes. A forgiving, joint-friendly squat pattern for all fitness levels.
    3. The Two-Handed Swing — Drive your hips explosively forward while swinging the bell to shoulder height. Power comes from the hips, not the arms.

    Beginner Starter Routine (3 days/week):

    • Goblet Squat — 3 sets of 10 reps
    • Two-Handed Swing — 3 sets of 15 reps
    • Romanian Deadlift — 3 sets of 10 reps
    • Kettlebell Halo — 3 sets of 8 reps each direction
    • Dead Bug (bodyweight) — 3 sets of 8 reps

    Intermediate Progression: Add single-arm swings, kettlebell presses, and Turkish get-ups once you can complete the beginner routine with controlled, pain-free form for four consecutive weeks.

    Advanced Options: Kettlebell complexes (performing multiple exercises back-to-back without setting the bell down), double kettlebell training, and kettlebell sport (timed sets for maximum reps) are all high-intensity options for experienced practitioners.

    If you’re building a broader fitness program, pairing kettlebell training with compound exercises for full-body strength can accelerate your results significantly.

    Common Mistakes That Sabotage Results

    Kettlebell training has a relatively steep learning curve compared to machines. These are the mistakes most beginners make — and exactly how to fix them.

    Mistake 1 — Using Your Arms to Swing, Not Your Hips
    This is the most universal beginner error. The swing is a hip-driven movement, and your arms are just along for the ride. If your shoulders and biceps are sore after swings, you’re arm-pulling the bell. Fix: Practice the hip hinge pattern in slow motion before adding the swing. Think "snap hips forward" rather than "lift the bell."

    Mistake 2 — Going Too Heavy Too Soon
    More weight doesn’t mean more results — especially early on. Excessive load before you’ve developed proper movement patterns leads to compensations, poor form, and eventual injury. Fix: Spend at least four weeks at a moderate weight, prioritizing clean reps and full range of motion before adding load.

    Mistake 3 — Skipping the Warm-Up
    Kettlebell movements are ballistic and dynamic. Starting cold dramatically increases injury risk, particularly at the lower back, shoulders, and wrists. Fix: Spend 8–10 minutes warming up with hip circles, thoracic rotations, band pull-aparts, and bodyweight hip hinges before touching any kettlebell.

    Mistake 4 — Neglecting Recovery
    Because kettlebell sessions are intense and full-body, many beginners train too frequently and don’t allow adequate recovery time. Mayo Clinic research on resistance training recommends at least 48 hours of recovery between sessions targeting the same muscle groups. Fix: Limit kettlebell sessions to 3–4 days per week, especially during your first 8 weeks.

    Mistake 5 — Ignoring Grip and Wrist Positioning
    Dropping the bell or spraining a wrist because of poor grip technique is a common and entirely avoidable issue. Fix: The handle should sit diagonally across the palm (not in the fingers) with a firm but not white-knuckle grip. For overhead movements, the bell should rest on your forearm, not your wrist.

    What to Eat to Support Kettlebell Training

    Kettlebell training is intense and metabolically demanding. Your nutrition needs to reflect that — especially if your goal is building strength, losing body fat, or improving endurance.

    Protein — The Non-Negotiable
    The Academy of Nutrition and Dietetics recommends 1.2–2.0 grams of protein per kilogram of body weight for adults engaged in regular resistance and endurance training. For a 160-lb adult, that translates to roughly 87–145 grams of protein daily. Prioritize lean sources: chicken breast, Greek yogurt, eggs, cottage cheese, tofu, and legumes.

    Carbohydrates — Your Training Fuel
    The ballistic nature of kettlebell training draws significantly on glycolytic energy systems, meaning carbohydrates are essential. The USDA Dietary Guidelines recommend that 45–65% of total calories come from carbohydrates for active adults. Opt for quality sources: oats, sweet potatoes, quinoa, whole grain bread, and fruit.

    Pre-Workout Nutrition: A small mixed meal 60–90 minutes before training — something like a banana with peanut butter or oatmeal with berries — provides sustained energy without causing digestive discomfort during intense swings and presses.

    Post-Workout Recovery: Within 30–60 minutes after your session, aim for a protein-carbohydrate combination to support muscle repair. A protein shake with fruit, eggs on toast, or Greek yogurt with granola all work well.

    Hydration: Even modest dehydration (1–2% body weight) significantly impairs strength and power output, according to NIH research. Aim for at least half your body weight in ounces of water daily, and add electrolytes if sessions exceed 60 minutes.

    For further reading on building a strong foundation for your movements, check out our guide on building a strong core beyond just abs — core stability is critical for safe, effective kettlebell training.

    How Long Until You See Results — and What to Track

    Results depend significantly on your starting fitness level, training frequency, nutrition, and sleep quality. That said, here are realistic timelines based on current exercise science research.

    Weeks 1–3: Neural Adaptation Phase
    You’ll feel soreness, improve coordination, and notice that movements become smoother. Don’t expect major visual changes yet — your nervous system is learning, not your muscles growing. Strength gains may appear faster than expected during this phase due to improved motor unit recruitment.

    Weeks 4–8: Early Strength and Conditioning Gains
    Most beginners report noticeable improvements in stamina, grip strength, and overall energy. Research published in the Journal of Human Kinetics found significant strength and aerobic capacity improvements in untrained adults after just 6 weeks of twice-weekly kettlebell training.

    Weeks 8–16: Visible Body Composition Changes
    With consistent training and appropriate nutrition, you can expect measurable changes in muscle tone and body fat distribution. These results vary significantly depending on your diet and recovery practices.

    What to Track:

    • Swing reps at a given weight before form breaks down
    • Resting heart rate (a declining trend signals improving cardiovascular fitness)
    • How quickly your heart rate recovers after a hard set
    • Energy levels and sleep quality — both typically improve within the first 3–4 weeks
    • Body measurements (waist, hips, arms) rather than scale weight alone

    When to Reassess: If you’ve been training consistently for 12 weeks without any measurable progress, it may be time to adjust your program, consult a certified strength and conditioning specialist (CSCS), or evaluate recovery and nutrition factors. Plateaus are normal — they’re a signal to change variables, not to quit.

    You can further accelerate your results by understanding how progressive overload works — a principle that applies directly to kettlebell training and is essential for continued strength gains.

    Frequently Asked Questions

    Is kettlebell training safe for people with lower back pain?
    It depends on the cause and severity of your back pain. When performed with proper hip hinge mechanics, kettlebell swings can actually strengthen the posterior chain and reduce chronic lower back discomfort over time. However, starting with poor form can aggravate existing issues. Always consult your healthcare provider or a certified physical therapist before beginning kettlebell training if you have a history of back problems.

    How many days a week should I train with kettlebells?
    For most beginners, 3 days per week with at least one rest day between sessions is the evidence-backed sweet spot. As you advance and your recovery capacity improves, you can increase to 4 sessions per week. Daily training is generally not recommended unless sessions are short, low-intensity, and specifically programmed for recovery.

    Can I lose weight with kettlebell training alone?
    Kettlebell training is an effective tool for body composition improvement, but sustainable fat loss requires a calorie deficit supported by consistent nutrition habits. Training creates the stimulus; diet primarily drives the energy balance. Combined with a modest calorie deficit and adequate protein, kettlebell training can support meaningful fat loss over time — but it’s not a standalone solution.

    Do I need more than one kettlebell?
    Not to start. A single kettlebell in the appropriate weight range is enough to build a comprehensive beginner-to-intermediate program. As you advance, adding a second kettlebell (same or different weight) unlocks double-bell movements that significantly increase training options and intensity.

    Is kettlebell training appropriate for older adults?
    Absolutely — with appropriate modifications. Research published in Aging Clinical and Experimental Research found that kettlebell training improved grip strength, balance, and functional movement in adults over 60. The key is starting lighter, prioritizing movement quality, and progressing more gradually than younger trainees.

    Start Where You Are — One Swing at a Time

    Kettlebell training isn’t a trend. It’s a time-tested, research-backed approach to building functional strength, improving cardiovascular fitness, and moving better in everyday life — all with one piece of equipment and minimal space. It rewards consistency and punishes shortcuts, which means the people who stick with it tend to build the kind of durable, practical strength that machines simply can’t replicate.

    You don’t need to be an athlete to start. You don’t need a gym membership. You just need the right starting weight, a willingness to learn the movements, and the patience to build your foundation before pushing intensity.

    Start with the goblet squat and the two-handed swing. Practice them until they feel natural. Then build from there. Small, consistent steps — not heroic effort followed by burnout — are what create lasting results.

    Your action for today: Look up one beginner kettlebell tutorial from a certified strength coach, choose your starting weight, and schedule your first three sessions of the week. That’s it. Start there.


    This article is for informational and educational purposes only. The content is not intended to replace professional medical, nutritional, or fitness advice. Always consult a qualified healthcare provider, registered dietitian, or certified fitness professional before starting a new health program or making significant changes to your lifestyle.

    Content reviewed by our wellness editorial team, with references to peer-reviewed research and guidelines from leading health organizations.

  • Flexibility Training for Adults: Move Better, Feel Stronger

    Flexibility Training for Adults: Move Better, Feel Stronger

    Flexibility Training for Adults: Move Better, Feel Stronger

    If bending down to tie your shoes leaves you winded — or your hips ache after sitting at a desk all day — flexibility training might be the missing piece in your wellness routine.

    Why Most Adults Are Losing Flexibility Without Realizing It

    Here’s a sobering truth: after age 30, adults can lose up to 10% of their muscle flexibility per decade if they don’t actively work to maintain it. That’s not a scare tactic — it’s a well-documented physiological reality confirmed by research published in the Journal of Aging and Physical Activity.

    Most people don’t notice the gradual stiffness creeping in until something goes wrong — a pulled hamstring during a weekend jog, chronic lower back pain after long work hours, or simply the frustrating inability to reach overhead without wincing.

    And yet, flexibility is one of the most neglected components of adult fitness. Unlike strength training or cardio, it rarely gets scheduled into the week. There’s no calorie counter for a hip flexor stretch. No leaderboard for a longer hamstring hold.

    But here’s what the science keeps confirming: flexibility isn’t just about being able to touch your toes. It’s directly tied to injury prevention, joint health, posture, athletic performance, and even stress relief. In this guide, you’ll get a practical, evidence-based roadmap to start — or restart — a flexibility training routine that actually fits your life.

    Why Flexibility Training Matters More Than You Think

    Flexibility is formally defined by the American College of Sports Medicine (ACSM) as the ability of a joint or series of joints to move through an unrestricted, pain-free range of motion. It sounds clinical, but in everyday terms it means how freely and comfortably your body moves.

    The stakes are higher than most people realize. According to the ACSM’s Health-Related Fitness guidelines, poor flexibility is a contributing risk factor for musculoskeletal injuries, chronic pain conditions, and even falls in older adults. In a population where back pain alone affects roughly 80% of Americans at some point in their lives (per the National Institutes of Health), that matters enormously.

    Beyond injury prevention, flexibility training has been linked to improved circulation, reduced muscle soreness, better posture, and reduced tension headaches — all issues that affect busy adults in their prime working years.

    There’s also an underappreciated connection between flexibility and stress. Research published in the Journal of Physical Therapy Science found that stretching activates the parasympathetic nervous system, helping lower cortisol levels and promote a calmer mental state. That means a 10-minute stretching session before bed isn’t just good for your hips — it may also help you sleep better.

    The bottom line: flexibility training is a foundation, not an accessory. If you’re already doing compound exercises for full-body strength or following a mobility training program, adding structured flexibility work will amplify your results across the board.

    The Science Behind Flexibility: How It Actually Works

    Before diving into techniques, it helps to understand what’s actually happening in your body when you stretch. Muscles don’t work alone — they’re surrounded by connective tissue called fascia, and attached to bones via tendons. When you hold a stretch, you’re influencing all of these structures.

    The primary mechanism behind improved flexibility is a reduction in neural inhibition. In simple terms, your nervous system limits how far a muscle stretches as a protective reflex. Regular stretching trains your brain to tolerate a greater range of motion over time — not just your tissues. This is why consistency matters more than intensity when it comes to flexibility gains.

    Busting a common myth: Many people believe that stretching before a workout prevents injuries and improves performance. However, the research tells a different story. A landmark review published in the British Journal of Sports Medicine found that static stretching (holding a stretch for 30-60 seconds) performed immediately before exercise can actually temporarily reduce muscular strength and power output by up to 8%.

    The better approach? Save static stretching for after workouts or as a standalone session. Before exercise, opt for dynamic stretching — controlled movements that take your joints through their range of motion, like leg swings, arm circles, and hip rotations. This primes the nervous system without compromising muscle performance.

    There are three main types of flexibility training worth knowing:

    • Static stretching: Hold a position for 20-60 seconds. Best for post-workout or dedicated sessions.
    • Dynamic stretching: Controlled, movement-based. Ideal pre-workout warm-up.
    • PNF stretching (Proprioceptive Neuromuscular Facilitation): Contract-relax technique, often done with a partner. Highly effective for rapid flexibility gains, but requires proper instruction.

    Each has its place in a well-rounded program. For most adults starting out, static and dynamic stretching provide the best accessibility-to-results ratio.

    How to Get Started: A Practical Flexibility Routine

    The most important thing to know before you start: you don’t need to be flexible to start a flexibility program. That would be like needing to be strong before starting strength training. You simply begin where you are.

    The ACSM recommends that adults perform flexibility exercises for all major muscle groups at least 2-3 days per week, with daily stretching being ideal for maximum benefit. Each stretch should be held for 10-30 seconds (building to 60 seconds over time), and repeated 2-4 times.

    Beginner Level — The Daily 10-Minute Routine

    Focus on the most commonly tight areas for desk workers and sedentary adults:

    1. Standing quad stretch — 30 seconds each side. Hold a wall if needed for balance.
    2. Standing hamstring stretch (forward fold) — 30-45 seconds. Keep knees slightly bent to protect your lower back.
    3. Hip flexor lunge stretch — 30-45 seconds each side. Drop to one knee, shift your hips forward gently.
    4. Chest opener stretch — Clasp hands behind your back and gently open your chest. 30 seconds.
    5. Neck side stretch — Tilt ear toward shoulder, apply gentle pressure with hand. 20 seconds each side.
    6. Seated figure-four stretch — Cross one ankle over the opposite knee. Hold 30-45 seconds each side. Excellent for piriformis and hip rotators.

    Do this sequence daily. Results won’t come overnight, but most people notice meaningful improvement in tightness and ease of movement within 3-4 weeks of consistent practice.

    Intermediate Level

    Once the beginner routine feels manageable, add:

    • Extended hold times (45-60 seconds per stretch)
    • Butterfly stretch for inner thighs and groin
    • Pigeon pose (from yoga) for deep hip opening
    • Doorway pectoral stretch for chest and shoulder health
    • Supine spinal twist for thoracic and lumbar mobility

    Advanced Level

    Incorporate PNF techniques with a trained partner or coach, yoga flows that challenge end-range flexibility, and targeted active flexibility work (holding the stretched position using your own muscle strength rather than gravity or assistance).

    If you’re already doing bodyweight training, adding this flexibility sequence as a cooldown is an efficient way to check both boxes in the same session.

    Common Mistakes That Sabotage Your Flexibility Progress

    Most adults who try flexibility training don’t fail because the approach is wrong — they fail because of entirely avoidable errors. Here are the most common ones:

    Mistake 1: Bouncing through the stretch (ballistic stretching)
    This feels natural — bouncing at the end range of a hamstring stretch, for example. But ballistic stretching triggers the stretch reflex, causing the muscle to contract rather than relax. It also raises your injury risk. Fix it: move into the stretch slowly, breathe into it, and hold without bouncing.

    Mistake 2: Holding your breath
    Tension and breath-holding go hand in hand, and they work against you in flexibility training. When you hold your breath, you increase muscular tension system-wide. Fix it: inhale slowly to prepare, then exhale as you deepen into the stretch. Use long, slow nasal breaths throughout each hold.

    Mistake 3: Only stretching what’s already flexible
    People tend to stretch what feels good, not what needs work. If your calves are naturally loose, you might ignore your tight hip flexors. Fix it: do a full-body flexibility assessment — or simply follow a structured routine that targets all major muscle groups equally.

    Mistake 4: Inconsistency
    Stretching once a week after an intense workout won’t move the needle. Flexibility requires consistent stimulus to adapt. Fix it: treat flexibility like brushing your teeth — a daily non-negotiable, even if it’s just 10 minutes. The ACSM specifically highlights frequency as the key variable in flexibility improvement.

    Mistake 5: Stretching through sharp or acute pain
    There’s a difference between the productive discomfort of a deep stretch and pain that signals tissue damage. Flexibility work should feel like a sustained, manageable pull — never a sharp, stabbing, or burning sensation. Fix it: if you feel sharp pain, back off immediately and consult a physical therapist before continuing.

    What Supports Your Flexibility: Nutrition and Recovery Habits

    Flexibility training doesn’t happen in a vacuum. Several nutritional and lifestyle factors directly affect how well your muscles and connective tissue respond to stretching.

    Hydration matters more than most people think. Fascia and connective tissue are water-dependent structures. Dehydrated tissues are stiffer, less pliable, and more injury-prone. The National Academies of Sciences, Engineering, and Medicine recommends approximately 3.7 liters of total daily water intake for men and 2.7 liters for women (from all food and beverage sources combined).

    Protein and collagen synthesis. Connective tissues — tendons, ligaments, and fascia — are largely made of collagen. The Academy of Nutrition and Dietetics highlights that adequate protein intake supports tissue repair and remodeling. Some research, including a study published in the American Journal of Clinical Nutrition, suggests that vitamin C-enriched collagen supplements taken before training may support collagen synthesis in tendons and ligaments — though more research is needed.

    Anti-inflammatory foods. Chronic low-grade inflammation can increase muscle stiffness and reduce range of motion over time. Diets rich in omega-3 fatty acids (from salmon, sardines, walnuts, and flaxseed), colorful vegetables, and polyphenol-rich foods like blueberries and olive oil are associated with lower systemic inflammation according to research cited by Harvard Health Publishing.

    Magnesium. This essential mineral plays a role in muscle relaxation and neuromuscular function. According to the NIH, many American adults fall short of recommended magnesium intake. Foods like spinach, pumpkin seeds, black beans, and almonds are excellent dietary sources.

    Sleep and recovery. Much of the tissue adaptation from flexibility training happens during sleep. Consistently poor sleep can impair connective tissue recovery and increase perceived muscle tightness. Prioritizing 7-9 hours per night (per the National Sleep Foundation) is a legitimate part of your flexibility strategy.

    How Long Until You See Real Results — and What to Track

    Flexibility gains are real, measurable, and often faster to achieve than most people expect — but they do require patience and consistency.

    Research published in the Journal of Strength and Conditioning Research found that participants who stretched 5 days per week for 6 weeks showed significant improvements in hamstring flexibility compared to those who stretched 2-3 days per week. The takeaway: frequency is the most powerful lever you can pull.

    Realistic timelines:

    • Week 1-2: Reduced muscle tightness and tension. You’ll feel it, even if you can’t measure it.
    • Week 3-4: Noticeable improvement in range of motion for key areas like hamstrings, hip flexors, and shoulders.
    • Week 6-8: Measurable flexibility gains. This is when most people start seeing objective changes (can reach further, move more freely).
    • Month 3+: Sustained improvement in functional movement, posture, and reduction in everyday aches and stiffness. Results vary based on age, starting flexibility, and consistency.

    What to track:

    • Sit-and-reach test: A classic benchmark for hamstring and lower back flexibility. Measure weekly.
    • Shoulder flexibility: Can you clasp your hands behind your back? Note which side is tighter.
    • Hip flexibility: How far can you drop into a hip flexor lunge before feeling the stretch? Track progressively.
    • Subjective tightness rating: Rate morning stiffness on a scale of 1-10. This simple self-measure is surprisingly valuable over time.

    If you’re not seeing any improvement after 8 weeks of consistent effort, consider consulting a physical therapist. Some stiffness is related to joint structure, past injuries, or neuromuscular patterns that benefit from professional assessment.

    Frequently Asked Questions About Flexibility Training

    Is it too late to start flexibility training after 40 or 50?
    Absolutely not. While connective tissue does become less elastic with age, research consistently shows that adults of all ages respond positively to regular stretching. A study in the Journal of Aging and Physical Activity found significant flexibility improvements in adults aged 40-70 after a 12-week stretching program. Starting later simply means starting — and every week of consistency moves you forward.

    How long should I hold each stretch?
    The ACSM recommends holding static stretches for 10-30 seconds at minimum, building toward 60 seconds as you progress. Shorter holds (under 10 seconds) provide minimal lasting benefit. For most adults, 30-45 seconds per stretch, repeated 2-3 times, is the practical sweet spot.

    Can flexibility training help with lower back pain?
    For many adults, yes — particularly when the pain is related to tight hip flexors, hamstrings, or thoracic stiffness. The Mayo Clinic notes that targeted stretching is a common component of back pain management programs. However, some back conditions require specific movement precautions, so always consult your healthcare provider before beginning if you have existing back issues.

    Should I stretch every day?
    Daily stretching is ideal and generally safe. Unlike strength training, flexibility training doesn’t require recovery days between sessions — gentle daily stretching can actually accelerate progress. The exception is if a specific area is acutely sore or injured, in which case rest and professional guidance are appropriate.

    Does yoga count as flexibility training?
    Yes, with important nuance. Yoga incorporates static flexibility work, dynamic movement, balance, and sometimes strength — making it an excellent complementary practice. Research published in PLOS ONE found that regular yoga practice significantly improved flexibility and balance in adults. However, yoga alone may not address all tight areas systematically, which is why a dedicated stretching routine remains valuable alongside it.

    The Takeaway: Small Stretches, Big Payoffs

    Flexibility training isn’t glamorous. It won’t make headlines the way a new HIIT protocol does. But day after day, it quietly does something profound — it keeps your body moving freely, reduces pain, improves your posture, and makes every other form of exercise more effective and enjoyable.

    You don’t need an hour-long yoga class or a personal trainer on day one. You need 10 consistent minutes, a clean stretch sequence, and the patience to show up regularly. Start with the beginner routine in this guide. Do it after your next workout or right before bed tonight.

    Your future self — the one who bends down without groaning, reaches overhead without wincing, and moves through the day with ease — will thank you for the small, boring, completely life-changing choice you made today.


    Wellness Disclaimer: This article is for informational and educational purposes only. The content is not intended to replace professional medical, nutritional, or fitness advice. Always consult a qualified healthcare provider, registered dietitian, or certified fitness professional before starting a new health program or making significant changes to your lifestyle.

    Content reviewed by our wellness editorial team, with references to peer-reviewed research and guidelines from leading health organizations.
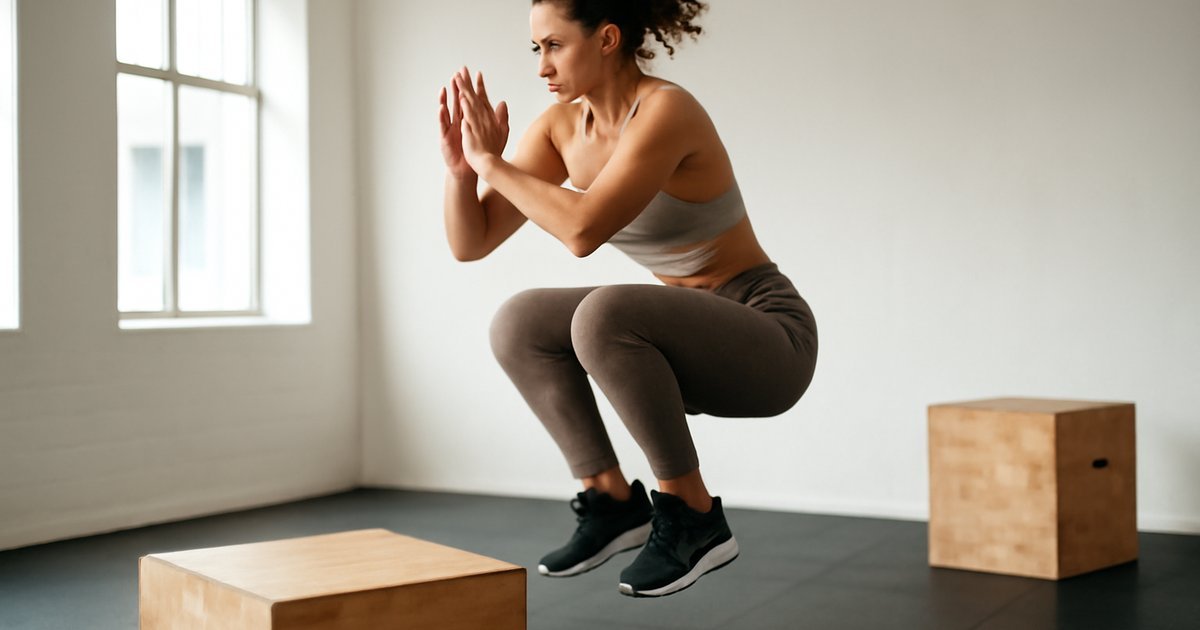
  • Isometric Training: Build Real Strength Without Moving

    Isometric Training: Build Real Strength Without Moving

    You don’t always have to move to get stronger — and the research behind isometric training might change how you think about exercise entirely.

    Introduction

    Picture this: you’re holding a plank and your entire body is shaking, but you’re not moving an inch. Yet somehow, you’re burning muscle energy, building strength, and improving endurance — all while completely still. That’s isometric training in action, and it’s one of the most underrated tools in fitness today.

    Most people associate getting stronger with lifting, pushing, or pulling — movements you can see. But isometric exercises, where your muscles contract without changing length or joint angle, offer a surprisingly powerful alternative that fits almost any fitness level, schedule, or training environment.

    Whether you’re a beginner looking for a low-impact entry point, a busy professional with limited gym time, or someone returning from injury, isometric training deserves a serious look. In this guide, you’ll learn how it works, what the science actually says, and how to build it into your routine — starting today.

    Why Isometric Training Matters More Than You Think

    We live in a culture obsessed with visible effort — more reps, more weight, more sweat. Isometric training flies under the radar because it looks, well, boring. But the physiological benefits are anything but.

    According to research published in the Journal of Human Hypertension, isometric exercise — particularly wall sits and handgrip exercises — produced greater reductions in resting blood pressure than aerobic training or dynamic resistance exercise in several controlled trials. That’s a significant finding for adults managing cardiovascular risk.

    Beyond heart health, isometrics are uniquely effective at building strength in specific joint angles, improving neuromuscular activation, and enhancing postural endurance. Athletes use them to break through strength plateaus. Physical therapists rely on them for safe, early-stage rehabilitation. And for everyday adults, they offer a practical way to maintain muscle mass and joint stability without equipment or high impact.

    If you’ve been skipping this method, you’ve been leaving results on the table.

    The Science Behind Isometric Training: How It Actually Works

    During an isometric contraction, your muscle fibers are fully engaged — they’re generating force — but the muscle length doesn’t change. Think of pushing against a wall that won’t move. You’re working hard, but no joint movement occurs.

    This creates a unique training stimulus. Because you’re sustaining tension for a set duration (typically 20–60 seconds), your muscles face prolonged metabolic stress, which drives muscle fiber recruitment and endurance adaptations. Unlike dynamic training, where muscles cycle in and out of peak tension, isometrics force sustained activation throughout the hold.

    One important myth to bust: Many people believe isometric training only builds strength at the specific angle you train. While there is a degree of angle-specificity — research from the American College of Sports Medicine (ACSM) confirms strength gains are greatest within about 15 degrees of the trained joint angle — this doesn’t make isometrics less valuable. It just means smart programming uses multiple positions to cover full range of motion.

    A study published in the European Journal of Applied Physiology found that isometric training performed at longer muscle lengths (think a deep squat hold vs. a shallow one) produced greater overall muscle hypertrophy and carryover to dynamic strength. This means the angle you choose genuinely matters — and training at a stretched position tends to deliver more transferable results.

    Isometrics also have a measurable effect on tendon stiffness and joint stability, which is why they’re commonly used in managing tendinopathies, including patellar tendon issues in runners and rotator cuff rehabilitation, as noted in guidelines from the National Academy of Sports Medicine (NASM).

    How to Get Started: Practical Isometric Training Steps

    The good news: you need almost nothing to begin. No barbells, no machines, no gym membership. Here’s how to approach isometric training based on your current fitness level.

    Beginner: Build the Foundation

    • Wall Sit: Back flat against the wall, thighs parallel to the floor. Hold for 20–30 seconds. This targets quads, glutes, and hamstrings with zero joint stress.
    • Dead Hang: Grip a pull-up bar with both hands and simply hang. Builds grip strength, shoulder stability, and spinal decompression. Start with 15–20 seconds.
    • Glute Bridge Hold: Hips raised, core braced. Hold at the top for 20–30 seconds. Activates glutes and challenges lower back endurance.
    • Plank: Forearms or hands, body in a straight line. 20–40 second holds. Builds deep core stability more effectively than crunches for most beginners.

    Aim for 3 rounds of each hold, 3–4 days per week. Rest 30–60 seconds between sets.

    Intermediate: Add Intensity and Range

    • Single-Leg Wall Sit: Elevate one foot while performing a wall sit. Significantly increases unilateral demand.
    • Isometric Push-Up Hold: Lower to 90 degrees and hold for 15–30 seconds. Challenges chest, shoulders, and triceps with intense static tension.
    • Copenhagen Plank Hold: Side plank with top leg elevated on a bench. Targets adductors and lateral core — often undertrained.
    • Paused Deadlift at the Knee: Use light to moderate weight; pause for 3–5 seconds just below or at the knee. Builds strength in a critical power position.

    Advanced: Integrate with Dynamic Training

    • Use isometric overcoming contractions: push or pull against an immovable object (a loaded barbell against safety pins) with maximum effort for 5–8 seconds. This activates near-maximal motor unit recruitment and is used by strength coaches for peak force output.
    • Program functional isometrics within compound lifts — pause squats, paused bench, or dead stop deadlifts — to improve both strength and technique simultaneously. For more on compound movement programming, check out our guide on Compound Exercises: Your Full-Body Strength Shortcut.

    Common Mistakes That Sabotage Isometric Results

    Isometric training looks simple — hold still, done. But there are several ways people consistently undermine their results. Here are the most common mistakes and how to fix them.

    1. Holding your breath
    This is extremely common. When people strain against resistance, the natural tendency is to hold the breath (the Valsalva maneuver). While brief breath-holds are used in advanced strength training, sustained breath-holding during longer isometric holds significantly elevates blood pressure. Fix it: breathe slowly and consistently throughout every hold. Inhale through the nose, exhale through the mouth.

    2. Using passive posture instead of active tension
    A plank where you’re sagging through the hips or a wall sit where you’re barely activating your glutes gives you a fraction of the benefit. The muscle must be under intentional, active tension. Fix it: squeeze every muscle involved — consciously brace, activate, and generate force even when you’re not moving.

    3. Only training one joint angle
    If you always hold your plank at the same position or always do your wall sit at a shallow angle, your strength gains plateau quickly. Fix it: cycle through different joint positions. For example, vary your squat hold from 45 degrees to 90 degrees across your training week.

    4. Skipping progressive overload
    Many people hold the same 30-second plank for months and wonder why nothing changes. Isometrics need progression too. Fix it: increase hold duration, add resistance (a weight plate on your back during a plank), or reduce base support (single-leg variations). For a complete framework on advancing any training method, explore our Progressive Overload Training Guide.

    5. Ignoring recovery
    Because isometrics don’t feel as demanding as heavy lifting, people sometimes train too frequently without recovery. But the muscular and neurological demand is real. Fix it: treat isometric sessions like resistance training days — allow 24–48 hours of recovery for the targeted muscle groups.

    What to Eat to Support Isometric Training Performance

    Isometric training may not burn the same caloric load as a high-intensity circuit, but the nutritional demands for muscle recovery and performance are still significant.

    Protein: The Academy of Nutrition and Dietetics recommends 1.2–2.0 grams of protein per kilogram of body weight per day for active adults engaged in resistance training. Isometric training creates meaningful muscle protein synthesis demands, especially when training to near-failure on longer holds. Prioritize lean sources: chicken breast, eggs, Greek yogurt, lentils, tofu, and cottage cheese.

    Carbohydrates: Even low-intensity isometric sessions deplete glycogen over time, particularly during high-volume holds. A small carbohydrate-containing snack 60–90 minutes before training — like a banana with nut butter or oatmeal — supports performance without spiking blood sugar unnecessarily.

    Magnesium: This mineral supports muscle relaxation, reduces cramping, and improves sleep quality for recovery. The NIH Office of Dietary Supplements notes that many adults fall short of the recommended 320–420 mg/day. Foods rich in magnesium include almonds, black beans, spinach, pumpkin seeds, and dark chocolate.

    Hydration: Sustained muscle contractions generate heat. Even without visible sweating, you lose fluids during isometric holds. The USDA Dietary Guidelines recommend approximately 3.7 liters of total water intake daily for men and 2.7 liters for women, including water from food sources.

    What to limit: High-sodium processed foods can contribute to blood pressure elevation, which matters because isometric exercise already creates a transient blood pressure spike during effort. Keep sodium intake in check, especially if you’re using isometrics for cardiovascular health benefits.

    How Long Until You See Results — and What to Track

    Realistic expectations matter. Isometric training produces results, but the timeline depends on your baseline fitness, training frequency, and how well you progress your sessions over time.

    Weeks 1–2: You’ll notice improved body awareness and postural endurance. Holds that felt impossible at 20 seconds will become manageable at 30. This is primarily neuromuscular — your nervous system learning to recruit muscle fibers more efficiently.

    Weeks 3–6: Measurable gains in localized strength at trained angles. You may notice improved stability during dynamic movements (better squat depth, more controlled push-ups). Research from Harvard Health Publishing notes that consistent isometric training shows functional strength improvements within 4–6 weeks for most sedentary to moderately active adults.

    Weeks 6–12: Structural adaptations begin — modest but measurable improvements in muscle cross-sectional area, particularly when training at longer muscle lengths. Blood pressure reductions, if applicable, are often measurable at the 6–8 week mark based on the research referenced earlier.

    What to track:

    • Hold duration per exercise (seconds per set)
    • Number of sets completed without form breakdown
    • Resting heart rate and, if relevant, blood pressure readings
    • Subjective stability and posture improvements during daily activity
    • Performance in related dynamic exercises (e.g., squat max after regular pause squat holds)

    When to reassess: If you’ve been training consistently for 8 weeks with no progress in hold duration or functional strength, it’s time to reassess your programming. Consider adding variety in joint angles, increasing resistance, or consulting a certified personal trainer or physical therapist for individualized guidance.

    For those interested in pairing isometrics with mobility work to maximize joint function, our guide on Mobility Training for Adults provides an excellent complement to this approach.

    Frequently Asked Questions

    Is isometric training safe for people with high blood pressure?
    Isometric exercises cause a temporary spike in blood pressure during the hold itself, so people with uncontrolled hypertension should consult their physician before starting. That said, regular isometric training — particularly grip and leg-based holds — has been associated with meaningful reductions in resting blood pressure over time. If you have diagnosed hypertension, get medical clearance first and start conservatively.

    Can isometric training replace my regular strength training?
    It can supplement it powerfully, but a complete replacement isn’t ideal for most adults. Dynamic training develops strength across the full range of motion and builds more overall muscle mass. Isometrics are best used alongside dynamic training — as a plateau-breaker, rehabilitation tool, or when access to equipment is limited.

    How long should I hold each isometric exercise?
    For most adults, holds of 20–60 seconds per set are effective. Beginners should start with 15–20 seconds and build up. Advanced trainees using maximal effort overcoming isometrics (pushing against an immovable object) typically work in 5–10 second bursts. The intensity of the contraction dictates the ideal duration — maximum effort holds are short, submaximal holds are longer.

    Will isometric training help with back pain?
    For many people, yes — particularly when back pain is related to poor core endurance or muscular weakness rather than structural damage. The Mayo Clinic notes that isometric core exercises like the plank are frequently recommended in physical therapy for back pain management. However, always work with a qualified physical therapist or physician before using exercise as back pain treatment.

    Can I do isometrics every day?
    Light isometric work — like brief plank holds or dead hangs — can be done daily as part of a warm-up or movement break. But higher-intensity isometric training targeting the same muscle groups should follow the same recovery rules as resistance training: allow 24–48 hours of rest between intense sessions for those muscles.

    Conclusion

    Isometric training won’t win any dramatic highlight reels — there’s no barbell flying overhead, no dramatic drop set. But what it lacks in visual excitement, it more than makes up for in results. Stronger joints, better posture, improved blood pressure, and measurable gains in functional strength — all with minimal equipment and minimal injury risk.

    The best part? You can start today. A 20-second wall sit. A 30-second plank. A dead hang from a door frame bar. Small, still, and surprisingly powerful.

    Progress, as always, comes from consistency over perfection. Pick two or three of the exercises from this guide, commit to three sessions per week, and build from there. Still matters.


    Wellness Disclaimer: This article is for informational and educational purposes only. The content is not intended to replace professional medical, nutritional, or fitness advice. Always consult a qualified healthcare provider, registered dietitian, or certified fitness professional before starting a new health program or making significant changes to your lifestyle.

    Author Line: Content reviewed by our wellness editorial team, with references to peer-reviewed research and guidelines from leading health organizations.
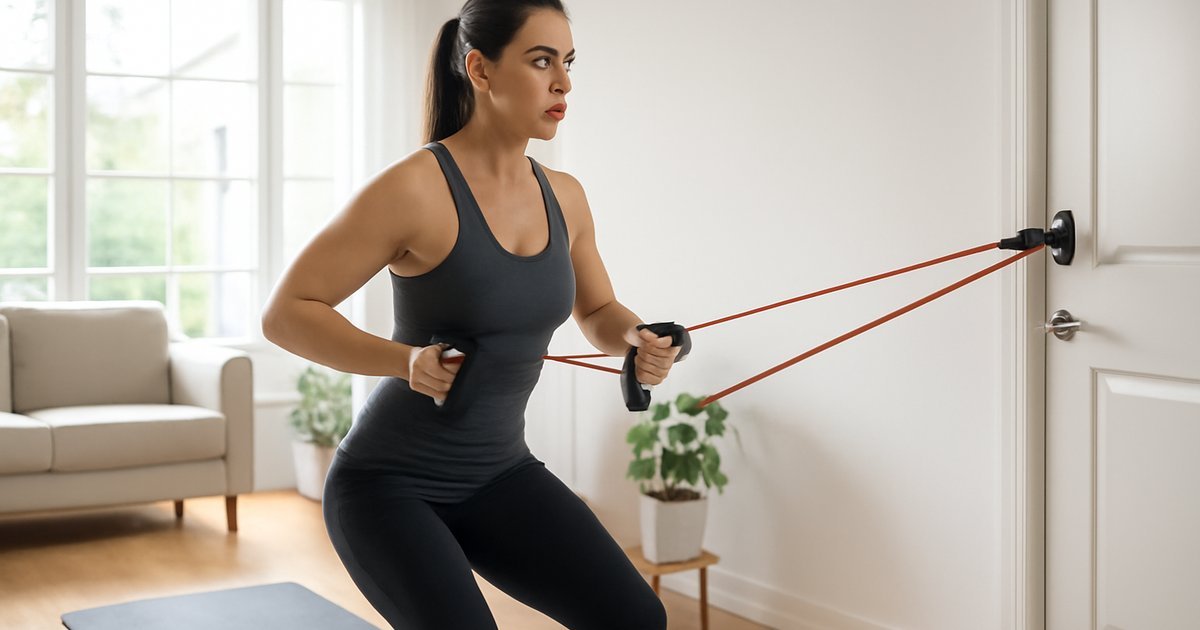
  • Plyometric Training: Power, Speed & Results for Adults

    Plyometric Training: Power, Speed & Results for Adults

    You don’t have to be an athlete to train like one — and plyometrics might be the missing piece your fitness routine has been waiting for.

    Why Most Adults Overlook Plyometric Training

    Think about the last time you had to move fast — catching yourself from a fall, sprinting to grab the elevator, or lunging to catch something off a shelf. Those split-second movements require a quality most gym routines completely ignore: power.

    Plyometric training — also called "jump training" or explosive training — is built around exactly that. And while it’s commonly associated with elite athletes and NFL combine drills, the science increasingly shows it’s one of the most effective tools adults of any fitness level can use to build strength, burn calories, and protect long-term joint and bone health.

    Yet most people over 30 avoid it entirely. Maybe it looks too intense. Maybe they assume their knees can’t handle it. Maybe they just don’t know where to start.

    This guide is here to change that. You’ll learn what plyometric training actually is, what the research says about its benefits, how to start safely — whether you’re a complete beginner or someone ready to level up — and what mistakes to avoid along the way.

    No Olympic experience required.

    Why Plyometric Training Matters More Than You Think

    Here’s something most gym-goers don’t know: your muscles have two speeds. There’s the slow, controlled force you use during a typical squat or bicep curl — and then there’s the explosive, rapid-fire force that fires during a jump, sprint, or quick change of direction.

    That second speed — called rate of force development (RFD) — naturally declines with age if you don’t specifically train it. According to research published in the Journal of Strength and Conditioning Research, explosive power tends to decrease faster than general strength as adults age, often beginning as early as the mid-30s.

    This matters for more than athletic performance. Explosive leg power is strongly linked to fall prevention, functional independence, and even metabolic health. A study supported by the National Institute on Aging found that lower-body power — not just strength — was one of the strongest predictors of mobility and quality of life in aging adults.

    Plyometric training directly targets this quality. By training your muscles to generate force quickly, you’re building a physical reserve that pays dividends in everyday movement, injury prevention, and body composition.

    The American College of Sports Medicine (ACSM) includes power training as a recommended component of a well-rounded adult fitness program — not just for athletes, but for general health and functional fitness.

    The Science Behind Plyometrics: How It Actually Works

    Plyometric exercises work through what’s called the stretch-shortening cycle (SSC). Here’s the simplified version: when a muscle rapidly lengthens (like when you sink into a squat before a jump), it stores elastic energy — similar to a rubber band being pulled back. When it then quickly contracts (the jump itself), it releases that stored energy with added force.

    The result is more power output than a slow, deliberate muscle contraction alone could generate.

    Over time, consistent plyometric training improves the efficiency of this cycle. Your neuromuscular system — the connection between your brain and your muscles — learns to recruit more muscle fibers, faster. This is why plyometrics can improve speed, agility, and overall athletic ability even without adding significant muscle mass.

    Busting a common myth: Many adults assume plyometrics are too hard on the joints. But research tells a more nuanced story. A 2020 review in the British Journal of Sports Medicine found that progressive, properly loaded plyometric training can actually strengthen tendons and improve cartilage health when introduced gradually. The key word is progressive — the problem isn’t plyometrics, it’s starting too hard, too fast.

    Low-impact plyometric variations also exist, making this training style accessible even for those with mild knee or hip concerns. More on that below.

    How to Get Started with Plyometric Training

    Before anything else: a foundation of basic strength matters. If you’re not yet comfortable with bodyweight squats, lunges, and push-ups performed with good form, spend 4-6 weeks building that base first. You can explore compound exercises for full-body strength as a solid starting point.

    Once you’re ready, here’s how to structure your introduction to plyometrics:

    Beginner Level (Weeks 1-4)

    • Box step-ups with a power emphasis: Drive off the standing leg explosively instead of stepping slowly. Great for building hip and glute power without high impact.
    • Squat jumps (low amplitude): Drop only slightly into the squat and jump just a few inches off the ground. Focus on landing softly, absorbing force through the hips and knees.
    • Standing long jump: Jump forward and stick the landing. This teaches deceleration — critical for joint safety.
    • Lateral shuffles: Quick, side-to-side steps that train lateral power and coordination.

    Volume: 2 days per week, 2-3 sets of 6-8 reps per exercise. Allow 48 hours of recovery between sessions.

    Intermediate Level (After 4-6 Weeks)

    • Box jumps (12-18 inch box): Step down — don’t jump down — to minimize eccentric stress on your joints.
    • Broad jumps: Maximize horizontal distance and stick each landing for 2-3 seconds before resetting.
    • Split jumps (scissor lunges): Alternate legs mid-air. Excellent for unilateral power and hip stability.
    • Lateral bounds: Single-leg jumps side to side, landing on the opposite foot.

    Volume: 2-3 days per week, 3 sets of 8-10 reps. Prioritize quality over quantity — plyometrics should never be done to fatigue.

    Advanced Level

    • Depth jumps, hurdle hops, single-leg box jumps, and reactive drills — these are best introduced with guidance from a certified strength and conditioning coach.

    Pairing plyometric work with a smart overall training plan is key. If you haven’t yet built a consistent fitness routine, check out this guide on building a sustainable workout routine before adding explosive training to the mix.

    Common Mistakes That Sabotage Your Results

    Plyometrics are highly effective — but also easy to get wrong. Here are the most frequent errors adults make, and how to course-correct:

    1. Skipping the landing mechanics. This is the biggest one. Many people focus entirely on how high or how far they jump — and completely ignore the landing. Poor landings (knees caving in, torso collapsing forward, heels hitting first) are where most plyometric injuries happen. Fix: Practice landing drills in isolation. Step off a low box and absorb the impact — knees tracking over toes, soft bend in hips and knees, chest up.

    2. Doing plyometrics when fatigued. Unlike steady-state cardio, plyometrics require your nervous system to be fresh. Doing box jumps at the end of a long strength session — or on poor sleep — dramatically increases injury risk and reduces power output. Fix: Always do plyometric work at the beginning of your training session, after a proper warm-up but before other heavy lifting.

    3. Progressing too fast, too soon. Enthusiasm is great — but jumping from beginner squat jumps to depth jumps in two weeks is a recipe for tendon overuse injuries. Fix: Follow the 10% rule — don’t increase intensity, volume, or height by more than 10% per week. Your tendons adapt more slowly than your muscles.

    4. Neglecting the warm-up. Cold muscles and connective tissue don’t absorb impact efficiently. Fix: Spend 8-10 minutes on dynamic warm-up movements — leg swings, high knees, hip circles, and light jogging — before any plyometric session. For a full mobility and warm-up approach, this guide to mobility training is worth bookmarking.

    What to Eat to Support Plyometric Training

    Explosive training has specific nutritional demands that differ somewhat from traditional endurance or strength training.

    Carbohydrates are your primary fuel source. Plyometrics rely heavily on the phosphocreatine and glycolytic energy systems — both of which are fueled by carbohydrates. The Academy of Nutrition and Dietetics recommends that adults engaged in high-intensity training consume 45-65% of daily calories from carbohydrates, with a pre-workout meal prioritizing easily digestible carbs 1-2 hours before training.

    • Good pre-session options: oatmeal with banana, whole grain toast with peanut butter, or a small portion of brown rice with lean protein.

    Protein supports muscle repair and tendon recovery. Research consistently supports 0.7-1.0 grams of protein per pound of body weight for active adults engaged in resistance and power training. Prioritize high-quality sources: chicken breast, eggs, Greek yogurt, salmon, legumes, or cottage cheese.

    Don’t skip post-workout nutrition. The 30-60 minute window after explosive training is ideal for a protein-carbohydrate combination to support glycogen replenishment and muscle protein synthesis. A simple option: a Greek yogurt parfait with berries, or a protein shake with a banana.

    Collagen and vitamin C for tendon support. Emerging research — including a study published in the American Journal of Clinical Nutrition — suggests that consuming 15 grams of collagen peptides with vitamin C approximately 30-60 minutes before exercise may support connective tissue adaptation. Results vary, and this remains an area of active research.

    Stay hydrated. Even mild dehydration (as little as 2% body weight) can impair neuromuscular performance, which directly affects your power output and reaction time during explosive movements.

    How Long Until You See Results — and What to Track

    Plyometric training produces results on multiple timelines, and it helps to know what to expect so you don’t abandon ship too early.

    Weeks 1-2: You’ll notice improved coordination and body awareness during explosive movements. These are neurological adaptations — your brain is learning to recruit muscle fibers more efficiently. Don’t expect dramatic physical changes yet.

    Weeks 3-6: Noticeable improvements in jump height, landing stability, and overall quickness. Many adults also begin feeling more energized in daily movement — stairs feel easier, posture improves, and workouts feel more dynamic.

    Weeks 6-12: Measurable changes in lower-body power, body composition (particularly in combination with proper nutrition), and cardiovascular conditioning. Research published in the Journal of Sports Science and Medicine found significant improvements in vertical jump performance and sprint speed in non-athlete adults after just 8 weeks of twice-weekly plyometric training.

    What to track:

    • Standing vertical jump height (measure monthly)
    • Standing broad jump distance
    • How you feel on stairs, during sports, or during quick movements in daily life
    • Recovery time between sets (should improve over weeks)
    • Body weight and circumference measurements if body composition is a goal

    When to reassess or seek professional guidance: If you experience persistent joint pain (not to be confused with normal muscle soreness), sharp discomfort during landings, or pain that lingers more than 48 hours, stop and consult a sports medicine physician or physical therapist before continuing.

    Frequently Asked Questions

    Is plyometric training safe for adults over 40?
    Yes — with appropriate progression. Adults over 40 may need a longer warm-up, more recovery time between sessions, and a more gradual introduction to impact. Starting with low-amplitude variations and building over 6-8 weeks is key. A 2019 study in the Journal of Aging and Physical Activity found that older adults who completed 12 weeks of modified plyometric training improved power output and balance without significant injury rates.

    How many days per week should I do plyometrics?
    For most adults, 2-3 days per week is optimal, with at least 48 hours between sessions. Your tendons and nervous system need more recovery time than your cardiovascular system does. More frequent training doesn’t accelerate results — it tends to increase injury risk instead.

    Can I do plyometrics if I have bad knees?
    It depends on the cause of your knee issues. Mild patellofemoral discomfort or general "achy knees" may actually improve with properly progressed plyometric training due to improved neuromuscular control and tendon strengthening. However, if you have a diagnosed condition — like severe osteoarthritis or a recent ligament injury — consult a physical therapist or orthopedic specialist before starting. Low-impact variations (lateral shuffles, banded jumps in water, step-up variations) may still be appropriate.

    Do I need equipment to do plyometrics at home?
    Not at all. Many effective plyometric movements — squat jumps, broad jumps, lateral bounds, split jumps, and skater hops — require nothing but your body and a safe, non-slip surface. If you want to progress further, a 12-18 inch plyo box is a worthwhile investment, but it’s absolutely not required to get started.

    Will plyometrics help me lose weight?
    Plyometric training is a high-intensity activity that can contribute meaningfully to calorie burn and body composition improvement — but it’s not a standalone solution. When combined with consistent nutrition habits and overall training volume, it can support fat loss while preserving or increasing lean muscle mass. Body composition changes typically become noticeable after 8-12 weeks of consistent effort paired with adequate protein intake.

    Start Where You Are — Then Build

    Plyometric training isn’t just for athletes, young adults, or people in peak physical condition. It’s a scientifically validated approach to building power, protecting your joints, improving body composition, and moving better in everyday life — all things that matter deeply as you move through your 30s, 40s, and 50s.

    You don’t need to do box jumps on day one. You just need to start somewhere. A few squat jumps, a lateral shuffle, a power step-up — done consistently and progressively — can completely change how your body feels and functions over time.

    The best version of explosive training isn’t the most dramatic. It’s the one you build carefully, sustain over months, and actually enjoy.

    Pick one beginner movement from this guide and add it to your next workout. That’s your only goal today.


    Wellness Disclaimer: This article is for informational and educational purposes only. The content is not intended to replace professional medical, nutritional, or fitness advice. Always consult a qualified healthcare provider, registered dietitian, or certified fitness professional before starting a new health program or making significant changes to your lifestyle.

    Author Line: Content reviewed by our wellness editorial team, with references to peer-reviewed research and guidelines from leading health organizations.

  • Resistance Band Training: Build Strength Anywhere

    Resistance Band Training: Build Strength Anywhere

    You don’t need a gym membership, expensive equipment, or hours of free time to build real, lasting strength — and resistance bands might be the most underestimated tool in modern fitness.

    Why Resistance Band Training Matters More Than You Think

    Most people assume that serious strength training requires barbells, dumbbells, and a gym locker. But here’s the thing: a set of resistance bands that fits in your gym bag can deliver a workout that challenges your muscles just as effectively — and in some cases, even more safely — than traditional free weights.

    According to the American College of Sports Medicine (ACSM), resistance training is one of the most important forms of exercise for adults, associated with improved muscle mass, metabolic health, bone density, and functional independence as we age. The problem? Millions of adults skip it entirely because access feels complicated.

    That’s where resistance bands change the game. Research published in the Journal of Human Kinetics found that elastic resistance training produces muscle strength and mass gains comparable to those achieved with conventional weight training. Same results, lower barrier to entry.

    Whether you’re a complete beginner or someone returning to fitness after a break, resistance band training offers a practical, joint-friendly, and genuinely effective path to building strength — on your schedule, in your living room, hotel room, or backyard.

    The Science Behind Resistance Bands: How They Actually Work

    Understanding why resistance bands work so well starts with a concept called variable resistance. Unlike dumbbells or barbells — which provide a constant load throughout a movement — resistance bands increase tension as they stretch. This means your muscles face the greatest challenge at the peak of contraction, exactly where they’re strongest and most capable of handling load.

    This progressive tension mirrors the natural strength curve of your muscles, which is one reason bands feel different (and sometimes harder) than free weights at equivalent resistance levels.

    A 2019 meta-analysis published in the SAGE Open Medicine journal reviewed 23 studies and concluded that elastic resistance training is equally effective as conventional resistance training for improving strength in both younger and older adults. For older populations especially, the lower compressive joint forces make bands a particularly smart option.

    The common myth to bust here: “Bands are only for warm-ups or physical therapy.” In reality, when used with proper tension and progressive loading, resistance bands can challenge even experienced athletes. Powerlifters and elite coaches have been using them for decades to build explosive strength and overcome sticking points.

    Bands also engage your stabilizer muscles more actively than machines — because there’s no fixed path of motion, your body has to work harder to control the movement. That translates into better real-world functional strength. For a deeper understanding of how progressive challenge drives results, check out our guide on Progressive Overload: The Key to Never-Ending Fitness Gains.

    How to Get Started with Resistance Band Training

    Getting started is simpler than most people expect. Here’s a clear, step-by-step path organized by experience level.

    Step 1: Choose the Right Bands

    Resistance bands come in several formats — loop bands, tube bands with handles, and therapy bands (flat sheets). For a full-body training program, a set of tube bands with handles (light, medium, and heavy) or a set of loop bands in varying resistances gives you the most versatility.

    As a beginner, start lighter than you think you need. You can always add resistance — building proper form first protects you from injury and sets you up for long-term progress.

    Step 2: Master These Foundational Movements

    Start with these six exercises that cover your entire body:

    • Banded Squat — step on the band, hold handles at shoulder height, squat to parallel (lower body)
    • Banded Deadlift — hinge at the hips with band under feet for posterior chain strength
    • Banded Chest Press — anchor band behind you, press forward at chest height (chest and triceps)
    • Banded Row — anchor at a low point, row toward your torso for upper back and biceps
    • Banded Overhead Press — step on band, press overhead for shoulders
    • Pallof Press — anchor at chest height, press straight out to challenge core stability

    Beginner routine: 2-3 sets of 12-15 reps per exercise, 3 days per week with at least one rest day between sessions.

    Intermediate option: Increase band tension, slow down the eccentric (lowering) phase to 3-4 seconds, or add supersets for efficiency.

    Advanced option: Combine bands with bodyweight movements (banded push-ups, banded pull-ups), add unilateral exercises (single-leg deadlifts, single-arm rows), and implement periodization — varying volume and intensity week over week. For a structured approach to long-term programming, our article on Build Your Sustainable Workout Routine: A Lifelong Guide walks you through exactly how to do that.

    Common Mistakes That Sabotage Your Results

    Resistance band training looks simple — and in many ways it is. But a few common errors can quietly stall your progress or increase injury risk.

    Mistake #1: Using too little resistance.
    This is the most frequent issue, especially for people who underestimate bands compared to traditional weights. If you can complete 15 reps without any real challenge in the last 3-4 repetitions, the band is too light. Progressive overload applies to bands just as it does to barbells — you need to consistently challenge the muscle for it to adapt and grow stronger.

    Mistake #2: Letting the band snap back uncontrolled.
    The eccentric phase — the return to the starting position — is where a significant portion of muscle growth is stimulated. Letting the band pull you back quickly means you’re skipping half the work. Control the return movement deliberately. This is where gains are often made, not lost.

    Mistake #3: Anchoring improperly.
    Using a door anchor that isn’t secure, wrapping a band around a sharp edge, or anchoring at the wrong height for the exercise can compromise both safety and movement mechanics. Always check that your anchor point is stable before loading the band with full force. Door anchors should be placed on the hinge side and tested before each set.

    Mistake #4: Ignoring full range of motion.
    Because bands feel lighter at the start of a movement, people often rush through the beginning and only work the end range where tension peaks. Moving through the full range — from full extension to full contraction — ensures the whole muscle is being trained and supports flexibility alongside strength.

    Mistake #5: Never replacing worn bands.
    Resistance bands degrade over time, especially with regular use. A band that’s fraying, discolored, or losing elasticity should be retired. Snapped bands during a workout can cause real injury. Inspect bands before each session and replace them every 6-12 months depending on use frequency.

    What to Pair with Resistance Band Training for Best Results

    Bands are incredibly effective on their own, but pairing them with the right nutrition and complementary movement habits amplifies what they can do.

    Protein intake: According to the Academy of Nutrition and Dietetics, adults engaged in regular resistance training benefit from consuming 1.2 to 1.7 grams of protein per kilogram of body weight per day. This supports muscle repair and growth following training sessions. Practical sources include eggs, Greek yogurt, lean poultry, legumes, and cottage cheese.

    Hydration: Even mild dehydration (as little as 1-2% of body weight in fluid loss) has been shown in research from the American College of Sports Medicine to impair muscular endurance and strength output. Aim for at least half your body weight in ounces of water daily — more if you’re training in heat.

    Recovery and mobility: Strength training without adequate recovery is counterproductive. The USDA Physical Activity Guidelines recommend that adults include at least two days of muscle-strengthening activity per week — but recovery days between those sessions are just as important. Light walking, stretching, and sleep are the underrated pillars of any resistance training plan.

    Pairing your resistance training with a solid mobility practice can also help you move better during exercises and reduce injury risk over time. Our Complete Guide to Mobility Training is a great complement to any band-based strength routine.

    How Long Until You See Results — and What to Track

    One of the most common questions: "How long before I actually feel a difference?"

    Here’s an honest, research-grounded answer: most people notice improvements in muscular endurance and energy within 2-3 weeks of consistent training. Visible changes in muscle tone and strength typically begin to emerge between 4 and 8 weeks — depending on training frequency, intensity, nutrition, sleep quality, and your individual starting point.

    Harvard Health Publishing notes that neurological adaptations (your nervous system learning to recruit muscle fibers more efficiently) are responsible for the initial strength gains in the first 4 weeks. Actual muscle hypertrophy — physical growth of muscle tissue — becomes more prominent after that initial adaptation period.

    What to track for progress:

    • Reps and resistance level — can you complete more reps or use a heavier band this week vs. last week?
    • Energy and recovery — are workouts feeling less exhausting over time?
    • Body measurements — waist, hips, arms — more reliable than scale weight for tracking body composition shifts
    • Functional benchmarks — can you carry groceries, climb stairs, or play with your kids without fatigue more easily?

    Results vary significantly based on age, hormonal status, training history, and consistency. If you’ve been training consistently for 8-12 weeks with proper nutrition and sleep and aren’t seeing any progress, it may be time to consult a certified personal trainer or a registered dietitian to assess what might be missing.

    Frequently Asked Questions About Resistance Band Training

    Can resistance bands actually build muscle, or are they only good for toning?
    "Toning" is largely a fitness industry myth — what most people want is a combination of reduced body fat and increased muscle definition. Resistance bands absolutely can build muscle, provided you’re using adequate tension and applying progressive overload over time. The research is clear: elastic resistance produces similar muscle and strength gains as free weights. The key word is consistent progressive challenge.

    Are resistance bands safe for people with joint pain or arthritis?
    Generally, yes — and this is one of the biggest advantages of bands over heavy free weights. The lower compressive forces on joints make them a popular recommendation in physical therapy and rehabilitation. That said, if you have a diagnosed joint condition, always consult your physician or a physical therapist before beginning any new exercise program. They may recommend specific modifications.

    How many days per week should I train with resistance bands?
    For most adults, 3 to 4 days per week is an effective and sustainable frequency. The ACSM recommends at least two days per week of muscle-strengthening activity for general health. If you’re training full-body each session, include at least one rest or active recovery day between sessions to allow muscles to repair and grow.

    Do I need to combine bands with other equipment?
    Not at all. A complete, effective training program can be built entirely around resistance bands. However, if you have access to bodyweight exercises (push-ups, pull-ups, dips), combining them with bands adds useful variety and can address certain muscle groups more effectively. Bands pair especially well with compound movement patterns that train multiple muscle groups at once.

    What’s the best way to progress when a band starts feeling too easy?
    You have several options: move up to a higher resistance band, slow down your reps (especially the eccentric phase), decrease rest time between sets, add more sets or reps, or shift to unilateral (single-limb) variations of the same exercise. All of these apply the principle of progressive overload — the foundation of any lasting strength program.

    Start Where You Are — It’s Enough

    You don’t need to overhaul your entire life to start building real strength. You just need a few bands, 30 minutes three times a week, and the willingness to show up consistently.

    Resistance band training isn’t a compromise — it’s a genuinely powerful training tool that has been validated by research, used by elite athletes, and recommended by rehabilitation specialists worldwide. It fits your schedule, respects your joints, and travels anywhere you do.

    The best workout is always the one you’ll actually do. And the best place to start is exactly where you are right now.

    Pick up a set of bands this week, run through those six foundational movements, and give yourself 30 days of consistent effort. The difference it makes might surprise you.


    Wellness Disclaimer: This article is for informational and educational purposes only. The content is not intended to replace professional medical, nutritional, or fitness advice. Always consult a qualified healthcare provider, registered dietitian, or certified fitness professional before starting a new health program or making significant changes to your lifestyle.

    Content reviewed by our wellness editorial team, with references to peer-reviewed research and guidelines from leading health organizations including the American College of Sports Medicine, Academy of Nutrition and Dietetics, Harvard Health Publishing, and the USDA Physical Activity Guidelines.